Emma Gibson | DriverFinder - We Make Drivers Work for You

DYMO LabelWriter 450 Driver Software

The DYMO LabelWriter 450 is a compact thermal label printer designed for home and office use. First released in 2009, it connects to your computer via a USB connection and prints labels without the need for ink or toner. This makes it ideal for printing any kind of labels, including address labels, shipping labels, file folder labels, and more.

How to Download the DYMO LabelWriter 450 Driver

To ensure your printer works correctly in Windows, you’ll need the latest driver and software for it.

Official Download

Visit the DYMO Support Page and select “The Latest Software & Drivers for all LabelWriters and LabelManager” from the list (the first option in the list). Download the latest version of DYMO Connect for Desktop Windows (v1.4.9 at the time of this writing).

DYMO LabelWriter 450 driver download

Save the downloaded file to your computer if your web browser prompts you to. The download will take about 375 MB of disk space.

How to Install the Driver on Windows

Once you have downloaded the software, you can start installing your printer. Follow the steps below.
Note: The full installation, including the MS .NET desktop runtime, will require approximately 651 MB of disk space (217 MB for .NET and 434 MB for DYMO Connect).

  1. Unplug the printer from your computer.​
  2. Run the installer you downloaded.​ E.g., double-click the file in the File Explorer (DCDSetup1.4.9.12.exe in this case).
  3. Follow the prompts on screen to:
    • Select the language,
    • Install the Microsoft  .NET Desktop Runtime (if not installed yet) – takes an additional 57 MB of disk space to download,
      .NET Windows Desktop Runtime
    • Accept the license agreement,
      DYMO Connect license agreement
    • Select the location where to install the software,
    • Choose “Complete” installation,
    • Click “Install” to start the driver and software installation.
  4. Finish the installation and uncheck any optional offers.
  5. Plug in the printer when prompted. The printer requires a standard USB 2.0 port. A USB 3.0 or higher can be used, but is not required.

After installation, your LabelWriter 450 should appear in your list of printers.​ Open by using: Settings -> Devices -> Printers & scanners.

How to Use the DYMO LabelWriter 450

After installing the driver and software, you can start using the LabelWriter 450 to print labels.

  1. Open the DYMO software you installed.​
    DYMO LabelWriter Software
  2. Select a label template or create a new one.
  3. Enter your text and add any images or barcodes.​
  4. Load the correct label roll into the printer.
  5. Click “Print” to produce your label.​

Make sure to select the correct label size in the software to match the labels you’ve loaded.​

Common Problems and Fixes

1. Installation Problems

  • Run the installer with administrator rights: Depending on the access rights for the Windows user, you may need to run the installer with admin rights.
    Simply right-click the downloaded installer, and in the popup menu click Run as administrator.
    DYMO Connect run as admin
  • Reinstall the .NET Windows Desktop Runtime: If this software is not properly installed, you may see errors during the installation of the DYMO software. An example is:
    DYMO Connect Pnp Service failed to start
  • Restart and restart the installer: Failed previous installations can cause problems during the installation process. Restarting Windows will often clean up such remnants and allow the installer to execute successfully after the restart.

2. Printer Not Recognized

  • Check the USB connection: Ensure the cable is securely connected.
  • Try a different USB port: Sometimes, ports can be not working as a result of USB configuration problems or simply a faulty port. Plug the LabelWriter 450 USB cable directly into a USB port on the computer; do not use a USB extension cable or USB hub.
  • Reinstall the driver: Uninstall and then reinstall the DYMO software.​

3. Poor Print Quality

  • Use genuine DYMO labels: Third-party labels may not work well.
  • Clean the print head: Use a soft brush or cotton swab to clean the print head and remove any debris that may affect the print quality.
  • Replace old labels: Labels can degrade over time.​ Hey, the printer is available from 2009, maybe your labels are also not the newest?

4. Printer Feeds Blank Labels

  • Check label alignment: Ensure labels are loaded correctly.​
  • Reset the printer: Unplug it, wait 30 seconds, and plug it back in. Leave the printer powered on during these steps.
  • Inspect the sensor: Make sure it’s clean and unobstructed.​

4. Labels Cut Off or Misaligned

  • Verify label size settings: Ensure the software settings match the label size that you are using.
  • Adjust print settings: Set the orientation to “Landscape” if needed.​

Additional Support

For more detailed troubleshooting, visit the DYMO LabelWriter 450 Troubleshooting Guide.

By following these steps, you should be able to set up and use your DYMO LabelWriter 450 with ease. If you encounter any issues, refer to the troubleshooting section or consult the official DYMO support resources.

Need other Windows device drivers? Download and use the DriverFinder software to scan your PC for missing and outdated drivers and download and install them.

DriverFinder Version 5.0.0

New DriverFinder version

Hi all! We’re excited to announce the latest version of our driver update software. DriverFinder Version 5.0.0.

So… what’s new? And what has changed?

First of all, what is not new?

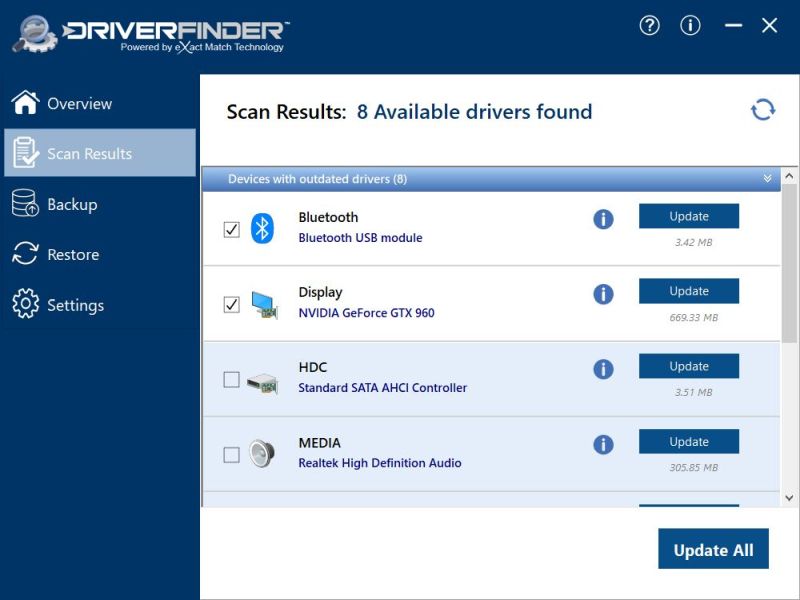
We kept the same user-friendly interface from our previous versions. Easy access to features and a recognizable layout will help existing users easily switch over to the new version. New users will find the GUI to be straightforward and intuitive.

DriverFinder 5 GUI

We also did not change the core logic of the device detection and driver recommendations. Users can rely on the latest and best drivers available being recommended as driver updates.

As always, you can install and run the program on any Windows version, from XP up to Windows 11. This may seem odd since my competitors have opted to only support Windows 7 and later, and only 64-bit systems at that. There are however scenarios where keeping a legacy system running is required. We want to support that, and since we have the legacy drivers in our database, users can find all the needed drivers.

So why this update?

After years of keeping the concept of a licensed version, we now decided to have a free evaluation version available. Yes, you can download and use the software to find and download drivers for your Windows system without a license!

The free version does have a few limitations though, since we still expect most users to want to upgrade to the Pro version to benefit from the full features. The main differences are the download speed for drivers and the need to manually install drivers in the free version.

Apart from that, there are minor bug fixes and improvements in the high DPI support in the latest Windows versions.

New features in the DriverFinder version 5

We keep a list of our version history, with the changes, on our updates page.

But in short, here are the new features:

  • Scheduled scans – run DriverFinder on a weekly, daily, or other scheduled basis automatically. The program will execute at the desired frequency with an automatic scan so that your system will always be able to get the latest drivers.
  • System Restore Points – in addition to automatic driver backups, the program can now also create a system restore point before any driver updates are installed. The System Restore point feature can be enabled directly from the program if not already enabled. Even accessing the Windows System Restore is possible from within the program.
  • Additional languages – the software has been limited in the number of languages it supported untill now. We are adding new languages, starting with Italian and Japanese in this update. More will follow.
    You can even switch languages at runtime!
  • Automatic program updates – in addition to being notified of software updates, it is now possible to install the update directly from within the program.

We hope you will like the new version. To download a copy of DriverFinder version 5, please click here.

Vulnerable Windows Drivers Could Allow Device Takeover

In several earlier articles, we have mentioned that drivers are a critical component in any operating system. In Windows kernel-level device drivers are loaded to ensure hardware devices can communicate with the operating system. This high level of access by device drivers is secured by a number of safeguards.

Sucuring vulnerable Windows drivers

Device drivers need to be digitally signed before they are allowed to be installed (even though this can be disabled on some Windows versions). Drivers can also be tested by Microsoft to get the WHQL certification (Windows Hardware Quality Lab). An advantage of WHQL drivers is that they are available through the Windows Update service.

Since the Windows 11 update in 2022, the Hypervisor-Protected Code Integrity (HVCI) security feature prevents vulnerable drivers from being installed. It is important to realize that this is based on a list of known vulnerable Windows drivers. So, anything unknown will not be on the list and still get installed.

Recent Analysis Showed 34 Vulnerable Drivers

It is good to know that there are always people looking for vulnerabilities to help prevent abuse of these vulnerabilities. VMWare recently also released their findings on an automated approach to finding vulnerable Windows drivers using a reverse engineering approach. Details are in their blog post, but the results are quite daunting.

Finding that 34 Windows drivers have vulnerabilities is quite a large number. Most (30) are based on the Windows Driver Model (WDM), while some (4) are using the Windows Driver Framework (WDF). Since some of these drivers include firmware access, one can imagine the kind of access and system takeover that can happen with the exploits of these vulnerabilities.

Solutions to Fix Vulnerable Windows Drivers

Since most of these problems need to be fixed by correcting the flaws, or shortcomings, in the device driver software, vendors must update their drivers and release new versions.

This has happened in 2 of the mentioned cases (Phoenix Technologies fixed the TdkLib64.sys driver and AMD fixed the PDFWKRNL.sys driver).

But there are also suggestions that Microsoft could make changes in how drivers are checked and loaded. The vulnerability list (HVCI) does not seem to be sufficient. It is suggested that preventing signed drivers with a revoked certificate would already block a third of the 34 drivers.

From a user perspective, it is important to keep your drivers up-to-date. Apart from using Windows Update, we recommend you use a program like DriverFinder to check for updates regularly.

Microsoft Printer Support is Changing

In order to use a printer, like any device, in Windows, a printer driver is required. With Windows 10, Microsoft introduced a new concept for printer support using an integrated driver. This is called the Microsoft IPP Class driver, and it supports Mopria-compliant printers over a network (ethernet, Wi-Fi, Bluetooth) or USB connection.

Windows printer support

The idea is that printer manufacturers will no longer need to create, maintain, and provide their own printer drivers. Knowing Microsoft, there is always the possibility that an aspect of control on their end also plays a role.

All device experience customizations would need to be done through a print support app, which printer manufacturers should then develop instead of a driver. This is already the recommended way for Windows 11.

The motivation for this is stated as improved reliability and performance, which is never a bad thing, especially in the context of Microsoft Windows.

As a result of this change, or plan of changes, Microsoft will phase out their servicing of legacy Windows printer drivers (version 3 and version 4). Due to the nature of the impact, the changes will take place over a period of several years. Following the announcement this year, from 2025 onwards, no new printer drivers will be published to Windows Update. In 20260, printer driver update recommendations will start favoring the IPP driver, and in 2027 third-party printer driver updates will no longer be allowed.

Mopria

Even though printer manufacturers can submit drivers for certification through the Windows Hardware Compatibility Program, from 2025 onwards the drivers will not be available through Windows Update. In addition, the Mopria certification will be required. A direct benefit is that all printers will be supported on various devices.

One of the main questions resulting from this is whether existing or even new third-party printer drivers will still be allowed. And according to Microsoft, they will be. They must have realized that this is critical, as many people make use of printers for a long time.

Even if there is no direct printer support for a specific printer on a new Windows version, a virtual machine with an older version of Windows can offer a solution. But that is really a last resort since it is much simpler to use a (older) printer driver directly.

HP Printer Error 83C0000B

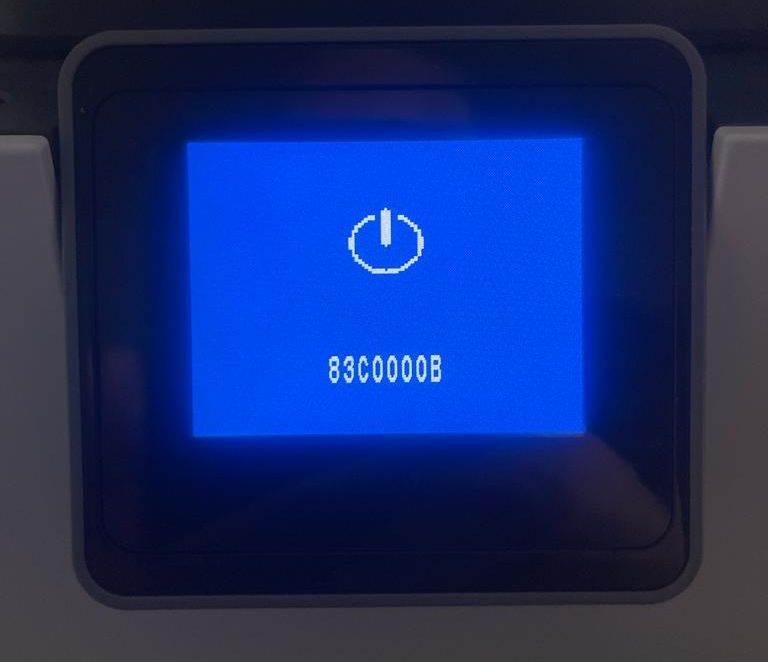
Hewlett-Packard has done it again. Agrevate users with firmware updates (this seems to be the cause) that result in printer problems. Error 83C0000B is shown with a blue screen on the printer.

Error 83C0000B

Like before, it appears that this is the result of a firmware update that includes dynamic security features. In the past, this has resulted in printers suddenly not working anymore if non-original ink or toner cartridges were used.

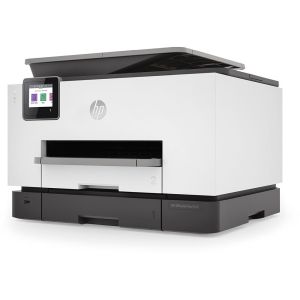
In the current case, it appears the error pertains to the OfficeJet 902x series printers. Resetting, disconnecting and reconnecting, unplugging, and plugging all seem to have no effect. As it would not be the case with a firmware issue.

Solving error 83C0000B

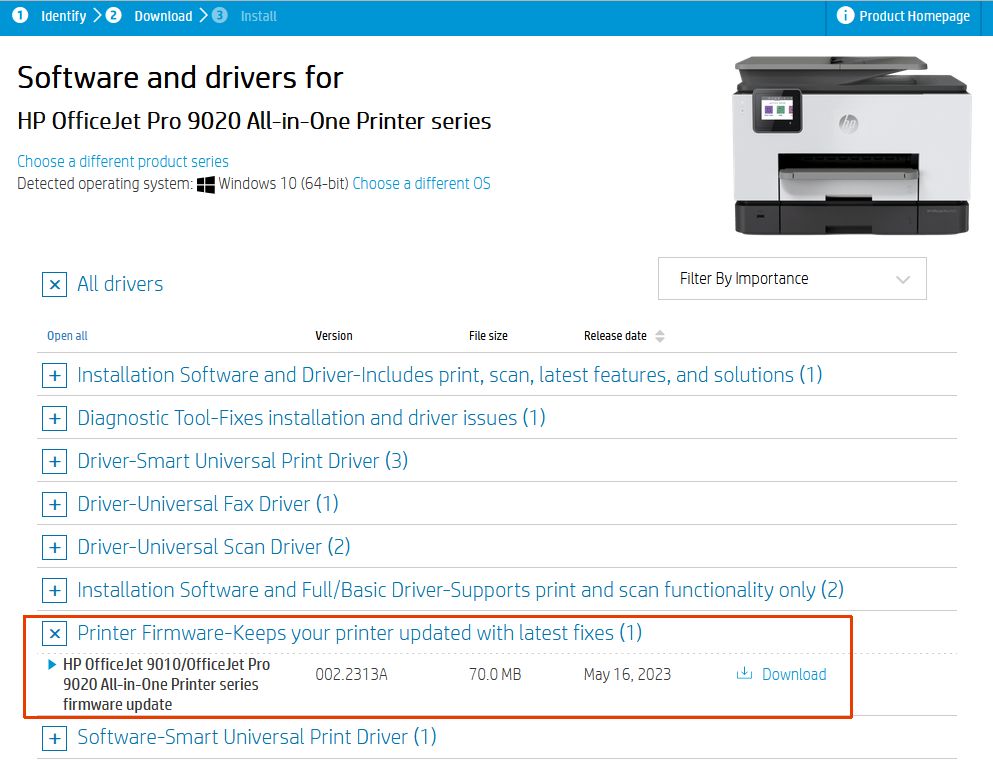
The only real solution would be an update from HP for the printer. That means you need to check the HP support website for a newer firmware version than the current version 002.2313A, dated May 16, 2023.

Visit the HP site for your printer model, for an OfficeJet Pro 9020 AiO for example. Then open the section with the firmware updates. Click Download to download the firmware installer file, and execute it after the download completes.

HP Error 83C0000B

Note: You may need to change the OS selection to show the firmware option in the list.

The installer will show the HP Printer Update window where you need to select your printer and click the Update button.

Let’s hope HP releases an update soon! You are not alone with this problem.

In any case, make sure to contact HP support, as they might be able to offer a solution or replacement. Their generic instuctions for a full power down and reset do not seem to help. But specific instuctions for your model to do a SemiFull reset, as they call it, might be helpful.

Going back to a previous firmware version

In theory, downgrading the firmware would be a viable option as well to solve error 83C0000B. It was a solution in the past when HP first started using dynamic security to ensure people used original cartridges and toners from HP (the first law suits are already being filed over this).

Using a USB stick, you can load older firmware (.ful2 extension) on the HP printer to install an older version. The process has a few challenges though. You need the exact match of firmware for your printer, and the steps need to be followed exactly to prevent problems during the downgrade process.

Related: How to solve HP printer installation errors.

Copyright 2009 and Beyond - DriverFinderPro.com - All Rights Reserved