How To | DriverFinder - We Make Drivers Work for You - Part 2

How to Update an Intel Bluetooth Driver – Windows 11

The Intel Bluetooth interface is part of the Intel wireless adapters in PCs with an Intel wireless chipset. The appropriate driver needs to be installed to ensure the Intel Bluetooth device functions on Windows 11. Windows 11 will normally install supported drivers automatically, but if you need to update an Intel Bluetooth driver on Windows 11, follow these instructions.

Manually Update the Bluetooth Driver

To update the Intel Bluetooth driver, we first need to download the latest version from the Intel website. In some cases, your PC manufacturer will also have a driver available for the Bluetooth interface in your PC. Make sure to check the available versions on both websites to see which version is required.

  1. Open a web browser and navigate to the Intel download center.
  2. On Intel the web page, use the Search option to locate the latest Bluetooth driver. Type “bluetooth” and press Enter.
    Search Bluetooth Intel support
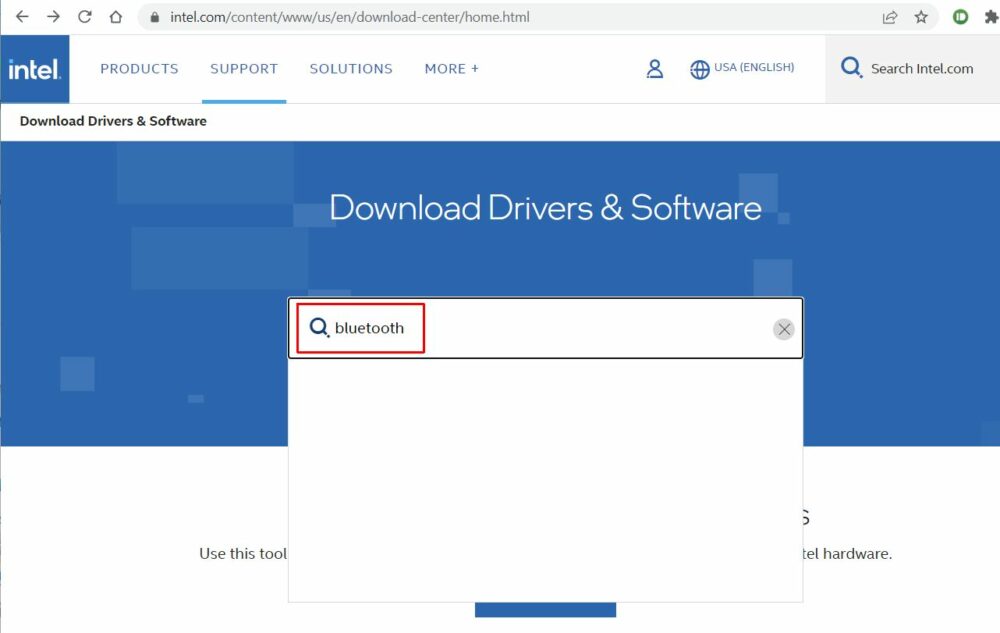
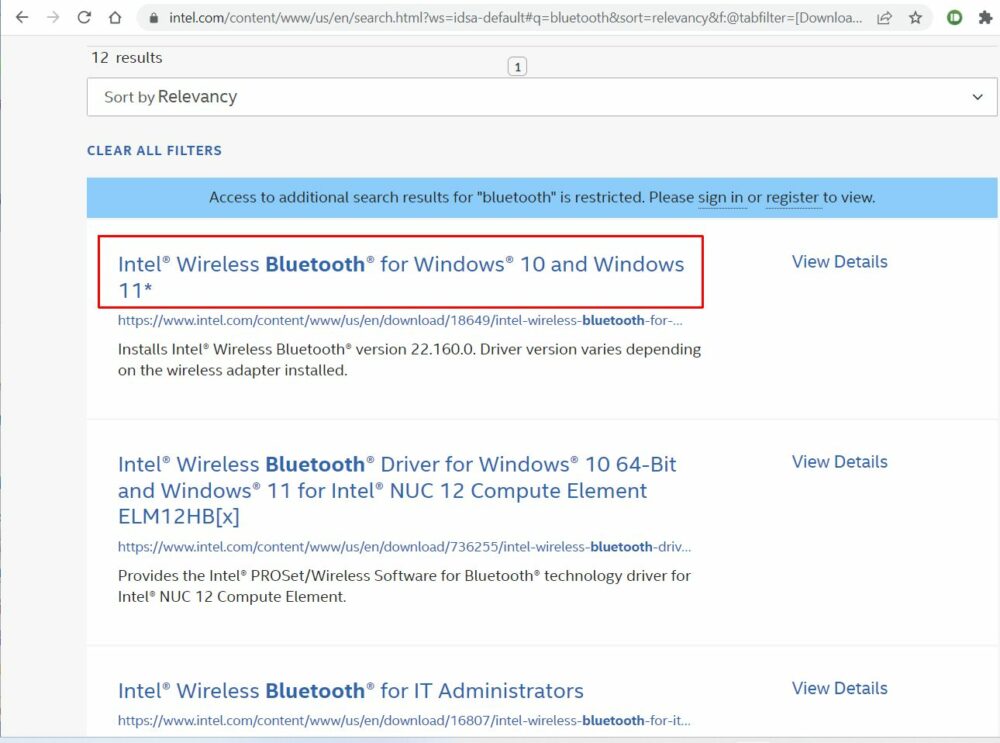
  3. In the list with search results, locate the Intel® Wireless Bluetooth for Windows 10 and Windows 11 entry and click it.
    Intel Bluetooth driver download link
  4. On the web page for the intel® Wireless Bluetooth® for Windows 10 and Windows 11, click the Download button for the installer.
    Note: The downloaded version will be the latest available. If you need an older version, use the Version drop-down field to select a previous version.
    Download Intel BT Driver
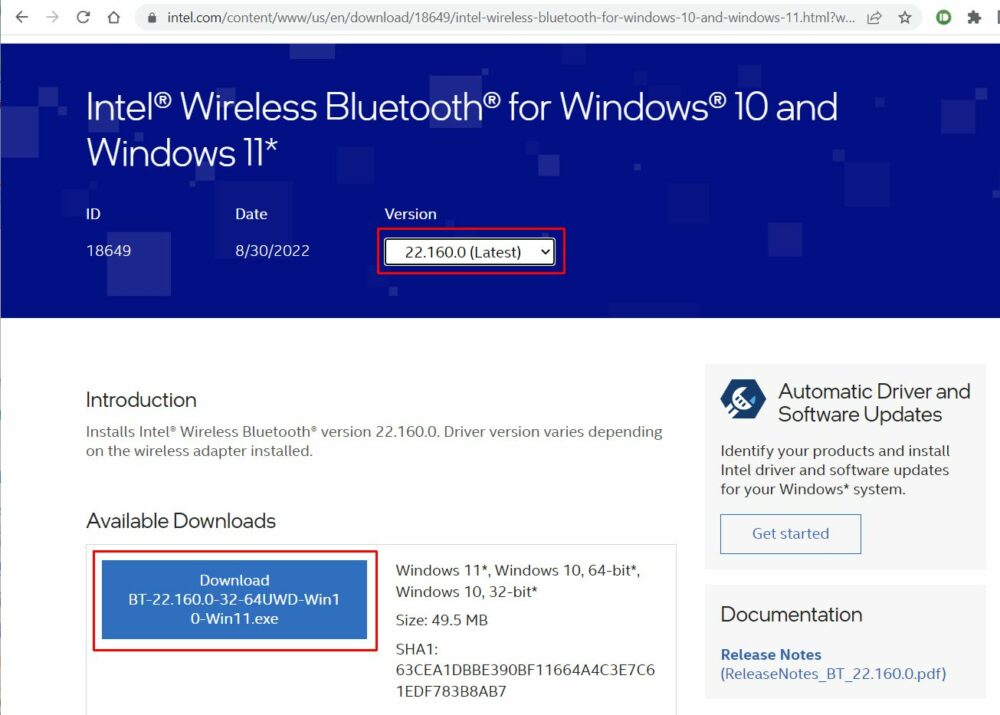
  5. Click the I accept the terms in the license agreement button in the windows that show next.
  6. The Intel Bluetooth installer file will start downloading.
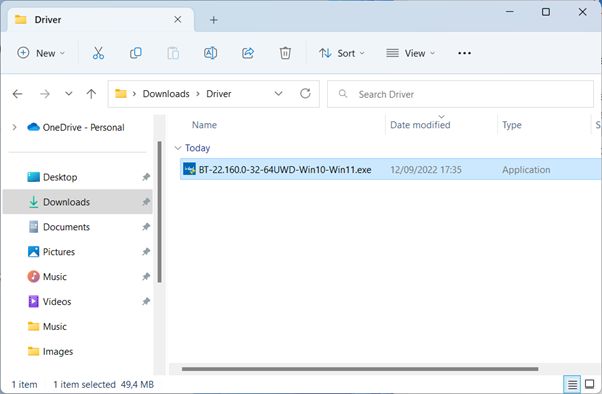
    Note: Depending on the browser being used, you may need to select a destination on disk for the downloaded file.
  7. Once the download completes, open a File Explorer and browse to the downloaded file.
    Intel Bluetooth Installer File
  8. Double-click the downloaded file to execute the driver installation and follow the on-screen instructions. If the UAC screen shows, click the Yes option to continue.
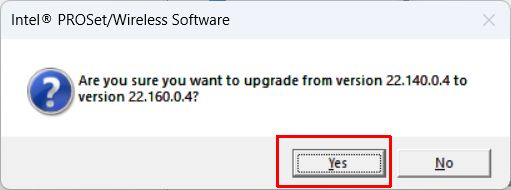
  9. If a driver is already installed for the Intel Bluetooth device, a popup will show to confirm the upgrade from the existing version to the new version of the driver. Click Yes to confirm.
    Intel Bluetooth Driver Upgrade
  10. After this, follow the on-screen instructions in the Intel® Wireless Bluetooth® Setup window.
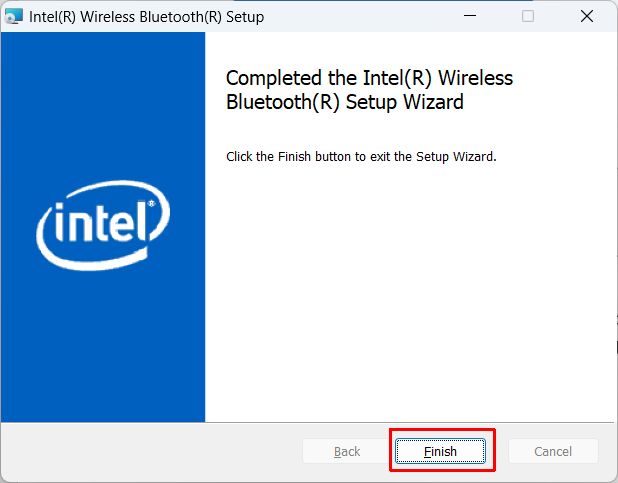
  11. Once the installation of the Intel Bluetooth driver completes, click the Finish button to close the setup window.
    Bluetooth Setup Complete

Note: Always make sure to check which wireless adapters are supported by the driver version. If your device is not listed, chances are that the driver will not work. For version 22.160.0.4, as shown in the instructions, the devices supported are:

Intel® Wi-Fi 6E AX4111, AX2111, AX2101
Intel® Intel® Wi-Fi 6 (Gig+) Desktop Kit1
Intel® Wi-Fi 6 AX2001, AX2011
Intel® Wireless-AC 95601,-AC 94621, 94611, 92601
Intel® Dual Band Wireless-AC 82651,-AC 82601, 3168
Intel® Wireless 7265 Family
Intel® Dual Band Wireless-AC 3165

Automatically Update an Intel Bluetooth Driver

To automatically update the Intel Bluetooth driver on Windows 11, run Windows Update. First, make sure automatic driver updates are not disabled.

  1. Open the Windows 11 Settings by pressing the Windows + I keys (or use the Start menu).
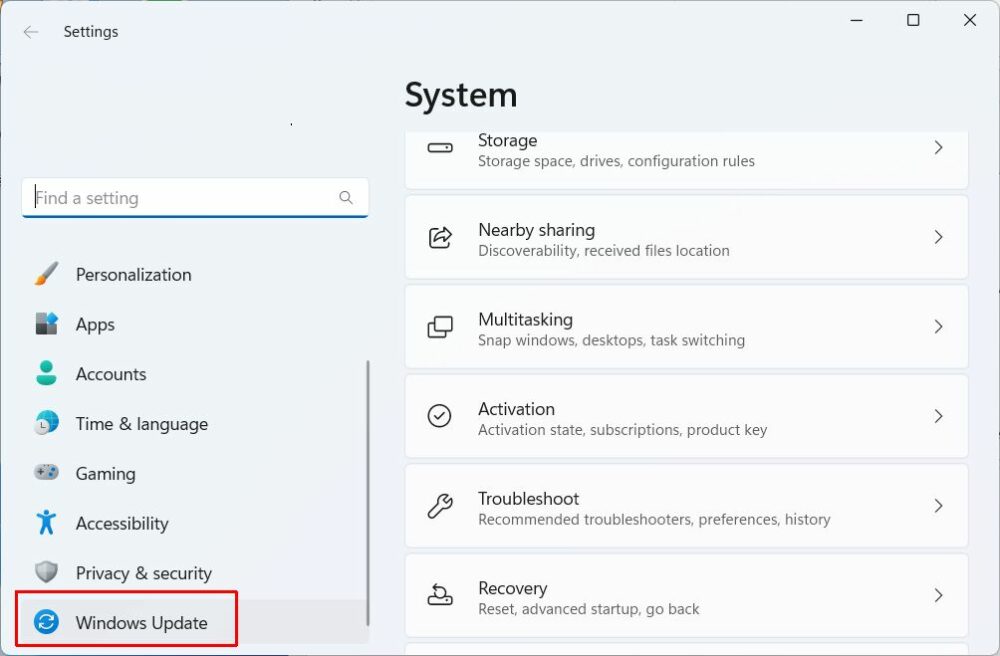
  2. Click Windows Update in the left-hand panel in the Settings window.
    Start Windows Update in Windows 11
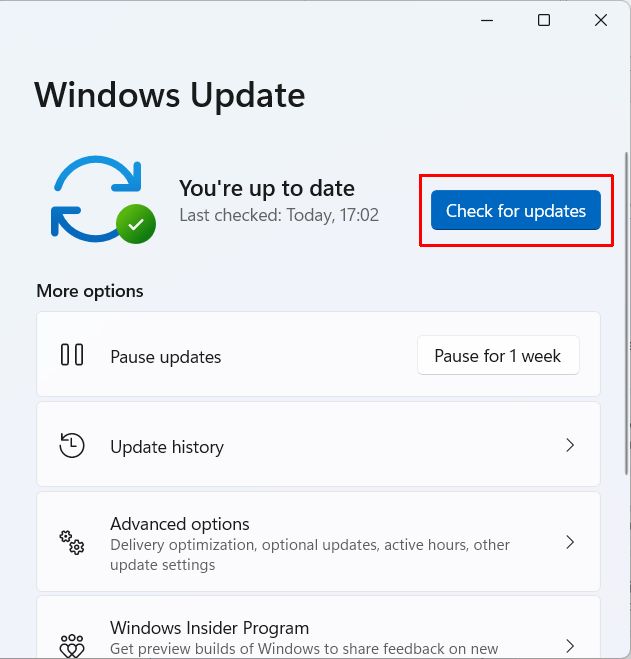
  3. Next, click the Check for updates button in the right-hand panel.
    Check for updates in Windows 11
  4. Wait for updates to be downloaded and installed.

A second option to automatically update the Intel Bluetooth drivers is to use a program like DriverFinder that will automatically find the latest version of the Bluetooth driver for your PC.

Update the Intel Bluetooth driver using the Device Manager

The last option to update the Intel Bluetooth driver is to use the Device Manager. The Device Manager has been part of Windows since the initial Windows versions. It allows you to see all devices that are present in the system. For each device, the drivers can be checked and updated.

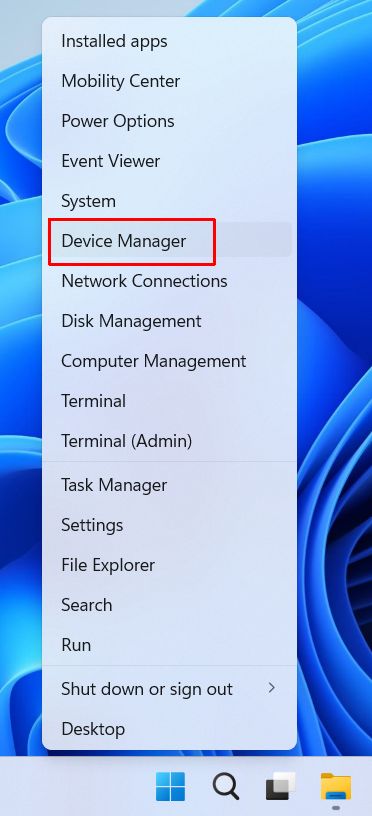
  1. Open the Device Manager by right-clicking the Start menu button and selecting Device Manager in the menu.
    Windows 11 Device Manager from Start menu
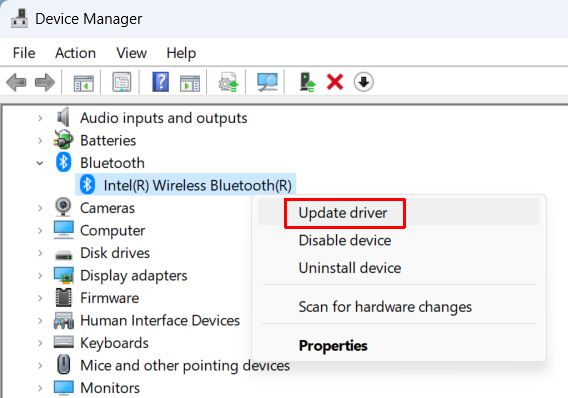
  2. In the Device Manager, expand the Bluetooth category.
  3. Right-click the Intel® Wireless Bluetooth® device, and in the context menu select Update driver.
    Intel Bluetooth Update Driver
  4. Click the option Search automatically for drivers and wait for the driver to be updated.
  5. Click Close when done, and then close the Device Manager window.

Tip: Use the Uninstall device option to remove the device from the Windows configuration. Combined with the option to remove the driver software for the device, this can help solve problems by doing a fresh install of the driver.

With the above instructions, you can download and install the Intel Bluetooth driver for Windows. This should solve any issues you have with Intel Bluetooth not working in Windows.

How to Uninstall Intel Wireless Bluetooth Software

As mentioned in the previous section, sometimes it is necessary to remove the Intel Bluetooth driver before installing a new version. If you find that the Intel Bluetooth driver update cannot be installed, try removing the software first using these steps.

Uninstall Intel Wireless Bluetooth software
  1. Open the Settings window from the Start menu.
  2. Select Apps in the left-hand pane (1).
  3. Select Installed Apps in the right-hand pane.
  4. Type intel in the Search apps box (2).
  5. In the apps found, click the three dots icon next to Intel(R) Wireless Bluetooth(R) (3).
  6. Select Uninstall in the context menu.
  7. Click Uninstall again in the confirmation popup.

Wait for the software to be uninstalled. After that rebooting the device is recommended to make sure all components are removed. If any part of the software is in use, a reboot will make sure it gets removed when Windows restarts.

How to Enable System Restore on Windows

When working with any operating system, there will be moments when things go wrong and you wish you could go back in time. In Windows, System Restore offers a feature that is somewhat like that. Restore points can be created to make a snapshot of the configuration. Using the System Restore option, that configuration can then later be restored.

System Restore will only capture Windows configuration, not user files or settings. So it is a good feature to ensure the system can be restored in case of problematic apps, updates, drivers, and other system-critical changes.

Enable System Restore

Before restore points can be created, the System Restore function needs to be enabled. Enabling system restore will also allocate storage space on one or more drives for creating restore points.

To enable system restore on Windows:

  1. Open the Settings window using the Windows + I keys (or use the Start menu).
  2. In the Settings window, click System and then About.
  3. Scroll down to Related settings, and click the Advanced system settings link.
    Windows 10 advanced system settings
    This will open a new dialog box named System Properties.
  4. In the System Properties window, select the tab System Protection.
  5. Under Protection Settings, select the drive for which to enable the system protection.
    Windows 10 system protection
  6. Click the Configure button. A new dialog box will open showing the drive protection settings.
  7. Select the option Turn on system protection (1).
  8. Optionally, change the slider for Max Usage (2) to limit the amount of drive space that can be used for creating restore points.
    Windows 10 turn on system protection
    Note: By default, Windows will have system protection enabled for the system drive.
  9. Click the OK button when done.
  10. Repeat steps 5 to 10 for any other drive for which you want to enable system protection. The main advantage of enabling system protection on other drives in your system is to limit the use of the system drive and allocate more space for restore points. The functionality of the System Restore feature does not change as a result.
  11. Click the OK button in the System Properties dialog box when done.

Once enabled, Windows will automatically create a system restore point when changes are made (driver install, Windows Update, etc.). But it is also possible to manually create a restore point. This can be convenient if you plan to manually make changes to your Windows system that you may need to reverse.

Using System Restore

When system protection is enabled and restore points are created, you can use these to restore the system to a previous state. Typically, this is done to solve problems with a device, an app, or Windows itself (after an update).

  1. Search for control panel in the Start menu search box.
  2. Click the Control Panel App in the search results.
  3. In the Control Panel window, click the Recovery option.
  4. Next, click the option Open System Restore.
    Windows 10 open system restore
  5. To use the most recent restore point, leave the Recommended restore option selected and click Next.
  6. To manually select a restore point, select the option Choose a different restore point and click Next.
  7. In the manual restore point selection, select the checkbox Show more restore points (1) if you do not see the restore point you want to use. After that, select the restore point in the list (2) based on date, time, and description, and then click Next (3).
    Windows 10 select restore point
  8. Click the Finish button to confirm using the selected restore point for System Restore.
    Note: If you are unsure of the impact of the System Restore using the selected restore point, click the Scan for affected programs This will show programs and drivers affected by the operation.

Manually Creating a Restore Point

Creating a restore point in Windows can be done at any time. To manually create a restore point in Windows use these steps.

  1. Type control panel in the search box on the Start menu and press Enter.
  2. In the search results, click the Control Panel App.
    windows 10 open control panel
  3. In the Control Panel window, locate and click the Recovery option.
    Windows 10 control panel recovery
  4. Next, click the option Configure System Restore. The System Properties window will open with the System Protection tab selected.
  5. Click the Create button at the bottom of the dialog box.
  6. Type a description for the restore point and then click the Create button.
    Create restore point in Windows 10
  7. Wait for the restore point to be created. Click the Close button when complete.
  8. Close the System Properties window and the Control Panel window.

Free up disk space used by restore points

Windows will only create restore points on the drivers for which system protection is enabled. The maximum configured size determines how many restore points can be created. Once the configured maximum space is used up, the next creation of a restore point will result in older restore points being removed.

It is also possible to manually delete restore points for a drive. The only valid reason for this is if you know that a restore point results in a problematic configuration. So, using the restore point is not desired and removal is the best option.

  1. Open the System Protection dialog box using the steps in the Enable System Restore
  2. Select the drive and click the Configure button.
  3. Next, click the Delete button.
    Delete restore points in Windows 10
  4. Click the Continue button to confirm the removal of all system restore points on the drive.
  5. Click the Close button when done.
  6. Close the drive system protection window, and then close the System Properties window.

After this, all system restore points on the driver are deleted and the disk space is freed up.

It is important to realize that these steps will remove ALL restore points on the drive. It is not possible to select individual restore points for removal. The only other option available is to use Disk Cleanup and remove all restore points apart from the last one.

  1. Type disk cleanup in the search box on the Start menu and press Enter.
  2. In the search results, click the Disk Cleanup
  3. Select the drive for clean up and click OK.
    Select drive for cleanup
  4. Select the More Options tab (1).
  5. Under System Restore and Shadow Copies, click the Clean up button (2).
    Windows 10 restore point cleanup
  6. Click the Delete button to confirm.

How to run a Windows Troubleshooter

The latest Windows versions have the ability to analyze and fix common problems. Microsoft has named this feature the Windows Troubleshooter. In earlier versions of Windows, Microsoft Fix It was available, which is a similar feature. But the Troubleshooter functions in Windows 10 and Windows 11 are more elaborate than this earlier solution.

In many cases, Windows will suggest running a Troubleshooter if a problem is encountered. The Troubleshooter can then be invoked automatically, or by clicking a link or button to confirm executing the problem analysis. The Troubleshooters in Windows can be executed for different categories, either device (hardware) or software related.

But it is good to know that you can also manually execute a Troubleshooter in case it is needed. Be prepared that not all problems can be fixed using a Windows Troubleshooter. Only common problems, known errors, and configuration problems can sometimes be solved. Typical steps executed by the troubleshooters are resetting configuration data and restarting services.

Windows 10

  1. Open the Settings window from the Start menu.
    Open Settings in Windows 10
  2. In the Settings window, click the option Update & Security.
  3. In the left-hand panel, click Troubleshoot (1).
    Windows 10 additional troubleshooters
  4. In the right-hand panel, scroll down until you see the option Additional troubleshooters (2) and click the link.
  5. In the list of Additional troubleshooters, find the type of problem you are trying to fix and click it.
  6. Next, click the Run the troubleshooter button that appears.
    Windows 10 Run troublshooter
  7. A new window will appear that will show Windows is detecting problems. Follow any instructions that appear and click Next each time.
    Note: The instructions and steps will vary for each type of problem and troubleshooter.
  8. When done, click the Close button.
  9. Close the Settings window.

Windows 11

  1. Open the Settings window by pressing the Windows + I keys or from the Start menu.
  2. In the left-hand panel, select System.
  3. In the right-hand panel, scroll down until you see Troubleshoot and click it.
    Windows 11 Settings troublshoot
  4. Next click Other troubleshooters in the right-hand panel.
  5. Scroll down to the Other section and then locate the Troubleshooter you want to execute.
  6. Click the Run button in the selected Troubleshooter.
    Windows 11 other troubleshooters
  7. A new window will show with Windows showing “Detecting problems”.
    Follow the instructions in the window to complete the Troubleshooter. Click the Next button after each required step and click the Close button when done.
    Windows 11 troubleshoot steps
    Exmple of running the trooubleshooter for Playing Audio.
  8. Close the Settings window.

In addition to the incorporated troubleshooters in Windows, a separate troubleshooter can be downloaded for problems related to program installation (and removal). This download is compatible with Windows 7, Windows 8, Windows 8.1, and Windows 10. So, if your problem relates to the installation or removal of a program, try downloading and running this tool.

Tip to Fix Audio Issues

There are some problems the audio troubleshooter may not fix. A common audio problem is dealing with crackling sound, audio stutter, or popping sounds. Often unexplainable, and it can sound like there is a bad connection.

A solution that help solve such issues in Windows is the disabling of the hibernation feature. Of course this is not recommended by Microsoft as it can lead to data loss when a power problem occurs. But if you are not concerned with that and just want the best quality audio, give it a try.

How to Manually Install Drivers in Windows 11

With each new version of Windows, more devices are automatically supported. This is also the case for Windows 11. But if your device is not supported, or not automatically installed,  you may need to manually install drivers.

The need to manually install drivers in Windows 11 can also come up when a non-supported device needs to be installed. If hardware is not compatible with Windows 11, but there are drivers for the hardware for previous Windows versions, these older drivers can often be used.

For Windows 11, Windows 10 drivers are almost always compatible. But even Windows 8 or Windows 7 drivers can often be used. Just make sure the right architecture is supported. For Windows 11 all drivers need to be 64-bit since that is the only Windows 11 version available.

Steps to manually install drivers in Windows 11

First, make sure you have the driver file available on your Windows 11 system. Download it from the hardware manufacturer’s website. If possible, use the installer that came with the driver. If that does not work, the manual install process is required.

  1. Make the driver files available in the installable format. That means you need to see files with a .SYS, .CAB, and .INF file extension. File extensions can be made visible in the File Explorer by clicking the View menu, followed by clicking Show in the dropdown menu, and finally selecting File name extensions.
    Windows-11 Show File ExtensionsDepending on the file format of the downloaded drivers, the driver files need to be extracted. For archived files, Windows 11 offers direct support. But other formats might need a separate program to extract them. (.7Z file extension – 7-Zip; .RAR file extension – WinRAR).
    I would recommend installing the 7-Zip program, as it actually supports many archive and compression formats. Even .ISO and some .EXE files can be extracted with it.
  2. Once the driver files are available, open the Device Manager. Press the Windows + R keys, and type msc in the Run window. Press Enter or click OK.
    Windows-11 Start Device Manager
  3. In the Device Manager, select the device for which you need to install the driver.
  4. Right-click the device, and in the popup menu click Update driver.
    Windows-11 Update Driver
  5. In the window that shows next, click the option Browse my computer for drivers.
    Browse my computer for drivers
  6. Next, use the Browse button to select the file location that contains the driver files (as downloaded and extracted earlier).
  7. Once selected, click the Next button.
    Manually install drivers in Windows 11
  8. Windows will analyze the driver files and match them with the selected device. If the drivers are compatible with the device, the drivers will be installed and the device should work after this.
  9. Click the Close button to close the window.
  10. Finally, close the Device Manager.

Hopefully with above steps you can find and install the required drivers for Windows 11. This way you can often keep using older hardwar, even not directly supported by Windows 11.

As always, if you have trouble finding support for your hardware in Windows, try using our DriverFinder software to automatically analyze the hardware devices and look for available and compatible drivers.

How to solve a DRIVER_POWER_STATE_FAILURE Error

Blue screen errors in Windows are notorious. There are different causes, but in general, they are serious errors. When you see a DRIVER_POWER_STATE_FAILURE error on the blue screen the error is caused by a device driver.

DRIVER_POWER_STATE_FAILURE

Depending on the Windows version, you could also see the stop error code  0x0000009F.

What is a Blue Screen Error?

Blue Screen Of Death (or BSOD in short) errors are caused by stop errors. These are the types of errors that cause the operating system (Windows) to crash. Stop errors causing blue screens have been in existence since Windows XP.

Since these errors are critical, the blue screen is shown with an indication of the stop error details. A stop error code, which can be a code or description is shown to inform the user. Further processing is halted to prevent damage or data loss if things were to continue processing.

Causes for the DRIVER_POWER_STATE_FAILURE error

This error indicates that the PC has an inconsistent power state. Typically this happens when the PC changes its power mode, going from sleep or hibernating to an active state or the other way around.

When a power transition happens, the hardware in the PC is of course affected. To communicate the power state change, Windows tells the hardware to change accordingly. This is where device drivers come into play. Communication from Windows to the hardware happens through the device drivers.

So, essentially the error is caused by non-expected behavior from a device driver. This can either mean that the hardware itself is causing it, or there is a problem with the driver.

What to do to fix it?

Although it might seem strange, in many cases the problem is not consistent and can be a one-time occurrence. Simply letting the PC reboot might result in Windows restarting without problems.

Considering the severity of the error, however, it is best to find out the cause and try to solve the issue. Device drivers operate at a high-security level in the operating system. This is why Windows will not keep running, but stops and shows the error.

Troubleshooting the error

To see which driver, and as a result, which hardware device, has caused the error we need to find more details.

The most automated, hands-off approach is to use the Windows Troubleshooter. It is available in the latest Windows versions, and can be started from the Settings. Microsoft is also recommenind the GetHelp app to automatically find solutions to Windows problems.

To find more information on the cause of the driver power state failure manually, you can use the Event viewer and something called a minidump.

When a stop error occurs, Windows creates a log file called a minidump. These files are stored in a folder called Minidump in the system root (typically C:\Windows\Minidump). The minidump filename will have the date in it and have an extension .dmp. If no such file is created, check the configuration for creating minidumps.

These crash dump files when generated as a result of the DRIVER_POWER_STATE_FAILURE error will often contain the filename, which in turn can help pinpoint the driver.

Reading and analyzing a minidump file is a rather technical process. Luckily, tools are available that can read minidump files and show the result in a more user-friendly way. Try BlueScreenView or WhoCrashed.

WhoCrashed minidump analysis

Fixing the DRIVER_POWER_STATE_FAILURE error

Once you know which driver caused the error, you can take action. To identify the driver in a minidump file, look for the .SYS file extension. A few examples:

BTHUSB.SYSBluetooth device
NVRAID.SYSNVIDIA nForce RAID Device
RTWLANE.SYSRealtek Wireless LAN 802.11 PCI-E Adapter
IntcSST.SYSIntel® Smart Sound Technology
HIDIR.SYSInfrared HID Device

In most cases the .SYS file name will be a good indication of the device name to look for in the Device Manager. If it is not clear, simply do an online search for the file name to identify the device.

The first step is to roll back the driver for that device using the Device Manager. This will undo the most recent update of the driver and bring back the previous (hopefully stable) version.

  1. Open the Device Manager.
  2. Locate the device that caused the stop error.
  3. Right-click the device, and in the popup menu click Properties.
    Device Driver Properties
  4. In the device properties window, select the Driver tab.
  5. Click the Roll Back Driver button.
    Roll Back Driver
  6. Click the Yes button to confirm the driver rollback.
    Roll Back Driver Confirm

If there is no option to roll back the driver, that means the original driver is installed. The option in that case, is to update the driver for the device to a newer version. Driver updates are released to fix know issues and make sure the driver is compatible with the latest Windows version. So, installing an updated version of the driver can also help solve the DRIVER_POWER_STATE_FAILURE error.

Driver not known

If the minidump did not provide the name of the driver or device that caused the stop error, you need a different approach to solving the issue.

The first step is to roll back drivers for any new devices, or updated driver versions.

For updating drivers, you can use DriverFinder. The program will automatically find the latest versions of device drivers for all hardware devices present in your system.

If rolling back and updating does not fix the problem, here are two more suggestions to fix stop errors in general.

  • Run a Windows check for missing or corrupt Windows components using Deployment Image Servicing (DSIM).
    Open a Command Prompt window with administrative privileges, and then type: DSIM /online /cleanup-image /restorehealth and press Enter.
  • Run a system scan to fix any Windows system file issues.
    For this, again you need to open a Command Prompt window with administrative privileges, and type: SFC /scannow at the prompt. Wait for the command to finish after pressing Enter.
    sfc scannow

It is suggested to run these commands in this sequence since the DSIM service is a more recent option with better results for the latest Windows versions. Please note that you will need an active Internet connection for the first command. For Windows versions older than Windows 10, you will first need to install the Windows Assessment and Deployment Kit.

Note: Both commands can take some time to complete.

Disable power saving altogether

In general, disabling the power saving is not the desired option, but it can actually be used to solve the DRIVER_POWER_STATE_FAILURE error. By disabling all power-saving options, no power changes take place, and as a result, devices do not cause this error.

You can use the Control Panel in Windows to change the power settings.

  1. Open the Control Panel by pressing the Windows + R keys and typing “control panel” in the Run box. Press Enter to confirm.
  2. In the Control Panel click the option Power Options.
    Note: You may need to change the View by option from Category to Large icons or Small icons.
    Control Panel Power Options
  3. In the power plan selection pick either Balanced or High performance.
  4. Next, click the Change plan settings link for the selected option.
    Change power plan settings
  5. In the Edit Plan Settings window, change the time for the options Turn off the display and Put the computer to sleep to Never.
    Keep display on and no sleep mode
    Note: The On battery options will only show for laptops and portable devices.
  6. Next, click the link Change advanced power settings.
  7. In the Power Options window, open up the PCI Express category, click the Link State Power Management and select the option Off to disable it.
    disable link state power management
  8. If there is a USB or Wireless category, also disable power management in those, or set it to maximum performance.
  9. Click OK to close the Power Options window.
  10. Click Save changes to close the Edit Plan Settings window and update the changed settings.

Keep in mind that this is more of a workaround than an actual solution. Even if you can prevent the error from happening, the core cause of the error is still unaddressed. It is best to still pinpoint the device or driver causing the issue and fix that, so the power management can be enabled again.

Windows will not start

If the DRIVER_POWER_STATE_FAILURE error is happening consistently, Windows might not start, or run long enough for you to take action. In that case, there are a few things to try:

  • Unplug external devices. The error is often caused by USB devices, so disconnecting external storage devices is essential in this case.
    After this, you can try starting Windows normally, and if that still does not work, try the next step.
  • Start Windows in Safe Mode.
    Safe Mode is a Windows state where not all device drivers are loaded. This way you will be able to make changes that are not otherwise possible.
  • Use a System Restore point to bring Windows back to a previous state.
    If System Restore is active, driver updates are generally proceeded by Windows creating a system restore point. So, reverting to a previous system restore point is similar to a driver rollback.
  • Reinstall Windows. Not something anybody wants, but as a last resort, this has to be mentioned. Reinstalling Windows will ensure that all drivers are original versions and device configuration is reset. Make sure to make a backup of your data first!

Once you have Windows running again, you can roll back any new drivers as mentioned earlier, or update drivers depending on their version.

Copyright 2009 and Beyond - DriverFinderPro.com - All Rights Reserved