How To | DriverFinder - We Make Drivers Work for You - Part 5

How to disable driver signature enforcement in Windows 10

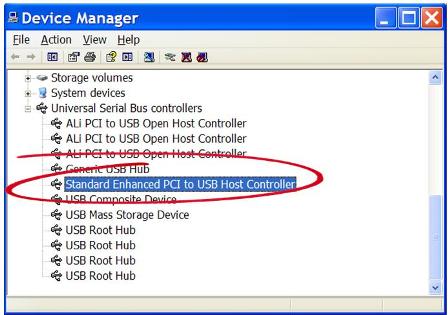
When device drivers are not available (yet) for Windows 10, you can often install drivers that are meant for Windows 8, or even Windows 7. In most cases that works without any problems, but in some cases you need to run the driver installer in compatibility mode. This can be achieved by right-clicking the installer. But when the driver does not install even when running the driver installer in compatibility mode, you might need to disable driver signature enforcement. Basically the driver signature ensures that the device driver is original and reliable, since it is guaranteed to originate from the manufacturer that put the signature on it.

But in some cases a signed driver is not available, or even the signed driver fails to install on Windows 10.

To disable the driver signature enforcement in Windows 10, follow these steps:

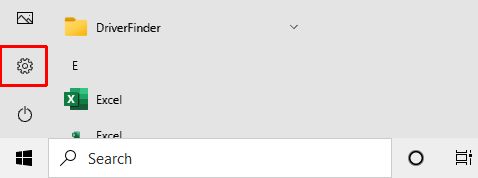
  1. Click the Start button in the taskbar.
  2. Click the Settings icon in the popup menu.
    Windows 10 Settings
  3. In the Settings window that comes up, click the option Update & Recovery option.Update & Recovery
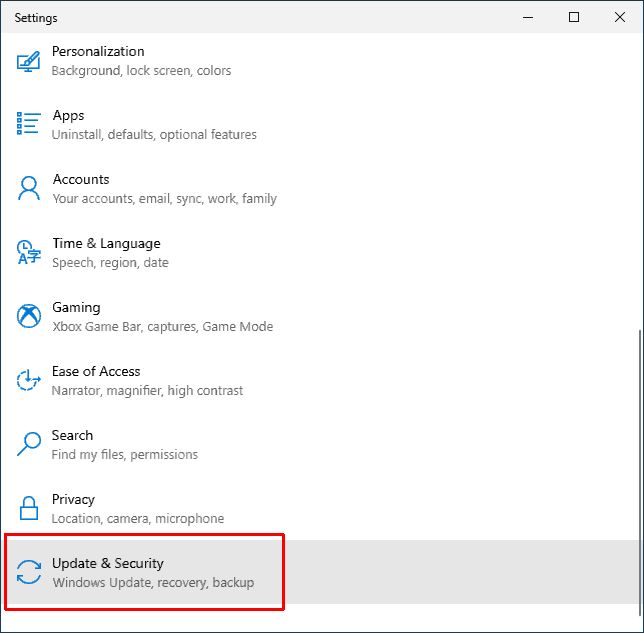
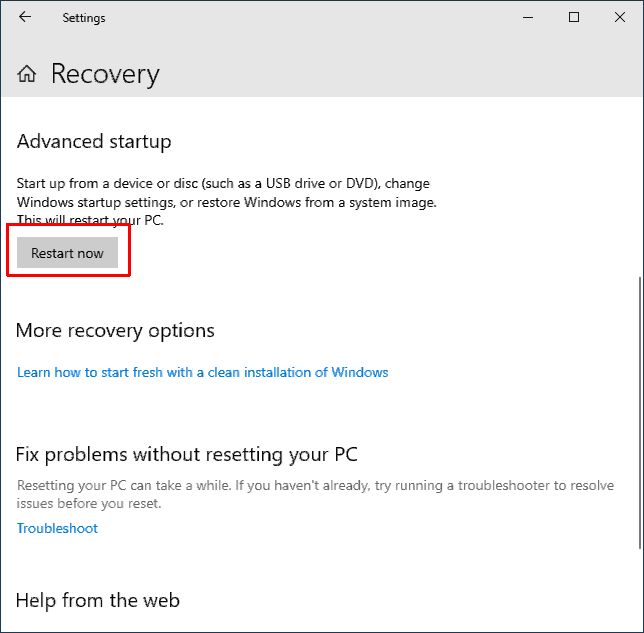
    Note: You need to scroll down in the Settings window to see this option.
  4. Next, click the Recovery option.
  5. In the Recovery window that comes up, you need to click the Restart now button under the heading Advanced startup.
    Windows 10 Advanced Startup
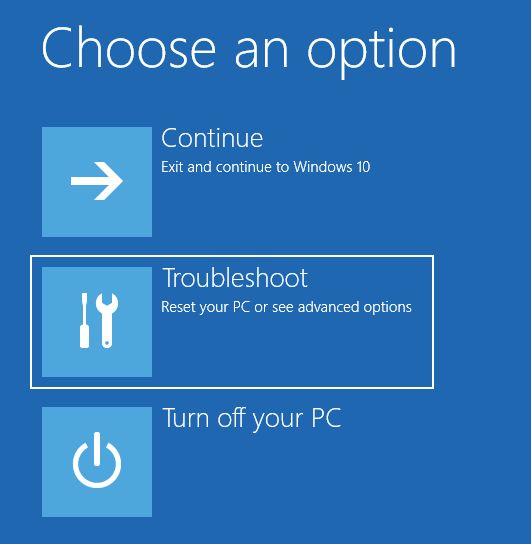
  6. Once the PC has restarted, you will see a screen that says Choose an option. Here you click the Troubleshoot option.
    Windows 10 Troublsheet
  7. Under Troubleshoot you select Advanced options.
    Windows 10 Advanced Options
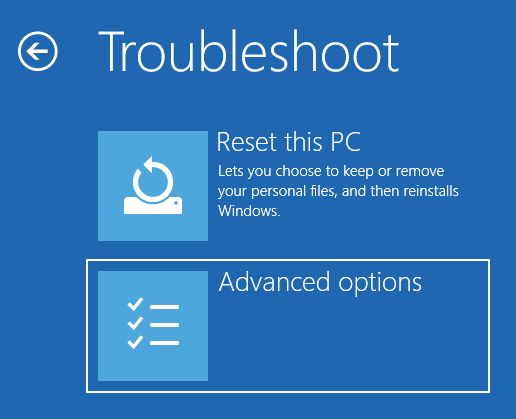
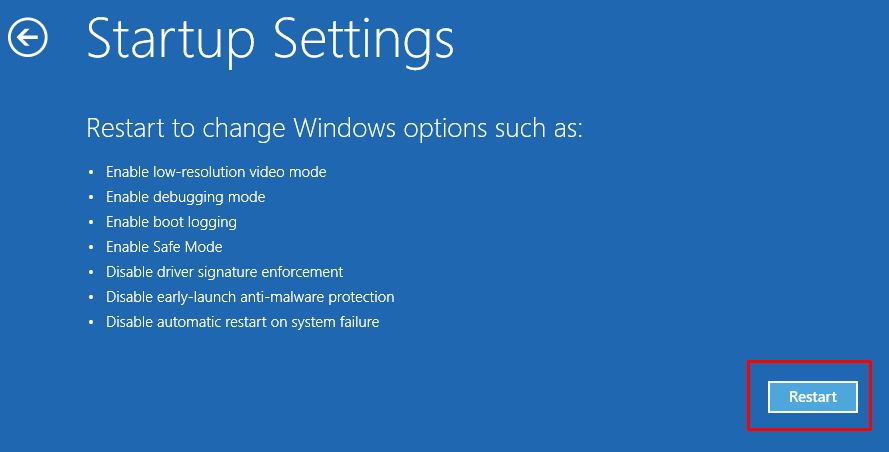
  8. Next, click the Startup Settings option, followed by the Restart button.
    Restart with Startup Settings
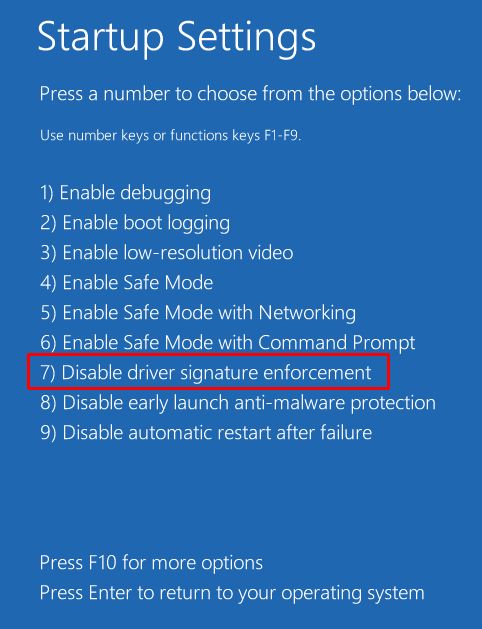
  9. After restarting a list with Startup Settings comes up. In the list you select option 7 to disable driver signature enforcement. You can either press the 7-key or use the function key F7 for this.
    Disable Driver Signature Enforcement
  10. Your PC will again need to restart, after which you can install the driver.

When installing the drivers, make sure to continue with the installation, even if Windows shows a warning regarding the unsigned drivers.

Searching for drivers for Windows 10? Download and use DriverFinder to find them!

List Drivers in Use on Windows

Using the Device Manager, you can easily check the details for each device on a Windows computer. But If you want list drivers in use by the system, the Device Manager is not suited for that.

However, in Windows Vista, Windows 7, Windows 8, and Windows 10 you can create list of all device drivers in use by using a simple internal command.
To do this, first start a command prompt with administrator rights (right-click the command prompt icon and select Run as administrator in the popup menu).
Once the command prompt window opens type:

driverquery.exe /v /fo csv > c:\temp\driverlist.csv

This will instruct the command to list all drivers, and use the CSV output format. The greate-than symbol (>) is used to redirect the output of the command to the file specified (in this case driverlist.csv ). Make sure you include a path for the output file, otherwise the file will be stored in the default path of the command prompt (typically C:\Windows\System32 ).

For a full specification of the possible parameters for the driverquery command see the Microsoft website.

Now you can open the driverlist.csv file with Microsoft Excel (or any other program supporting comma-separated-values), and check the details of the drivers in one overview.

List Drivers in Use
MS Excel view of the resulting Windows driver list

Check the column named State to see if a driver is in use (Running), or not (Stopped).

The Path columns will show the location and file name of the actual driver file (.sys). Drivers that are included in the Windows installation typically will have C:\Windows\System32\ are the folder location, while additionally installed drivers will resider in C:\WINDOWS\system32\DriverStore\FileRepository\.

Check the Version of Your Apple Mobile Device Driver

All Apple devices that can be connected to a PC using the USB port will use the Apple mobile device driver for Windows. To check which version of this driver is installed, use the following steps:

  1. Make sure the iPad, iPhone or iPod is connected to the PC using a USB cable.
    (Otherwise it will not show up in the Device Manager, and you cannot check the version with these steps.)
  2. Open the Windows Device Manager from the Control Panel, or type “devmgmt.msc” at the Start menu.
  3. In the Device Manager, expand or open the Universal Serial Bus Controllers group.
    Apple USB Device
  4. Locate the Apple Mobile Device USB Driver, and right-click this device.
  5. In the popup menu, select Properties.
  6. Next select the Driver tab.
  7. Check the Driver Date and Driver Version of the Apple USB driver to see if you have the latest version of the driver.
    Apple mobile device driver

In case you do not see the Apple Mobile Device USB Driver under the Universal Serial Bus controllers category, it is possible that it is listed under the Universal Serial Bus devices categories.

Apple Mobile Device

The steps are the same, rick-click the Apple Mobile Device USB Composite Device, and in the popup menu select Properties and then select the Driver tab.

Apple Mobile Device driver

To update an Apple mobile device driver, you normally need to install the updated iTunes application. The iTunes software is quite large (install requires 400 MB of disk space), and you might not use it at all. So, if you download the stand alone Apple USB driver update using DriverFinder, you can simply update the driver without the need to download and install the complete iTunes software.

Once downloaded, simply run the AppleMobileDeviceSupport.msi (or AppleMobileDeviceSupport64.msi for 64-bit Windows versions) to install the new driver.

When you plug your iPod, iPhone or iPad, the new driver will automatically be used!

Solved: CD/DVD Drive Not Recognized

Your PC is made up of many devices that interact with each other. Although in most cases updating your drivers is the solution to CD/DVD problems, there may be PC settings (or other applications) interfering with your CD/DVD device.

The following steps outline what you need to do to delete filters in your Windows registry, which may be preventing you from using your CD/DVD device. Steps may vary slightly depending on the Windows OS you use. ALWAYS back up your Windows Registry before making any changes.

  1. From the Windows Start menu, click Run.
  2. Type regedit (1) in the space provided and then click OK (2).
    Windows run regedit
    Note: If the UAC window shows up, click Yes to continue.
  3. Go to this folder: HKEY_LOCAL_MACHINE\SYSTEM\CurrentControlSet\Control\Class\{4D36E965-E325-11CE-BFC1-08002BE10318}
  4. On the right pane, right-click UpperFilters.
    Note: You may also see an UpperFilters.bak registry entry. You do not have to remove that entry. Remove UpperFilters only.
    If you do not see the UpperFilters registry entry, you still might have to remove the LowerFilters registry entry. To do this, go to Step 7 below.
    Delete UpperFilters in Registry to fix CD/DVD
  5. In the context menu, click Delete.
  6. If prompted to confirm the deletion, click Yes.
  7. On the right pane, right-click LowerFilters.
  8. In the context menu, click Delete.
  9. If asked to confirm the deletion, click Yes.
  10. Exit the Registry Editor.
  11. Restart your PC.

After the PC restarts, your CD/DVD drive should be recognized and a driver letter should be assign to the drive.

If you are using an external CD/DVD drive that is connected through a USB port, also check your USB ports and drivers. Connecting to a different USB port can sometimes be sufficient.

Recommended: Update Your CD/DVD Drivers with DriverFinder

Check if Your PC is USB 2 Enabled

Universal Serial Bus (USB) 2.0 was released in 2001, and it allowed for higher speeds than its predecessor (USB 1). Through USB 2.0, a wider range of external devices can be used on your computer. It also enables these devices to perform faster.

For a USB 2.0 driver to be installed on your PC, your system MUST be USB 2.0 enabled. If not, you cannot use a USB 2.0 driver.

How to Check if Your PC is UBS 2.0 Enabled

  1. From the Windows Start menu, click Control Panel.
  2. Click System->Hardware->Device Manager.
  3. Scroll down to the Universal Serial Bus controllers folder and click the ‘+’ sign to see its contents.

If your Device Manager shows an ENHANCED USB Host Controller, the system has High Speed USB (USB 2.0) capability. All other types are USB 1.1.

If your system is only USB 1.1 enabled, you must purchase a PCI card that has USB 2.0 ports.

Recommended: Update Your USB Drivers with DriverFinder

Copyright 2009 and Beyond - DriverFinderPro.com - All Rights Reserved