How To | DriverFinder - We Make Drivers Work for You - Part 6

How to Uninstall USB Root Hubs

Your PC is made up of many devices that interact with each other. Although in most cases updating your drivers is the solution to USB problems, there may be PC settings (or other applications) interfering with your USB ports device.

The following steps outline what you need to do to uninstall USB Root Hubs, which may be preventing you from using your USB device. (Steps may vary slightly depending on the Windows OS you use.)

  1. From the Windows Start menu, click Control Panel.
  2. Click System.
  3. Select the Hardware tab.
  4. Click Device Manager.
  5. Scroll down to Universal Serial Bus controllers. You will see entries called Universal Root Hub.
  6. Right-click each one and select Uninstall.
  7. Restart your PC.

Recommended: Update Your USB Drivers with DriverFinder

How to Roll Back a Driver

All Windows version create a driver backup whenever a new driver is installed, so it is possible to restore that driver from the backup. This is called a Roll Back in Windows.

And even if drivers are installed manually from a driver setup program, or using the Device Manager, a driver roll back is possible.

To roll back a driver in Windows, open up the Windows Device Manager.

    1. From the Windows Start menu, click Control Panel.
    2. Click System, select the Hardware tab and then click Device Manager.
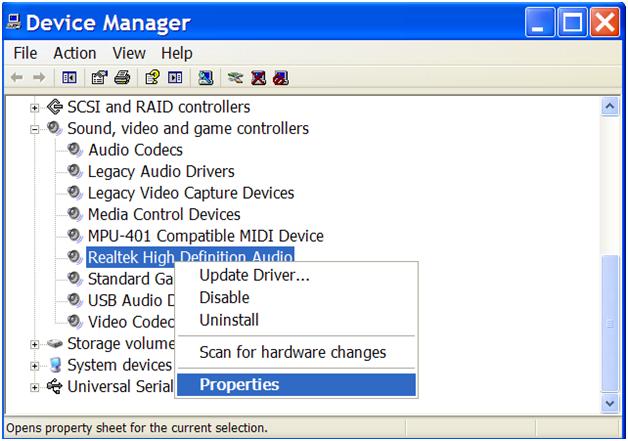
    3. In the device manager, you need to right-click the device for which you want to restore the previous driver version. In the pop-up menu, select Properties.
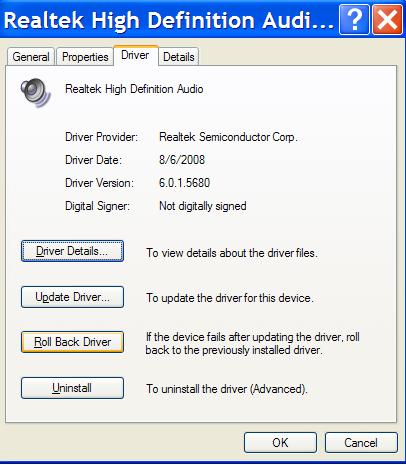
    4. In the device Properties window, select the Driver tab.
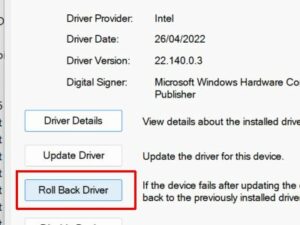
    5. Next, click the Roll Back Driver button.

      Note: If the button is not enabled (greyed out), that means is is not possible to roll back a driver. Most likely, a driver update was never installed for the selected device.
    6. You will see a confirmation message, where you need to click the Yes button.

Some notes on this procedure…

• Make sure you are logged in as a user with Administrator privileges.
• You can only roll back to one previous version of a driver.
• The driver roll back feature is not available for printer drivers. In that case you will need to download the older version of the printer driver and install that driver.

Recommended: Update Your Windows Drivers with DriverFinder

Install a Driver in Windows Compatibility Mode

When drivers are being installed, it’s important that they MATCH the Windows operating system (OS) that is installed on the PC. However, when Microsoft releases a new OS (e.g., Windows 11), it’s impossible for ALL hardware manufacturers to simply comply and have new drivers immediately for the new OS.

To solve this issue – and to prevent your devices from simply stopping functioning when you upgrade to a new Windows OS – Microsoft has the Windows Compatibility Mode feature. It can be used to execute programs, including driver installation programs, in a mode that is compatible with an older version of Windows.

Here is how to use the Windows Compatibility Mode to run a driver installer:

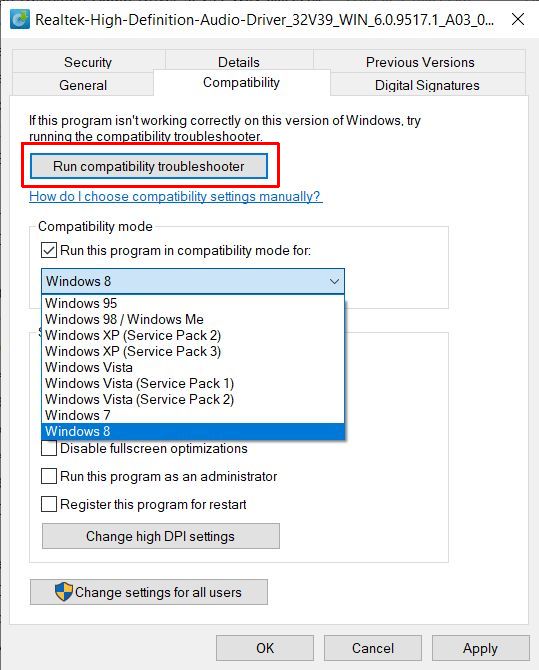
  1. Right-click the driver installer file for the driver you want to install and then select Properties in the popup menu.
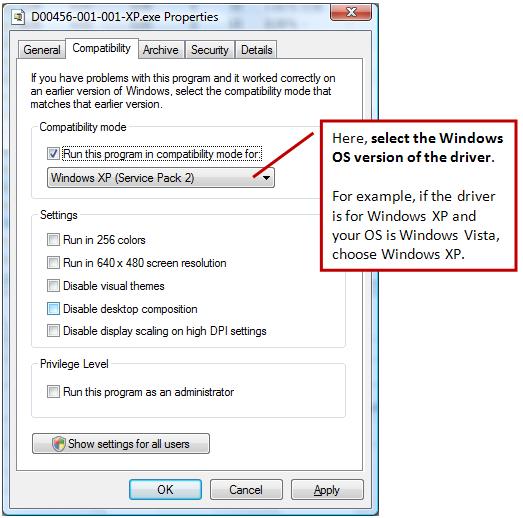
  2. Select the Compatibility tab.
  3. Under Compatibility Mode, select the checkbox named Run this program in compatibility mode for:
  4. Click the down arrow and select the Windows version of the driver.

    Tip: If needed, you can also select the option to Run this program as an administrator. Many driver installers require this option if the user account does not have administrative privileges.
  5. Click OK.
  6. Install the driver by double-clicking the driver installation file to execute it.

If you are not sure which version of Windows the driver is compatible with, you can also use the option to let Windows check it. In that case, click the Run compatibility troubleshooter button in the properties window.

Windows Compatibility Troubleshooter

After this, Windows will analyze the driver installer file and try to determine the best compatibility mode.

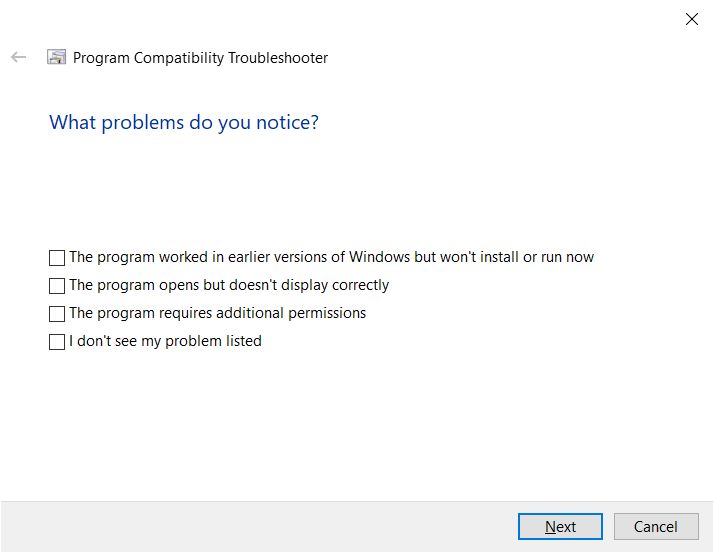
You can then click Try the recommended settings or click Troubleshoot program. The first option will run the driver installer with the suggested settings. In the second option, a wizard will ask you for details about the program execution to try and solve the issues.

Windows compatibility-troubleshooter wizard

Answer the questions as best as you can, and click Next.

In the end, click the Test program button to execute the driver installer with the new settings to see if it works.

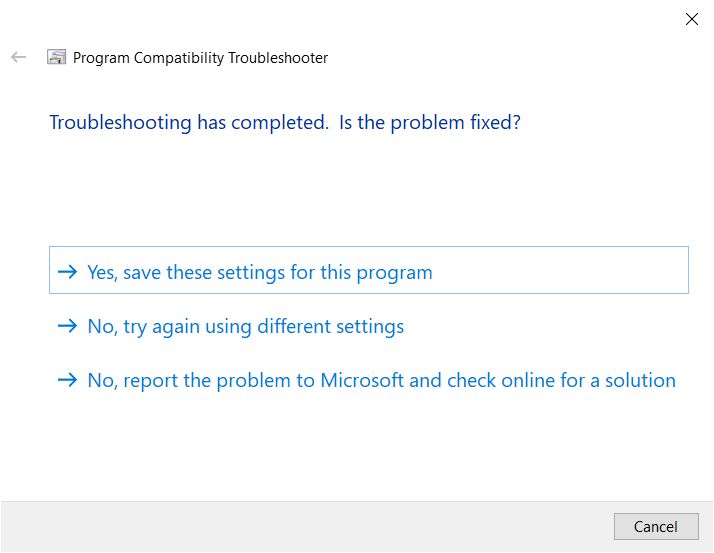
If it does, great! If not, you can choose different settings, or report the problem to Microsoft.

Windows compatibility troubleshooter result

How to Install a Driver Update in Windows

Driver updates normally come as one, often big, single file. If the driver file has the extension “.exe”, that means the driver file is a self-installing driver file or a self-extracting driver file. Simply double-click the driver file to execute the driver installation process. Follow the instructions of the installation program to complete the hardware driver installation. A reboot might be required on the end of the driver installation.

In the case of a self-extracting driver file, executing the “.exe” file will result in the extraction of the compressed driver files. You often need to specify a destination for the driver file extraction. Once the files are extracted, you will see the driver files that are required to install the driver update.

However, if the driver update file has a “.zip” or “.rar” extension, you need to manually uncompress the driver files. Windows supports the “.zip” extension, but if required get a program like 7-Zip to uncompress the driver files.

Within the folder with the driver files, you would typically find a driver installation program. In most cases it will be called “setup.exe” or “install.exe”, but other program files with the “.exe” extension are also possible. Again, simply double-click these installer programs to install the hardware driver update. An installation wizard will guide you through the driver install process.

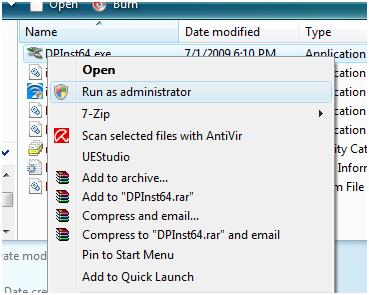
In the example below the “.exe” file is called “DPInst64.exe”.
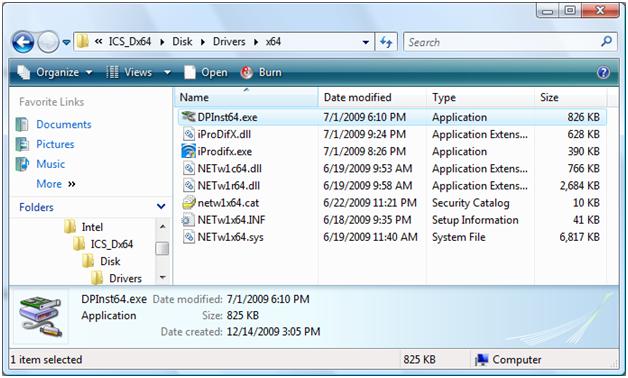
install-drivers

Note: Make sure that you are logged in with Administrative rights when you want to install a driver in Windows Vista or Windows 7. Another option is to right-click the “.exe” file and in the popup menu, select Run as Administrator.
windows7-drivers

If there is no file with the “.exe” extension in the folder with driver files, you will need to manually install the driver update.

Installing Drivers in Vista and Windows 7

Open the Control Panel from the Windows Start menu. In the Control Panel, select Hardware and Sound. Next, select Device Manager. If the UAC message comes up, click the Continue button.

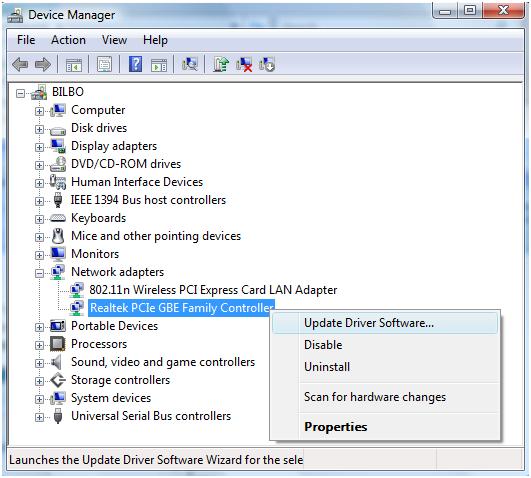
In the Device Manager, select the device for which you want to update the drivers. Right-click the device, and in the popup menu select Update Driver Software.
realtek-drivers

In the next screen, select Browse my computer for driver software. Click the Browse button, and select the location where you extracted the driver files.

After you selected the driver file location, click the Next button to update the drivers.

Installing Drivers in Windows XP

In Windows XP the steps to install a hardware driver update manually are almost the same, but the screens and selections differ a bit.

In the Start menu, select the Control Panel. Next, select Printers and Other Hardware. Next, select System in the left-hand panel (If you use the classic view, you can click System immediately).

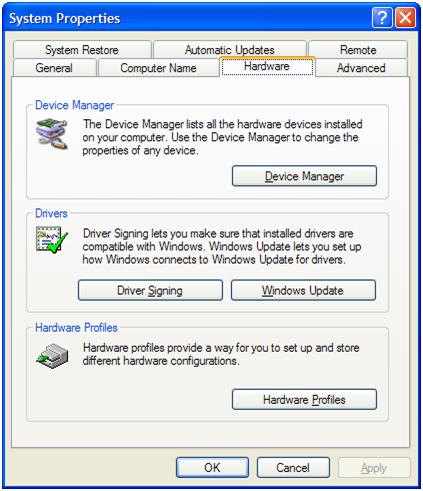
In the System Properties window, select the Hardware tab. Next, click the Device Manager button.
device-manager

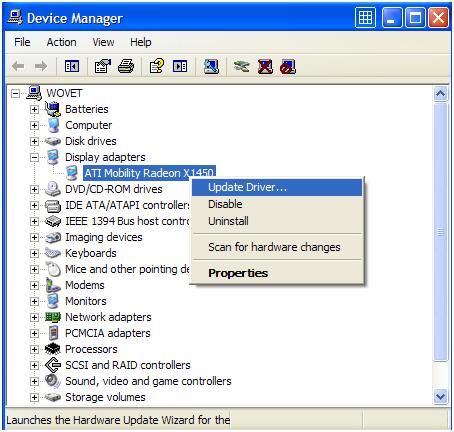
In the Device Manager, select the device for which you want to update the drivers. Right-click the device, and in the popup menu select Update Driver.
update-drivers

In the Hardware Update Wizard, select the option “No, not this time”, and click Next.

In the next screen, select “Install from a list or specific location (Advanced)”, and then click Next again.

Then select “Don’t search, I will choose the driver to install”, and click Next again. Now you need to select the hardware category to which your device belongs, and click Next. If you do not know the category, simply select the default Show All Devices.

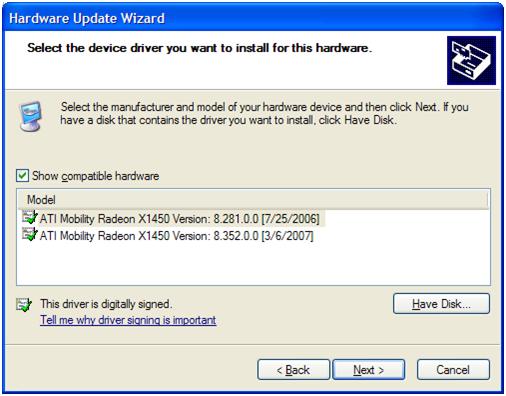
In the next screen, select the Have Disk button.
hardware-update

The Hardware Update Wizard will now show an Install From Disk window, where you need to click the Browse button.

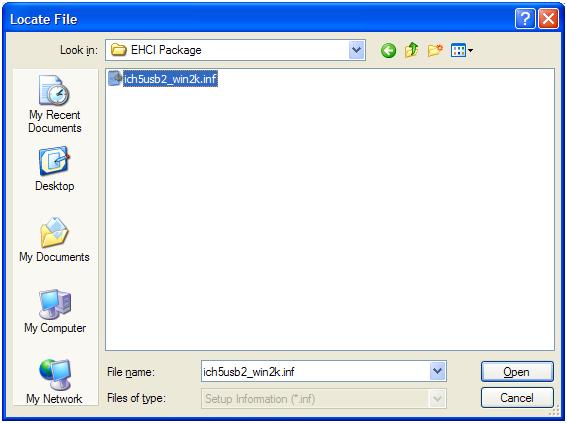
Using the file browser, you will now navigate to the location where you extracted the driver update files. The file browser will look for a file with the “.inf” extension.
inf-file

Once you have selected the file with the “.inf” extension, you click the Open button and the click the OK button. Windows will then show you the list of devices supported by the driver update, from which you need to select your device. Then click Next to proceed with the driver installation. When the driver installation is finished, click the Finish button.

Copyright 2009 and Beyond - DriverFinderPro.com - All Rights Reserved