
HP LaserJet series printers have always been a solid choice when it comes to reliable high-demand printing. The LaserJet P1007 is one such model that is a popular choice with consumers and small offices. It is a small, light-weight, monochrome laser printer. But with newer versions of Windows, it may become harder to get support. If a driver is needed for Windows 10, or even Windows 11, you may need to download and install the HP LaserJet P1007 driver manually.
Manual install of the HP LaserJet P1007 Driver
To manually install the driver, download the installer from the HP support website and execute the installer.
- Open a web browser and navigate to the HP support page for printer software.
- Enter the model number in the search box under Enter your product name.
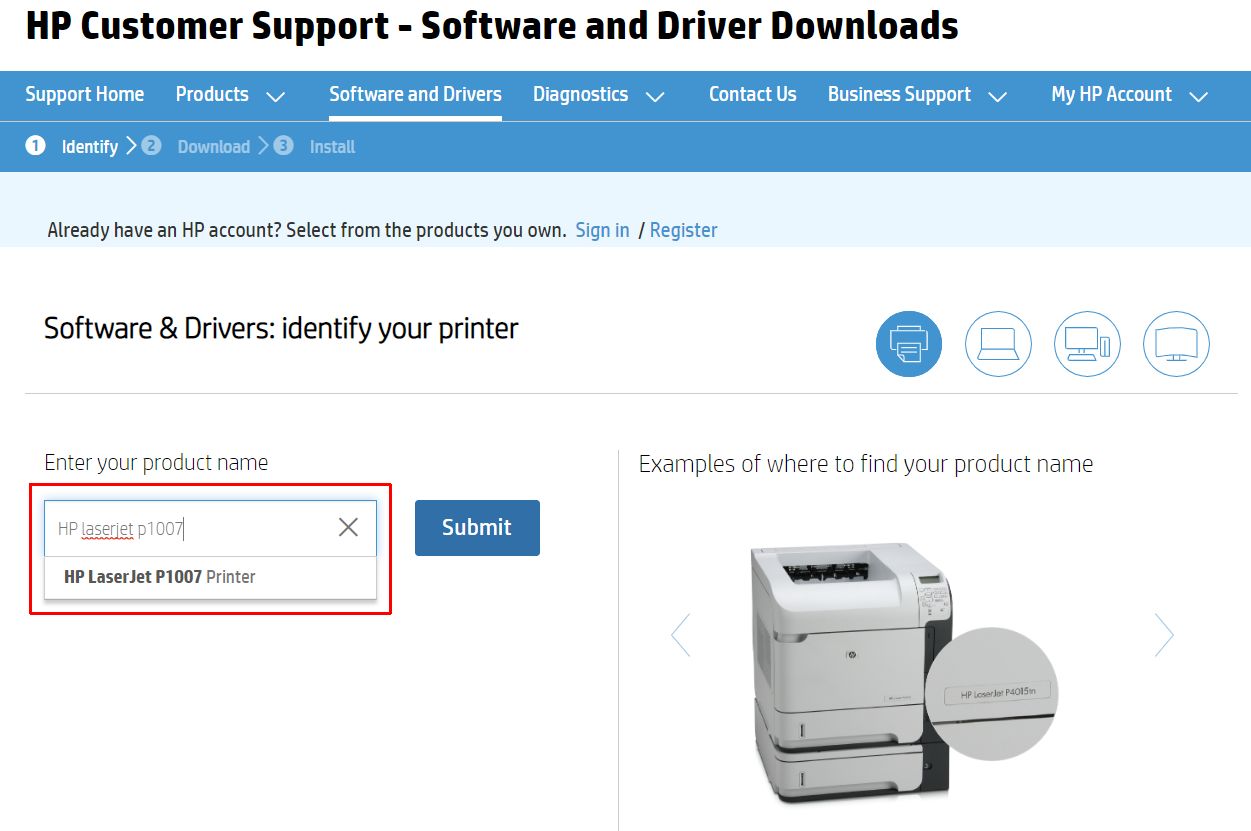
- Click the result link under the search box.
Note: If the result link does not show, click the Submit button and click the HP LaserJet P1007 link in the search results. - On the HP product support page, check that the Detected operating system matches your Windows version (1). If it does not, click the Choose a different OS link next to it to select the correct Windows version.
- Click the Driver-Product Installation Software link and then the Basic Drivers link to show the available driver details and download option.

- Click the Download link to download the printer driver installer (2).
- Open a File Explorer window and navigate to the file location of the downloaded installer.
- Double-click the file to execute the HP LaserJet P1007 driver installer. In this example, the file name is
ljP1000_P1500-HB-pnp-win64-en.exe.
Note: Click Yes in the User Account Control window when it shows to confirm the execution of the installer. - Follow the instructions in the installer program to complete the driver installation.


This completes the manual installation of the driver. You can now use the HP P1007 printer in Windows and applications.
Installation without running the HP Driver Installer
If for some reason you cannot use the downloaded installer to install the printer, there is another option. Use a program like 7-Zip to extract the contents of the downloaded installer file.
- Download and install the 7-Zip program.
- Right-click the downloaded installer file in the Windows File Explorer.
- In the popup menu, select 7-Zip and then click Extract to “ljP1000_P1500-HB-pnp-win64-en.exe \” (the suggested folder name will vary depending on the name of the downloaded file).
Note: In Windows 11, you may need to click Show more options in the popup menu before the 7-Zip option is visible.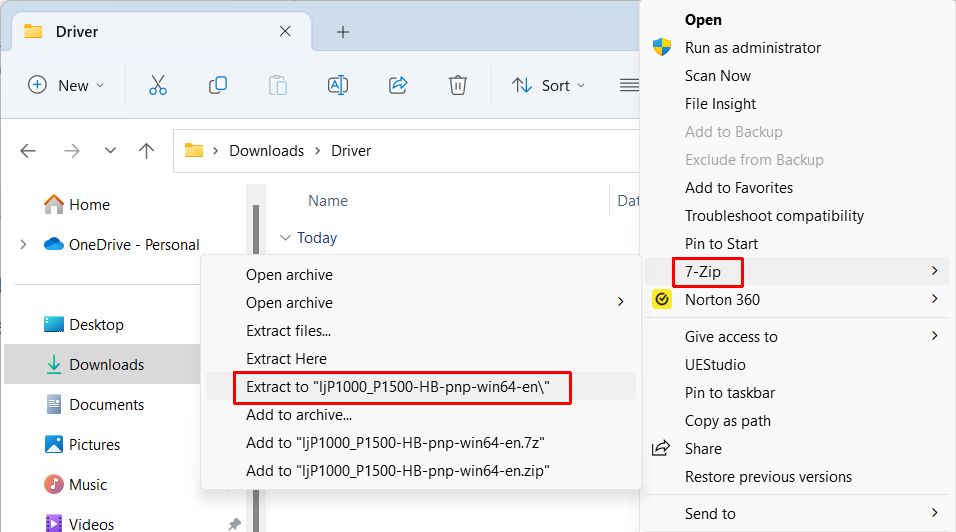

After this, use our instructions to manually install a driver in Windows to install the printer from the Windows Device Manager.
As always, we recommend you use DriverFinder to find and download the latest drivers for your Windows devices. The drivers for the HP LaserJet P1007 are included!
Hopefully with the above instructions, you can get your HP LaserJet P1007 working again. Even though it is from 2012, it can still function as a reliable printer.


