Printer Drivers | DriverFinder - We Make Drivers Work for You

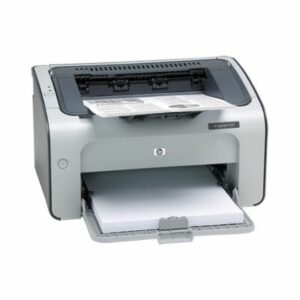
Download HP LaserJet P1007 Driver for Windows

HP LaserJet series printers have always been a solid choice when it comes to reliable high-demand printing. The LaserJet P1007 is one such model that is a popular choice with consumers and small offices. It is a small, light-weight, monochrome laser printer. But with newer versions of Windows, it may become harder to get support. If a driver is needed for Windows 10, or even Windows 11, you may need to download and install the HP LaserJet P1007 driver manually.

Manual install of the HP LaserJet P1007 Driver

To manually install the driver, download the installer from the HP support website and execute the installer.

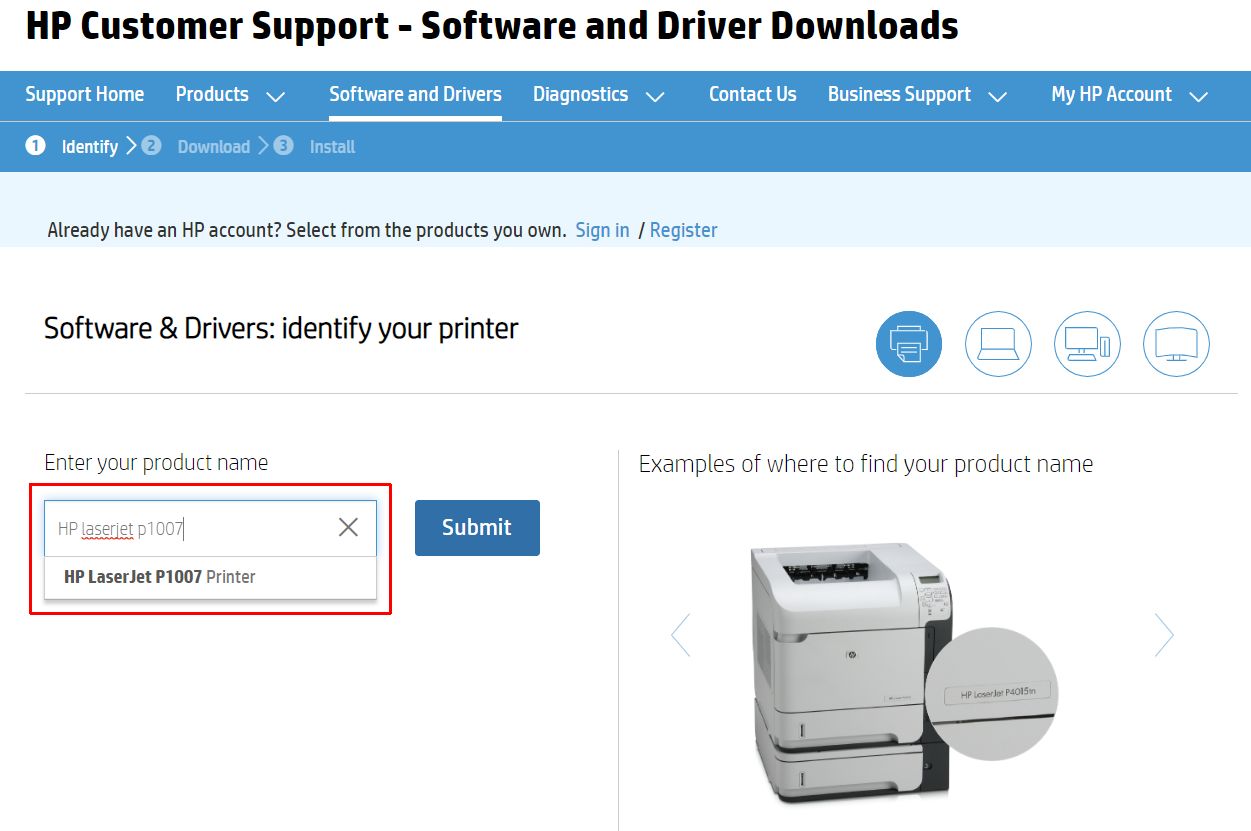
  1. Open a web browser and navigate to the HP support page for printer software.
  2. Enter the model number in the search box under Enter your product name.
    HP printer Support Online
  3. Click the result link under the search box.
    Note: If the result link does not show, click the Submit button and click the HP LaserJet P1007 link in the search results.
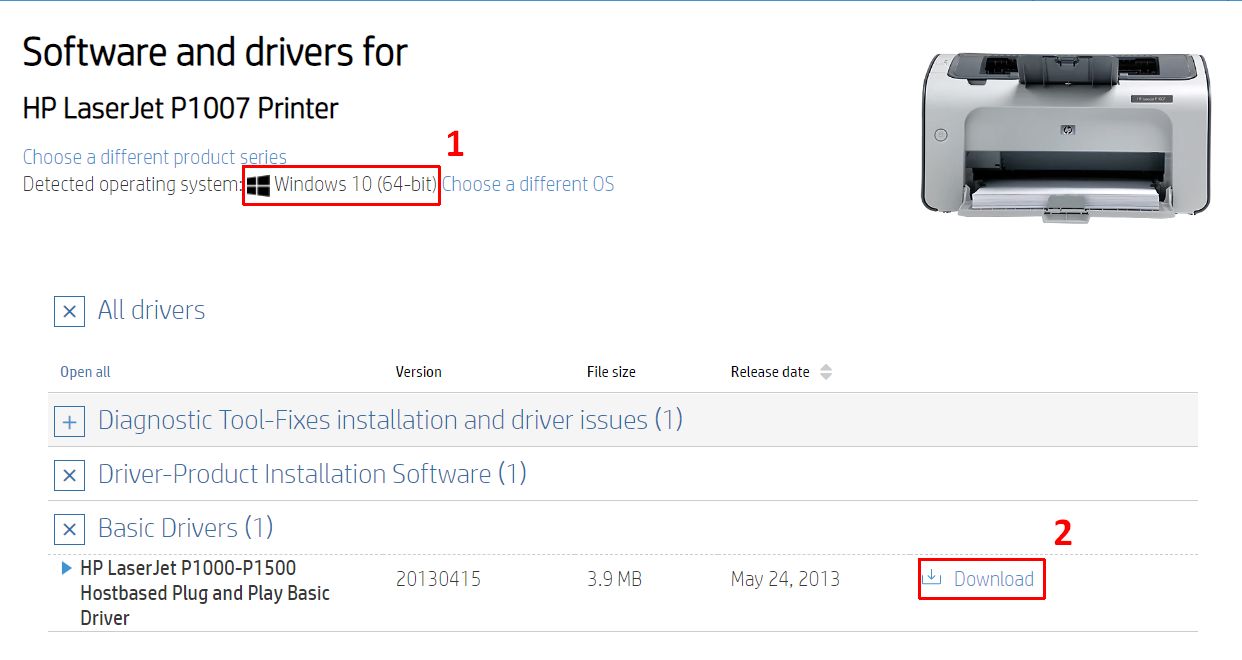
  4. On the HP product support page, check that the Detected operating system matches your Windows version (1). If it does not, click the Choose a different OS link next to it to select the correct Windows version.
  5. Click the Driver-Product Installation Software link and then the Basic Drivers link to show the available driver details and download option.
    Download HP LaserJet P1007 Driver
  6. Click the Download link to download the printer driver installer (2).
  7. Open a File Explorer window and navigate to the file location of the downloaded installer.
  8. Double-click the file to execute the HP LaserJet P1007 driver installer. In this example, the file name is ljP1000_P1500-HB-pnp-win64-en.exe.
    Note: Click Yes in the User Account Control window when it shows to confirm the execution of the installer.
  9. Follow the instructions in the installer program to complete the driver installation.
    HP driver installer

This completes the manual installation of the driver. You can now use the HP P1007 printer in Windows and applications.

Installation without running the HP Driver Installer

If for some reason you cannot use the downloaded installer to install the printer, there is another option. Use a program like 7-Zip to extract the contents of the downloaded installer file.

  1. Download and install the 7-Zip program.
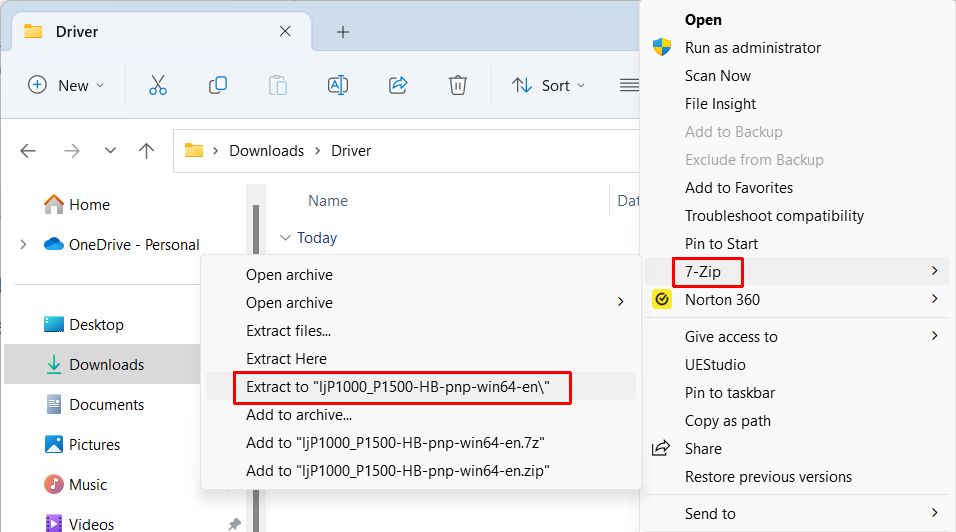
  2. Right-click the downloaded installer file in the Windows File Explorer.
  3. In the popup menu, select 7-Zip and then click Extract to “ljP1000_P1500-HB-pnp-win64-en.exe \” (the suggested folder name will vary depending on the name of the downloaded file).
    Note: In Windows 11, you may need to click Show more options in the popup menu before the 7-Zip option is visible.
    Extract HP LaserJet P1007 driver files

After this, use our instructions to manually install a driver in Windows to install the printer from the Windows Device Manager.

As always, we recommend you use DriverFinder to find and download the latest drivers for your Windows devices. The drivers for the HP LaserJet P1007 are included!

Hopefully with the above instructions, you can get your HP LaserJet P1007 working again. Even though it is from 2012, it can still function as a reliable printer.

Canon Printer Driver for Windows

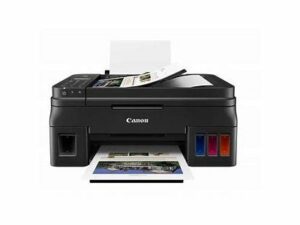
Although Canon is known for cameras, its product range also includes printers. Canon offers printers for both the home user, as well as professional office users. Inkjets, laser printers, photo printers, and multi-function devices for scanning, copying, and printing. A Canon printer driver is required to enable Windows to use your printer if you are using a Canon printer in combination with a Windows PC.

Which Canon printer driver is required is determined by the printer model and connection type. Older Canon printers like the Canon PIXMA MG2522, can use a USB port (or even a parallel port), while modern models often use a wireless connection or ethernet connection.

Download a Driver from Canon

As with many computer devices, the software for these devices can be obtained either directly from Microsoft or the product manufacturer. In the case of Canon, the best place to start for finding a printer driver is the Canon website.

  1. Open a web browser and visit the Canon printer website.
  2. Select the type of user you are in the top menu (1).
  3. Next, click the Support option in the main menu (2).
    Canon support website
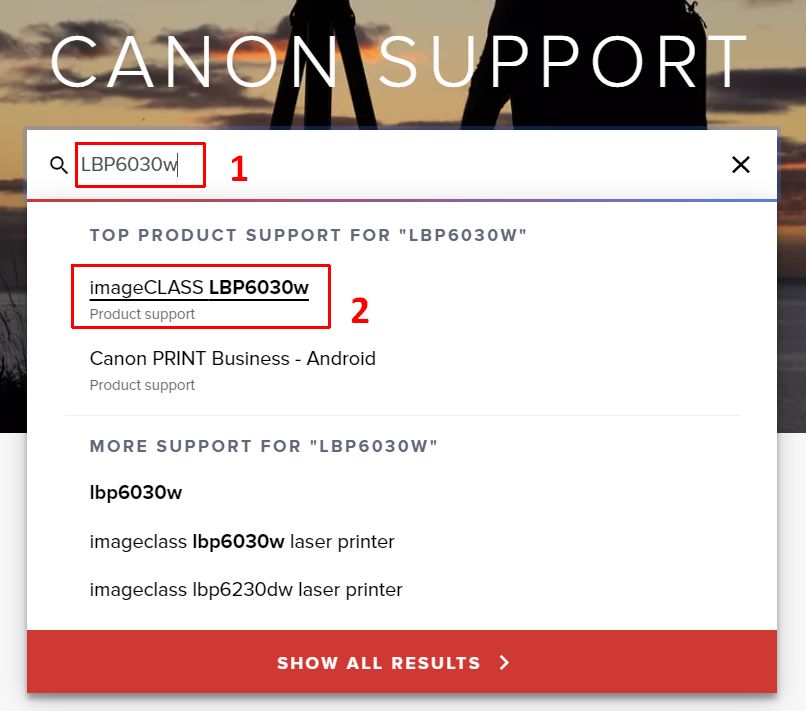
  4. In the Search field, type the model number for your printer.
    Note: With most Canon printers, the model number is clearly visible on the front or top of the device. If not, look at the sticker on the back or bottom of the device.
  5. In the search result click the link for the product support (2).
    Canon printer model selection
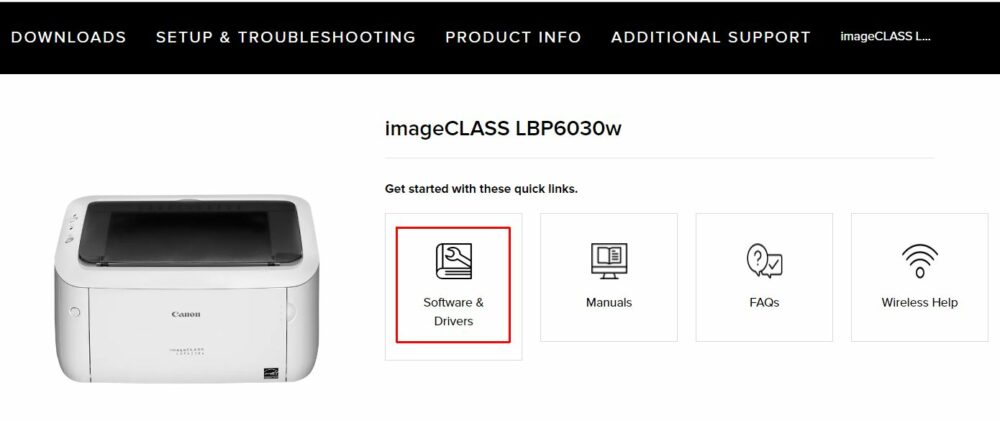
  6. The web page shown next is specific to the selected product. Click the Software & Drivers option next to the printer image.
    Canon printer driver software
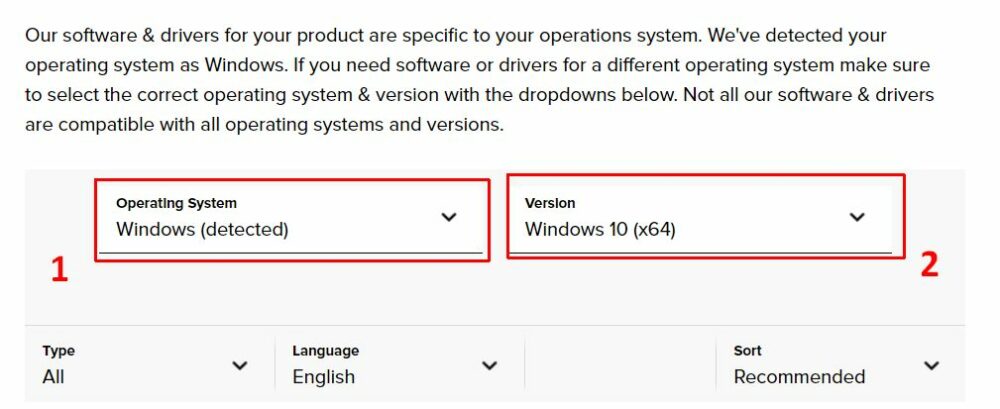
  7. Before you can download the Canon printer driver for your model, you need to select the Operating System (1) and Version of the operating system (2).
    Select Windows version
    Note: If your Windows version is not listed, the printer might not be supported on that version. You can try a driver for an earlier Windows version (make sure the architecture is correct – 32/64 bit), but there is no guarantee that it will work.
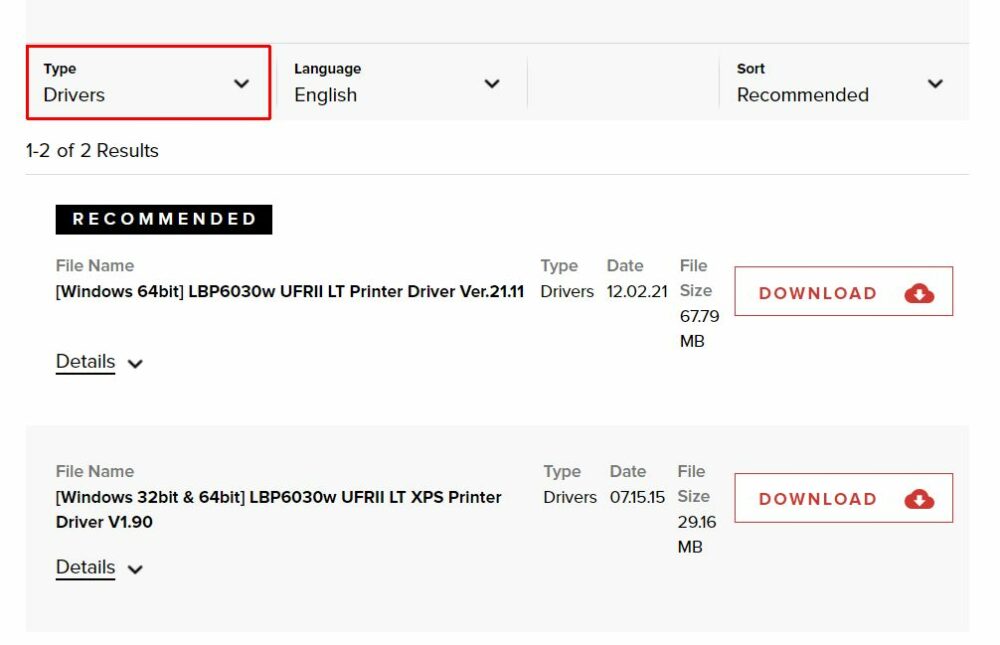
  8. Next, change the Type to Drivers, so the Results will only list the Canon printer drivers rather than all software.
    Canon printer drivers support
  9. Now click the DOWNLOAD button next to the top recommended entry in the result list. The top recommendation will be the latest version of the Canon printer driver for your printer model.
  10. Click the Yes button to confirm the License Agreement for the driver software if requested.
  11. Wait for the driver file to be downloaded. If required, select the destination on disk for the file when prompted (browser dependent).
  12. Click the Close button on the Canon web page to close the download page.
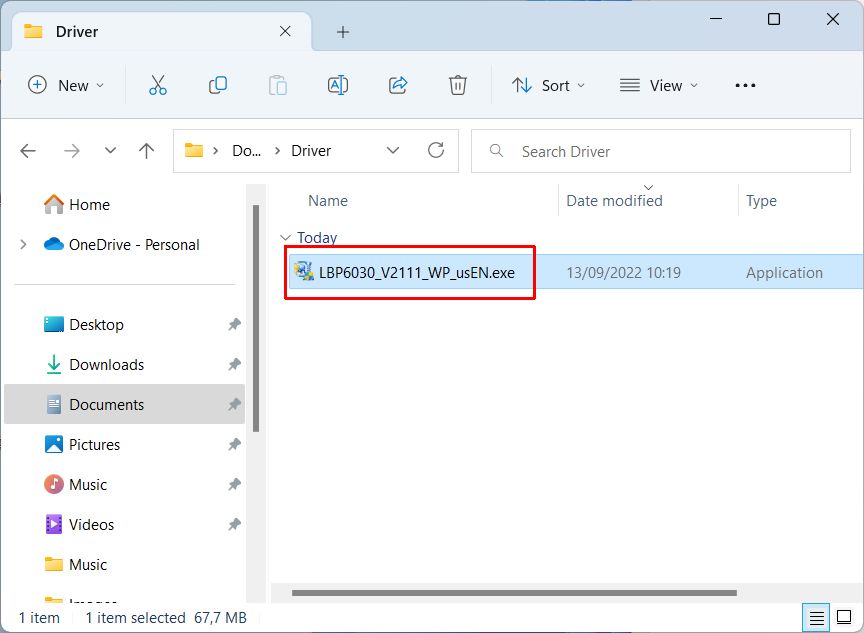
  13. Open a File Explorer window (Windows + E keys), and navigate to the Download location.
  14. To start the installation of the downloaded Canon printer driver, double-click the downloaded file (or select it and press Enter).
    Execute Canon Driver Installer File
  15. Click Yes in the UAC window to confirm the start of the setup program.
  16. If the printer setup starts automatically, follow the on-screen instructions to install the Canon printer driver (and software).
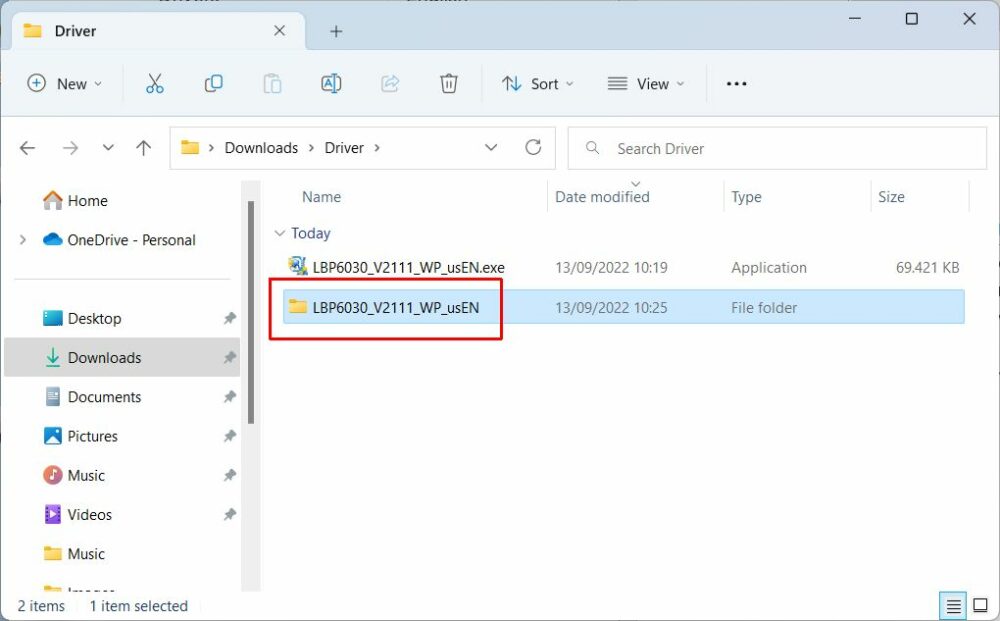
  17. In some cases, especially for older printer models, the downloaded file is a self-extracting executable. When executing the program, the installation files are extracted into a subfolder.
    Canon extracted driver files
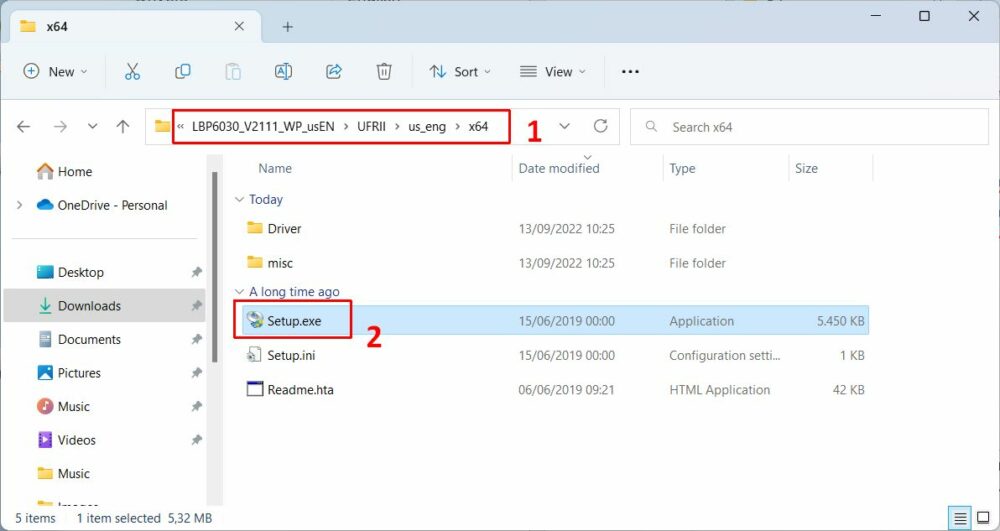
  18. In this case, open the subfolder and navigate into the further subfolders (1) until you see the Setup.exe for the driver. Double-click Setup.exe to install the driver (2).
    Execute Canon driver installer
  19. Next, follow the on-screen instructions to install the driver.
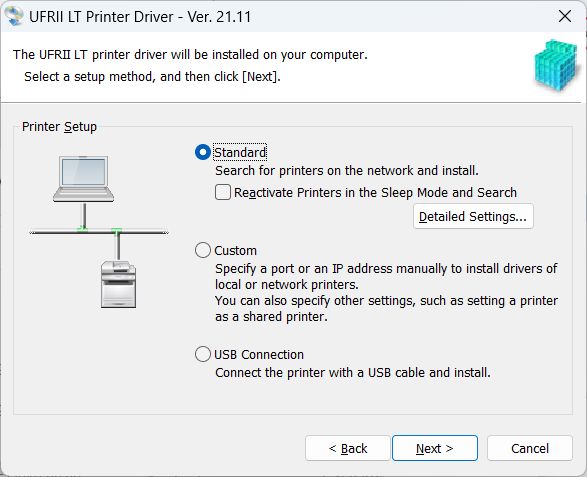
    Canon Printer driver setup

After these steps, your Canon printer driver is installed, and Windows should be able to communicate with the device.

In Windows 11, use Settings -> Bluetooth & devices -> Printers & scanners to see the installed printers on the PC. Click the printer to print a test page, change the preferences or run the troubleshooter.

Find a Canon Printer driver elsewhere

If you cannot find a driver for your Canon printer on the Canon support site, first make sure you have the right country selection. Not all Canon printers are sold and supported in all regions, so it is important to select the right region.

But for older Canon printers, support is no longer available directly from Canon. Canon offers support up to 10 years after the first release of its products. In that case, you will need to find a driver elsewhere. The best location is an original installation CD since you are certain it is a trusted source. The problem with that (apart from that they often get lost over time), is that it might not be the latest version. Compatibility with newer versions of Windows can be a problem.

Searching online for a driver can give you the right driver if you know how to look for it. But a better solution in most cases is to use a Driver Finder program to locate the driver for you. This program will scan your PC for all devices present and suggest the latest, correct drivers for your version of Windows.

Install Epson L3110 Driver in Windows

The Epson L3110 EcoTank printer is an all-in-one multifunction InkTank printer. It has been available since 2018 and is a popular choice for color printing because you can fill the color tanks separately. Like all printers that are used in Windows, the Epson L3110 printer needs a device driver to function properly. If Windows does not automatically install a driver for the printer, you can install it manually.

Here are the steps to install the Epson L3110 driver in Windows.

  1. Visit the Epson website in your Internet browser.
  2. Select your region to visit the local Epson website.
  3. In the page menu, click SUPPORT and then click Printers.
    Epson Printer Support
  4. In the printer support page, type “L3110” in the Search By Product Name
  5. Click the Search
  6. In the results, click the Epson L3110
    Search Epson L3110
    Note: If the search results do not include the L3110 printer, the printer support is not available in your region. Go back to the Epson home page and pick a different region. You can either choose a region with the same language as your country or pick a region with English support.
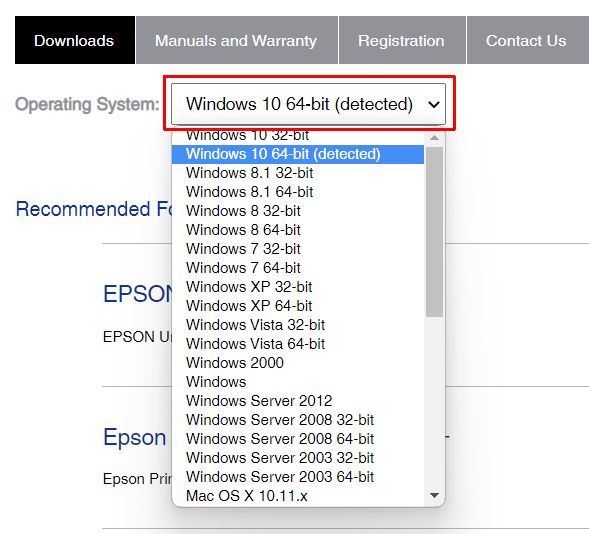
  7. With the Downloads option selected, change the Operating System to match your Windows version.
    Epson L3110 Windows support
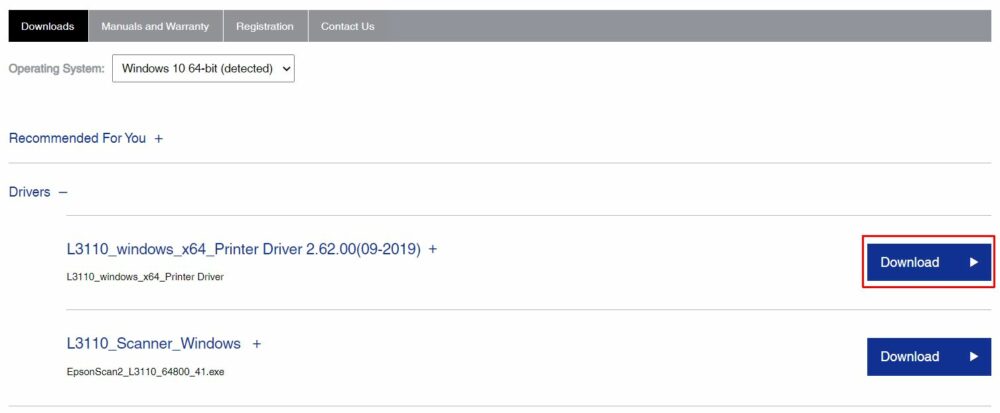
  8. Expand the Drivers section to see the available driver packages for the Epson L3110 printer.
  9. Click the Download button to the right of Epson L3110 printer driver.
    Download Epson L3110 Printer Driver
  10. Click the Accept button to confirm the Epson download terms and start the driver download.
    Accept Epson download terms
  11. Depending on your browser, you might need to select the location for the downloaded file to be stored on your computer.
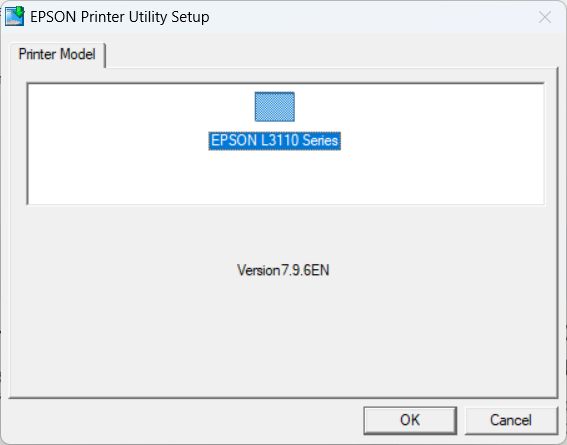
  12. Once the download is complete, open the downloaded driver file to install the driver. Follow the instructions in the installer screens to complete the E3110 driver installation.
    Epson printer setup utility

After this Windows should recognize your Epson L3110 printer and you can use it for printing. If you also need to use the scanner function of the L3110, you can repeat the process above to download and install the scanner driver for the L3110.

Tip: Download and install the Epson ScanSmart utility to get support for all features the Epson L3110 offers. Standard Windows functionality might not support all device features.

Also see: How To Add a Printer in Windows 10


Copyright 2009 and Beyond - DriverFinderPro.com - All Rights Reserved