The latest Windows versions have the ability to analyze and fix common problems. Microsoft has named this feature the Windows Troubleshooter. In earlier versions of Windows, Microsoft Fix It was available, which is a similar feature. But the Troubleshooter functions in Windows 10 and Windows 11 are more elaborate than this earlier solution.
In many cases, Windows will suggest running a Troubleshooter if a problem is encountered. The Troubleshooter can then be invoked automatically, or by clicking a link or button to confirm executing the problem analysis. The Troubleshooters in Windows can be executed for different categories, either device (hardware) or software related.
But it is good to know that you can also manually execute a Troubleshooter in case it is needed. Be prepared that not all problems can be fixed using a Windows Troubleshooter. Only common problems, known errors, and configuration problems can sometimes be solved. Typical steps executed by the troubleshooters are resetting configuration data and restarting services.
Windows 10
- Open the Settings window from the Start menu.
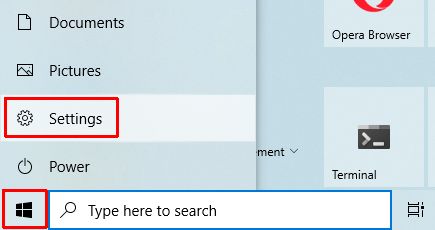
- In the Settings window, click the option Update & Security.
- In the left-hand panel, click Troubleshoot (1).
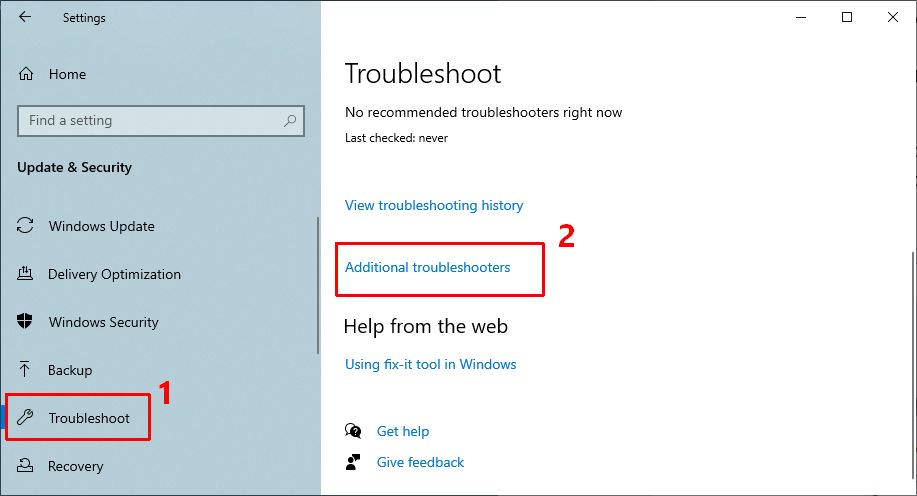
- In the right-hand panel, scroll down until you see the option Additional troubleshooters (2) and click the link.
- In the list of Additional troubleshooters, find the type of problem you are trying to fix and click it.
- Next, click the Run the troubleshooter button that appears.
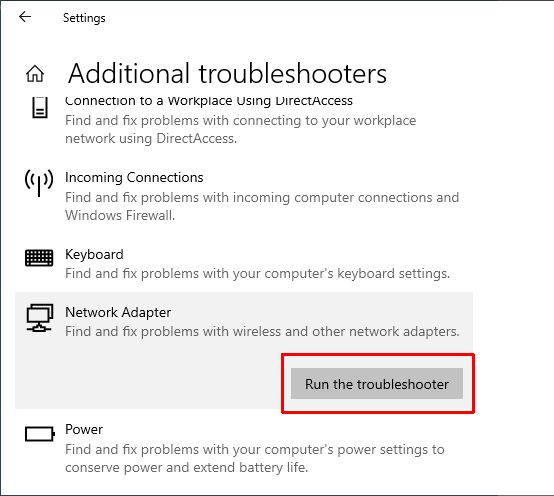
- A new window will appear that will show Windows is detecting problems. Follow any instructions that appear and click Next each time.
Note: The instructions and steps will vary for each type of problem and troubleshooter. - When done, click the Close button.
- Close the Settings window.
Windows 11
- Open the Settings window by pressing the Windows + I keys or from the Start menu.
- In the left-hand panel, select System.
- In the right-hand panel, scroll down until you see Troubleshoot and click it.
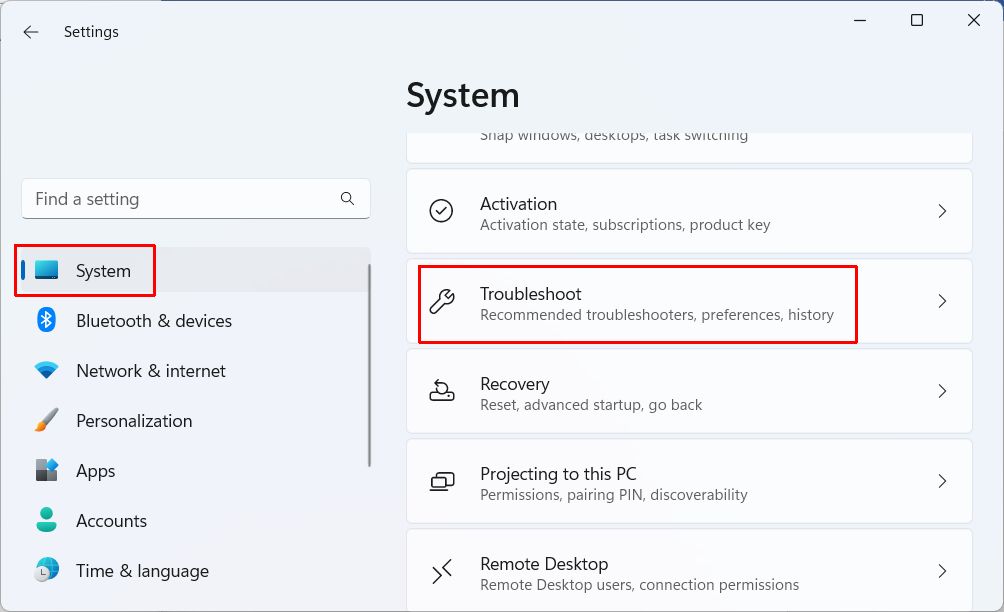
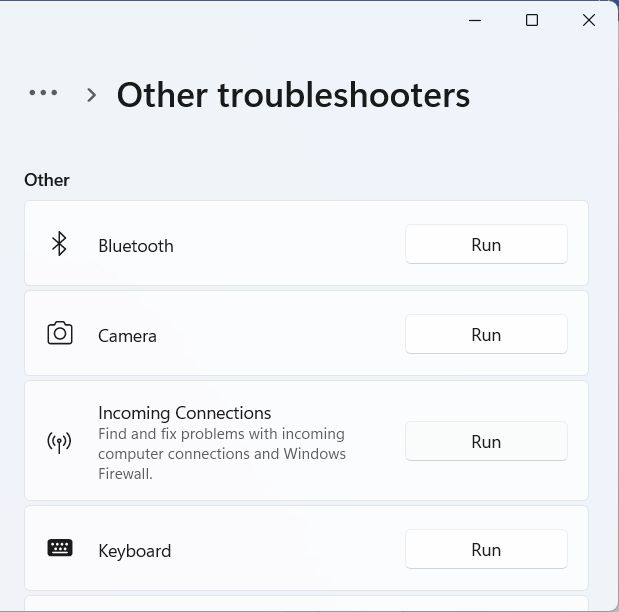
- Next click Other troubleshooters in the right-hand panel.
- Scroll down to the Other section and then locate the Troubleshooter you want to execute.
- Click the Run button in the selected Troubleshooter.
- A new window will show with Windows showing “Detecting problems”.
Follow the instructions in the window to complete the Troubleshooter. Click the Next button after each required step and click the Close button when done.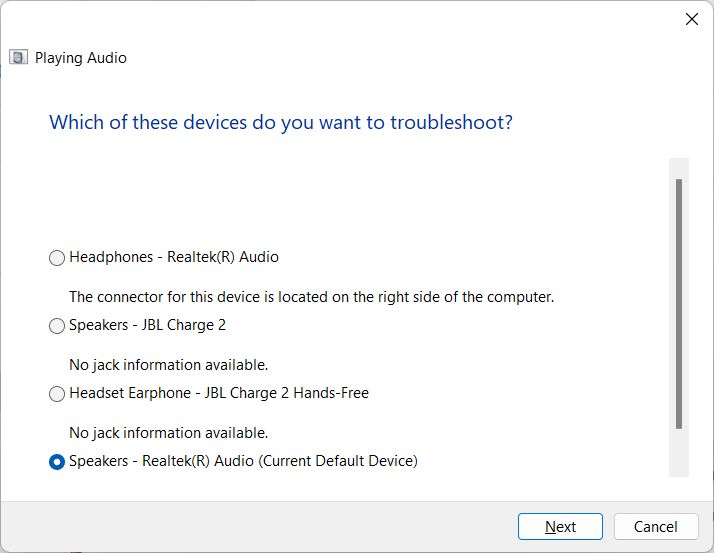
Exmple of running the trooubleshooter for Playing Audio. - Close the Settings window.
In addition to the incorporated troubleshooters in Windows, a separate troubleshooter can be downloaded for problems related to program installation (and removal). This download is compatible with Windows 7, Windows 8, Windows 8.1, and Windows 10. So, if your problem relates to the installation or removal of a program, try downloading and running this tool.
Tip to Fix Audio Issues
There are some problems the audio troubleshooter may not fix. A common audio problem is dealing with crackling sound, audio stutter, or popping sounds. Often unexplainable, and it can sound like there is a bad connection.
A solution that help solve such issues in Windows is the disabling of the hibernation feature. Of course this is not recommended by Microsoft as it can lead to data loss when a power problem occurs. But if you are not concerned with that and just want the best quality audio, give it a try.
- Windows 10 End of Life: How to Keep Your PC Safe (and Your Hardware Happy) - January 5, 2026
- DYMO LabelWriter 450 Driver Software - April 14, 2025
- DriverFinder Version 5.0.0 - March 4, 2024

