The Intel Bluetooth interface is part of the Intel wireless adapters in PCs with an Intel wireless chipset. The appropriate driver needs to be installed to ensure the Intel Bluetooth device functions on Windows 11. Windows 11 will normally install supported drivers automatically, but if you need to update an Intel Bluetooth driver on Windows 11, follow these instructions.
Manually Update the Bluetooth Driver
To update the Intel Bluetooth driver, we first need to download the latest version from the Intel website. In some cases, your PC manufacturer will also have a driver available for the Bluetooth interface in your PC. Make sure to check the available versions on both websites to see which version is required.
- Open a web browser and navigate to the Intel download center.
- On Intel the web page, use the Search option to locate the latest Bluetooth driver. Type “
bluetooth” and press Enter.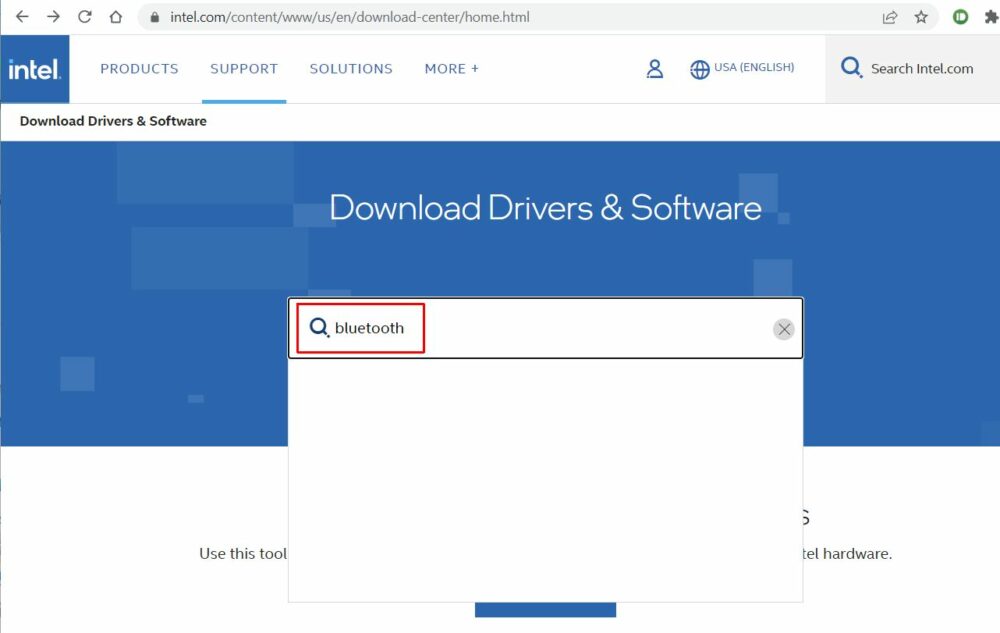
- In the list with search results, locate the Intel® Wireless Bluetooth for Windows 10 and Windows 11 entry and click it.
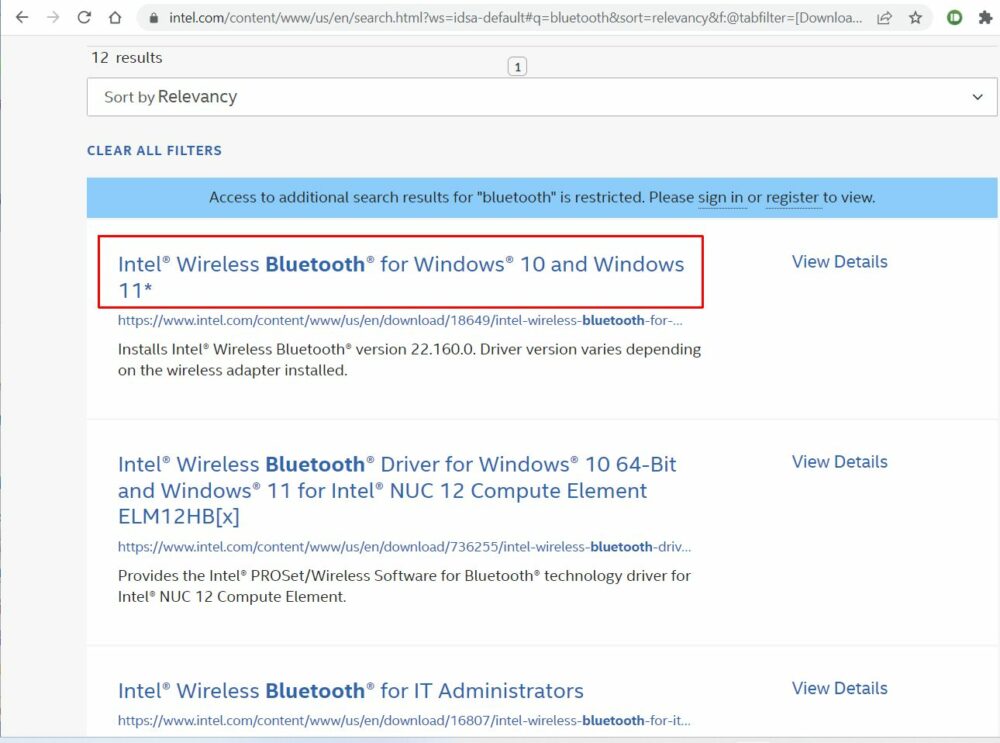
- On the web page for the intel® Wireless Bluetooth® for Windows 10 and Windows 11, click the Download button for the installer.
Note: The downloaded version will be the latest available. If you need an older version, use the Version drop-down field to select a previous version.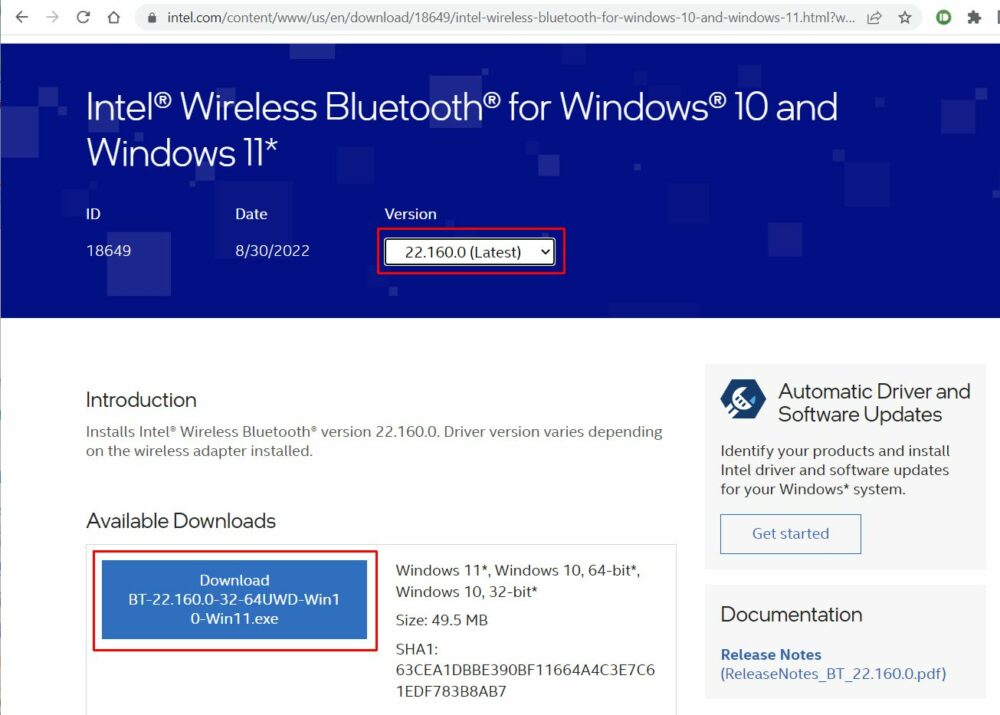
- Click the I accept the terms in the license agreement button in the windows that show next.
- The Intel Bluetooth installer file will start downloading.
Note: Depending on the browser being used, you may need to select a destination on disk for the downloaded file. - Once the download completes, open a File Explorer and browse to the downloaded file.
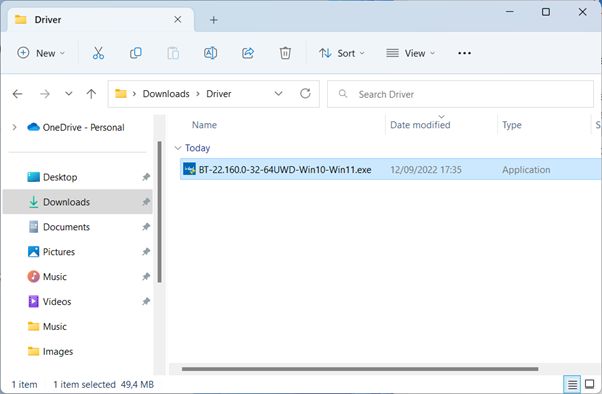
- Double-click the downloaded file to execute the driver installation and follow the on-screen instructions. If the UAC screen shows, click the Yes option to continue.
- If a driver is already installed for the Intel Bluetooth device, a popup will show to confirm the upgrade from the existing version to the new version of the driver. Click Yes to confirm.
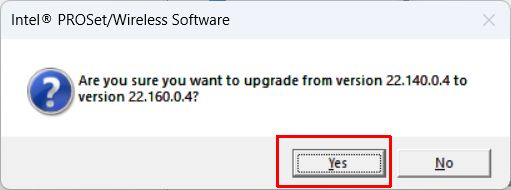
- After this, follow the on-screen instructions in the Intel® Wireless Bluetooth® Setup window.
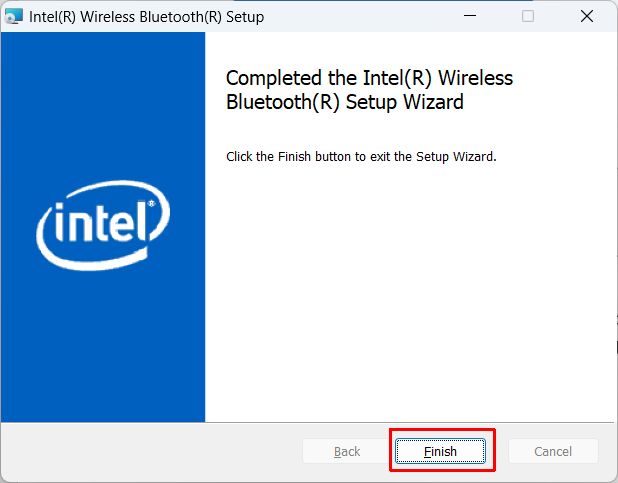
- Once the installation of the Intel Bluetooth driver completes, click the Finish button to close the setup window.
Note: Always make sure to check which wireless adapters are supported by the driver version. If your device is not listed, chances are that the driver will not work. For version 22.160.0.4, as shown in the instructions, the devices supported are:
Intel® Wi-Fi 6E AX4111, AX2111, AX2101Intel® Intel® Wi-Fi 6 (Gig+) Desktop Kit1Intel® Wi-Fi 6 AX2001, AX2011Intel® Wireless-AC 95601,-AC 94621, 94611, 92601Intel® Dual Band Wireless-AC 82651,-AC 82601, 3168Intel® Wireless 7265 FamilyIntel® Dual Band Wireless-AC 3165
Automatically Update an Intel Bluetooth Driver
To automatically update the Intel Bluetooth driver on Windows 11, run Windows Update. First, make sure automatic driver updates are not disabled.
- Open the Windows 11 Settings by pressing the Windows + I keys (or use the Start menu).
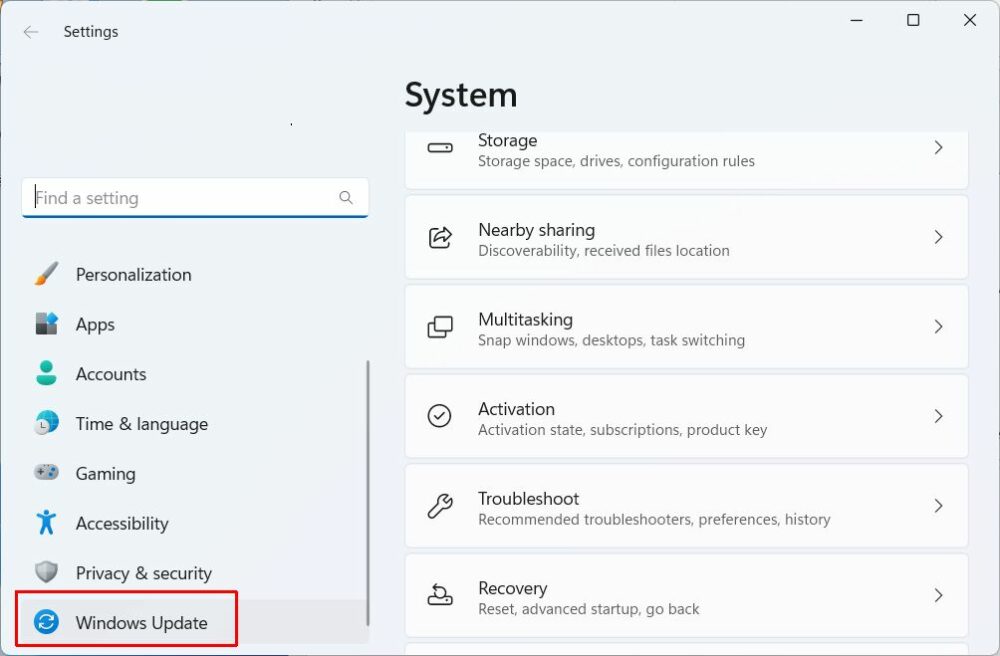
- Click Windows Update in the left-hand panel in the Settings window.
- Next, click the Check for updates button in the right-hand panel.
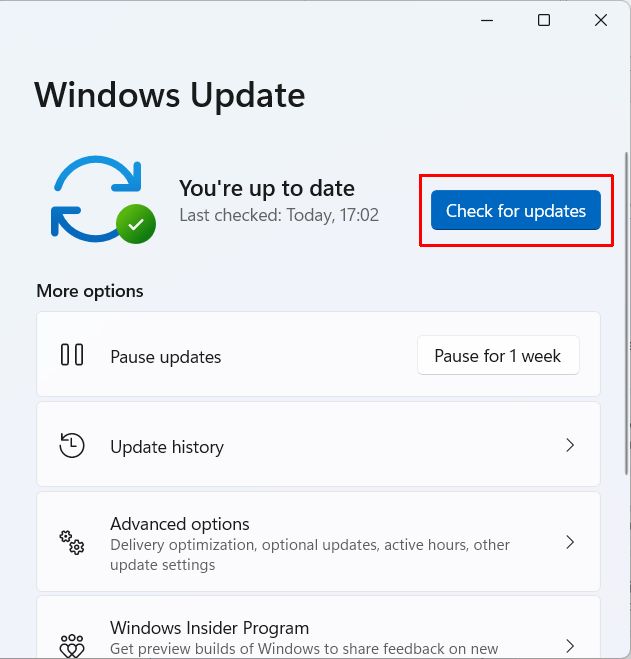
- Wait for updates to be downloaded and installed.
A second option to automatically update the Intel Bluetooth drivers is to use a program like DriverFinder that will automatically find the latest version of the Bluetooth driver for your PC.
Update the Intel Bluetooth driver using the Device Manager
The last option to update the Intel Bluetooth driver is to use the Device Manager. The Device Manager has been part of Windows since the initial Windows versions. It allows you to see all devices that are present in the system. For each device, the drivers can be checked and updated.
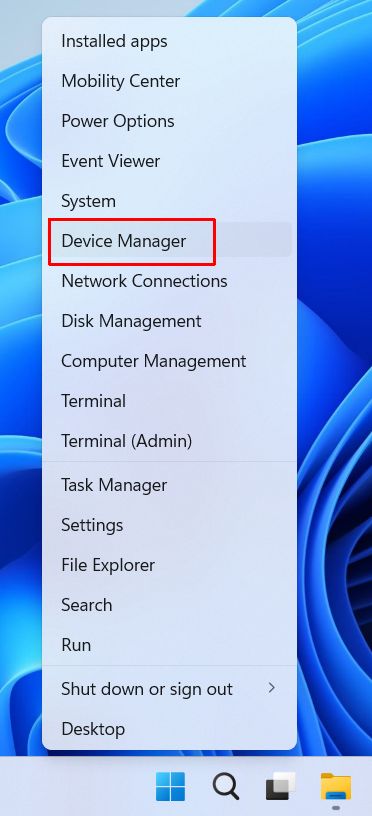
- Open the Device Manager by right-clicking the Start menu button and selecting Device Manager in the menu.
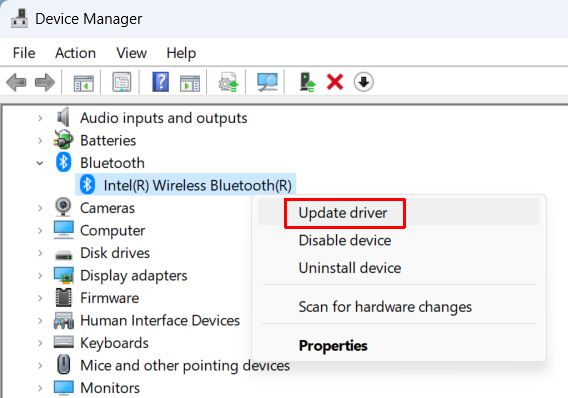
- In the Device Manager, expand the Bluetooth category.
- Right-click the Intel® Wireless Bluetooth® device, and in the context menu select Update driver.
- Click the option Search automatically for drivers and wait for the driver to be updated.
- Click Close when done, and then close the Device Manager window.
Tip: Use the Uninstall device option to remove the device from the Windows configuration. Combined with the option to remove the driver software for the device, this can help solve problems by doing a fresh install of the driver.
With the above instructions, you can download and install the Intel Bluetooth driver for Windows. This should solve any issues you have with Intel Bluetooth not working in Windows.
How to Uninstall Intel Wireless Bluetooth Software
As mentioned in the previous section, sometimes it is necessary to remove the Intel Bluetooth driver before installing a new version. If you find that the Intel Bluetooth driver update cannot be installed, try removing the software first using these steps.
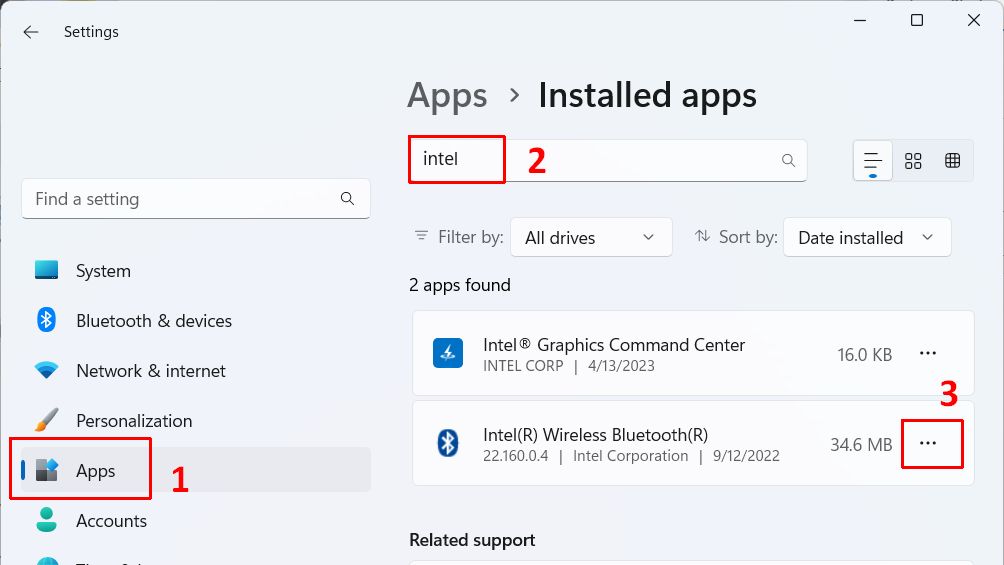
- Open the Settings window from the Start menu.
- Select Apps in the left-hand pane (1).
- Select Installed Apps in the right-hand pane.
- Type intel in the Search apps box (2).
- In the apps found, click the three dots icon next to Intel(R) Wireless Bluetooth(R) (3).
- Select Uninstall in the context menu.
- Click Uninstall again in the confirmation popup.
Wait for the software to be uninstalled. After that rebooting the device is recommended to make sure all components are removed. If any part of the software is in use, a reboot will make sure it gets removed when Windows restarts.
- PCI Encryption/Decryption Controller Drivers for Windows 10 - February 16, 2025
- WD Passport Drives and How to Use Them with Windows 10: A Complete Guide - November 14, 2024
- How to Fix Unknown USB Device – Device Descriptor Request Failed - May 8, 2024

