Most Lenovo notebooks and laptops come with integrated webcams. As such, it’s important to install the correct Lenovo webcam driver for Windows.
Different Lenovo devices use different webcams. This means they require require different drivers too. Depending on the Windows version installed on your device, drivers may be included with Windows itself – or require a separate download and install.
Lenovo uses multiple hardware vendors for integrated webcams. So depending on your device model, you might need a Realtek, SunPlus, LiteOn, Chicony, Vimicro, or Ricoh camera driver. Lenovo itself will refer to the camera as an Integrated Camera driver, Easy Camera driver, or even just USB Camera driver.
Manual: Download Lenovo Webcam Drivers from Lenovo PC Support
To download drivers for your Lenovo ThinkPad, IdeaPad, Yoga, or other portable device from the Lenovo Support site, follow these steps.
- Open a web browser.
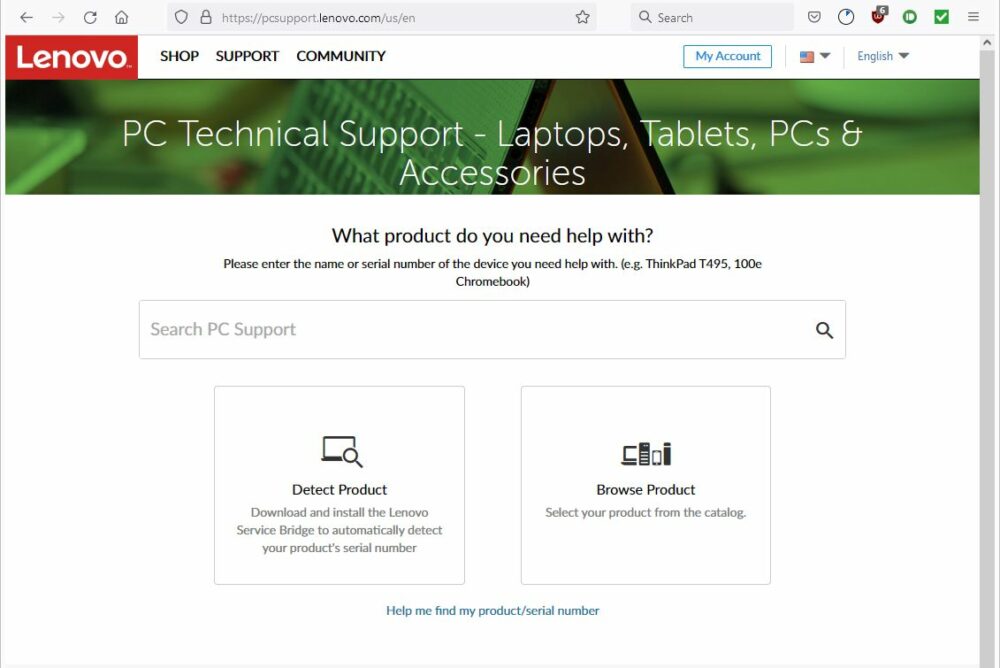
- In the URL, type “pcsupport.lenovo.com” and press Enter.
- Wait for the support site to load. The URL should redirect to your localized version of the Lenovo support website. If not, you can change the country and language in the top-right corner of the website.

- Next, enter the device model in the search box, or click the Detect Product or Browse Product to locate the support page for your Lenovo device model.
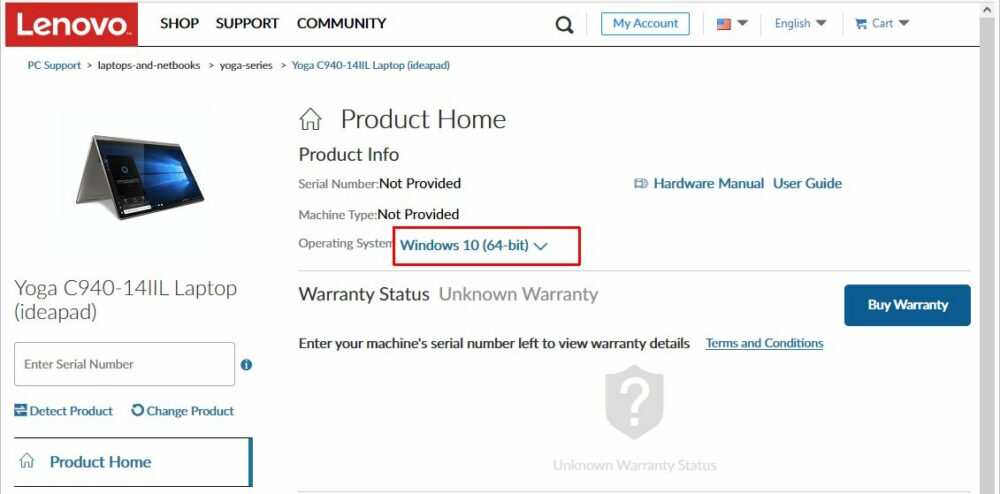
- On the device support page, select the Windows version.

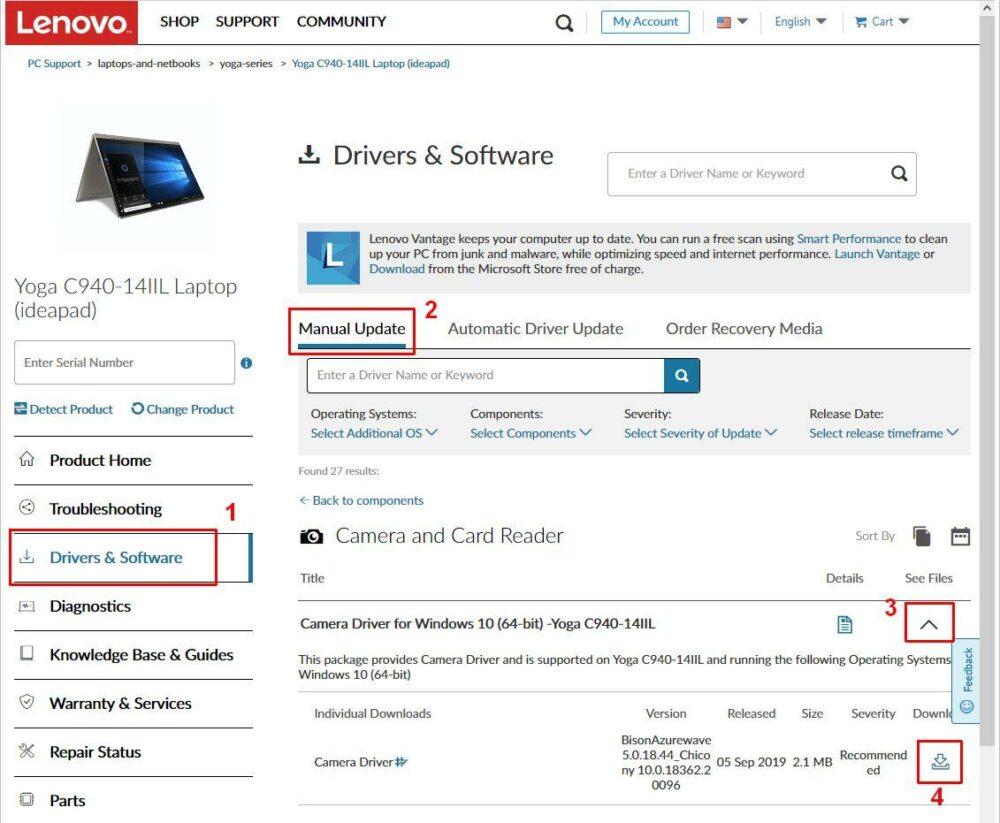
- On the updated page, click the Drivers and Software link (1) on the left-hand side, then select Manual Update (2) and pick the driver category.
- Click the ᐯ symbol (3) to show the files, and then click the download button (4).

- Once the download is complete, execute the downloaded file to install the Lenovo webcam driver.
Automated: Find and Download Lenovo Webcam Drivers Using DriverFinder
If you cannot find the webcam driver for your Lenovo device, you can use DriverFinder to find the driver for you. DriverFinder automatically scans your computer devices (working or not working) and finds the right driver for your device and Windows version.
Using a third-party application can be very useful, especially when Lenovo doesn’t support your device anymore nor the Windows version you have installed your device.
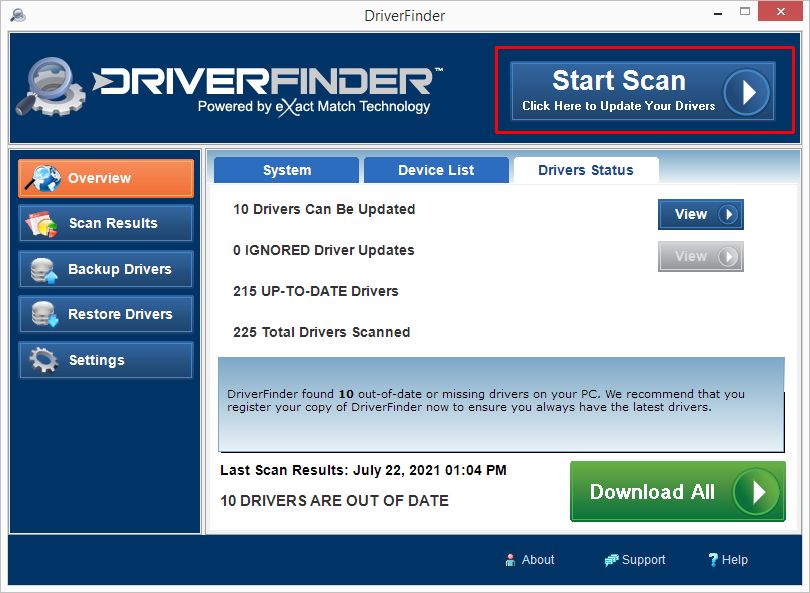
Simply download the DriverFinder program installer and execute the downloaded file to install the program. Activate the program after installation, and then run a scan (click the Start Scan button).

DriverFinder will show a list of devices found in (or connected to) your computer and a list of suitable drivers for download.
Click the Download button for the Lenovo Webcam and install the driver.
Troubleshooting: Lenovo Webcam Problems
If your webcam still not working after you’ve downloaded and installed the appropriate driver?
Here are some quick troubleshooting tips to get your Lenovo webcam to work.
- Make sure nothing is blocking the device. Some devices have a protection/privacy slider. (It’s also possible that someone put a protection sticker on it for privacy reasons.) Remove it.
- Use the Fn key on your keyboard to turn on the webcam device. This is not applicable to all devices. Just check your keyboard for a camera symbol (in most cases it is F8).
- Both Windows 8.1 and Windows 10 have Privacy Settings that can prevent access to the webcam. Settings -> Privacy -> Camera: Let Apps use my camera should be On.
- After installing the driver, the device should automatically start using the driver. If not, it can help to run a Scan for hardware changes in the Device Manager (in the Action menu). This option is not available in all Windows versions.
- In Device Manager, right-click the camera device and in the popup menu, select Uninstall. Reboot the device and the camera should get reinstalled. This resets the driver configuration, and can help fix the issue.
- PCI Encryption/Decryption Controller Drivers for Windows 10 - February 16, 2025
- WD Passport Drives and How to Use Them with Windows 10: A Complete Guide - November 14, 2024
- How to Fix Unknown USB Device – Device Descriptor Request Failed - May 8, 2024

