

Zoom primarily gained traction as a video conferencing software program that enables anyone (with an Internet connection) to e-interact with workmates when face-to-face meetings aren’t possible. However, Zoom has also proven itself great for organizing social events and even for day-to-day personal use.
As a cloud-based audio and video conferencing service, it was not surprising that many people found a need to update their audio drivers and video drivers too.
Remember, many did not have suitable – let alone ‘high-tech’ or updated – office set-ups at home. So when people started downloading Zoom and setting it up on their home laptops and computers, audio and video issues came to the fore.
Many used our software – DriverFinder (I know, shameless plug!) – to update their audio and video drivers. But A LOT of non-driver related inquiries landed on our Customer Support team as well :)
So we’ve decided to sort of group these common ‘Beginner Level’ questions people have about Zoom and put them together here!
Resources:
You can download Zoom here.
You can download DriverFinder here.
Quick read: How to Effectively Work from Home During COVID
Top 25 Zoom Questions Asked… and Answered
Download and Install Zoom For Windows
- Go to Zoom’s download page – https://zoom.us/download
- Under Zoom Client for Meetings, click Download.
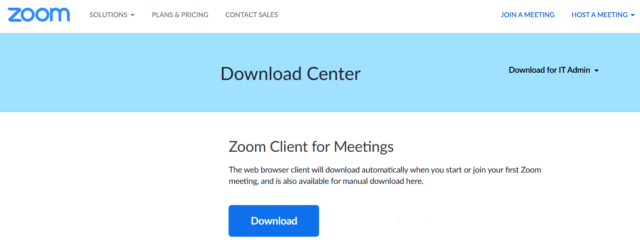
- Navigate to where you want to save the Zoom installer on your PC, and then click Save.
- Go to where you saved the installer (exe), and then double-click it.
- Click Run and wait for the installation to finish.

Sign Up For a Free Zoom Account
- Go to Zoom’s official website – https://zoom.us/ – and then click SIGN UP, IT’S FREE
- Provide your birth date details, and then click Continue.
- Type your work email address in the space provided, and then click Sign Up.
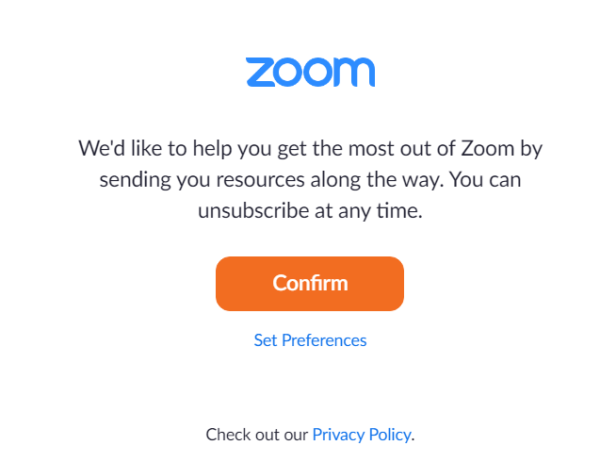
- A prompt will show asking for your permission for Zoom to send you tips on how to use the software, click Confirm.
- Check your messages for the Zoom verification email. Click the confirmation link inside that email to activate your Zoom.
- Clicking the email confirmation link will send you to a Zoom web page asking you to complete your registration by providing your name and a password to use Zoom.
- Click Continue.
- You can invite colleagues at this stage and click Invite, or you can click Skip this step.
- Click Start Meeting Now.
- Click Open Zoom Meetings to start this test meeting.
- Click End when done testing.

Schedule a Zoom Meeting Over the Web
- Log into your Zoom account online.
- Click Schedule a Meeting.
- Type a Topic for your meeting.
- Type a Description for your meeting (optional).
- Select a date and time for your meeting.
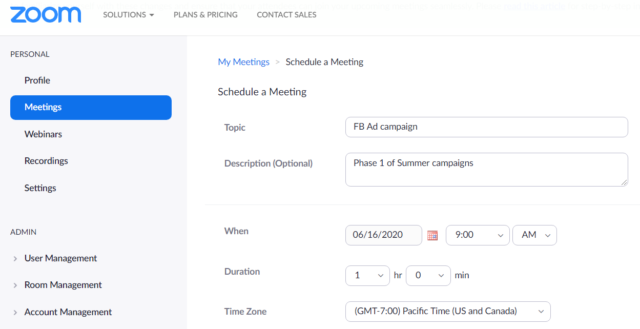
- Click Save.

Schedule a Zoom Meeting via the Desktop App
- Sign into your Zoom desktop app.
- Click Meetings at the top.
- On the left pane, click the plus sign, and then click Schedule Meeting.
- Enter the details of your meeting and then click Schedule.
Invite Participants to a Meeting via the Web Portal
- Sign into your Zoom account online.
- Under Personal, click Meetings.
- Click the meeting for which you want to invite participants.
- Scroll down to Invite Link, and then click Copy Invitation.
- Click Copy Meeting Invitation and close that window.
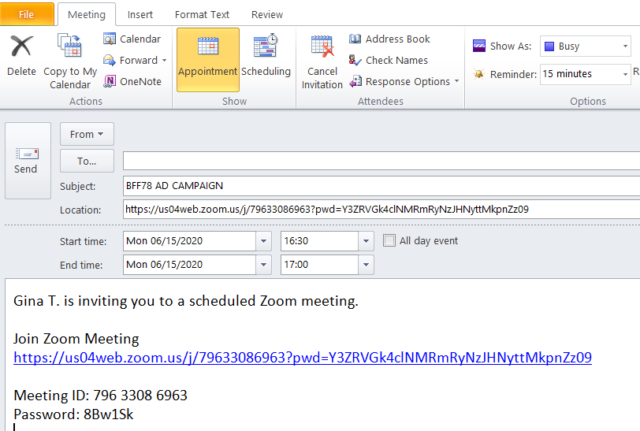
- Open your email client (e.g., Outlook, Mail, etc.), paste the Zoom Meeting Invitation into the body of your email, and then send the email to your intended recipients.
Invite Participants to a Meeting via the Desktop App
- Sign into your Zoom desktop app.
- Click Meetings at the top.
- Click the meeting for which you want to invite participants.
- Click Copy Invitation.
- Open your email client (e.g., Outlook, Mail, etc.), paste the Zoom Meeting Invitation into the body of your email, and then send the email to your intended recipients.
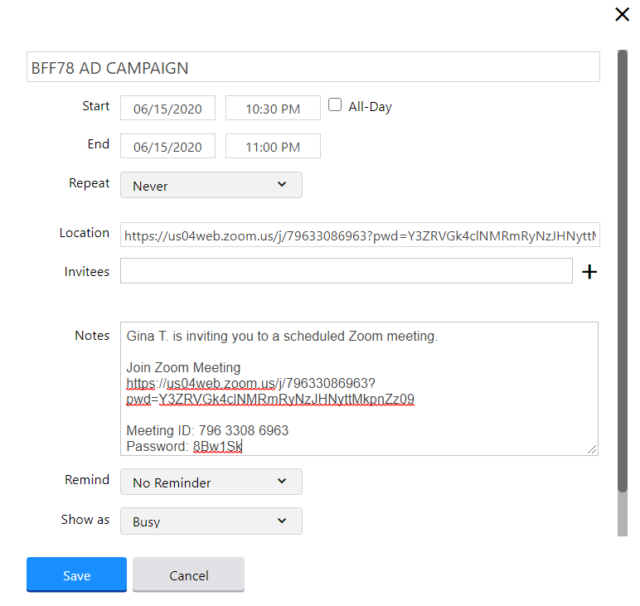
Add a Meeting to Your Google Calendar via the Web Portal
- Sign into your Zoom account online.
- Under Personal, click Meetings.
- Double-click the meeting you want to add to your Google calendar.
- Under Time, click Google Calendar.

- Sign-in to your Google account.

Note: If this is the first time you’re adding a Zoom event, a prompt will appear asking you to give Zoom permission to access events on your calendar. Click Allow if you want to proceed to adding the Zoom meeting to your Google Calendar. (You may need to re-confirm this action by clicking Allow again on the next prompt.)
- You will now see details of the meeting on your Google Calendar, click Save.
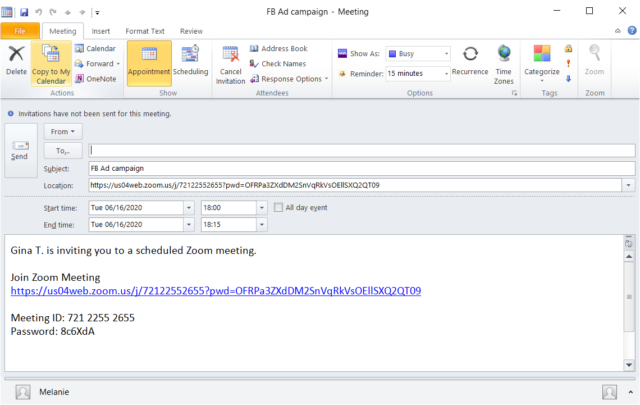
Add a Meeting to Your Outlook Calendar via the Web Portal
- Sign into your Zoom account online.
- Under Personal, click Meetings.
- Double-click the meeting you want to add to your Outlook calendar.
- Under Time, click Outlook Calendar.
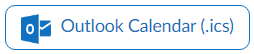
- Save the file on your PC.
- Open the Outlook email client on your PC.
- From the File menu, click Open.
- Click Open Calendar.
- Locate and select the Zoom calendar file you downloaded.
- Click Save and close.

Add a Meeting to Your Yahoo Calendar via the Web Portal
- Sign into your Zoom account online.
- Under Personal, click Meetings.
- Double-click the meeting you want to add to your Yahoo calendar.

- Under Time, click Yahoo Calendar .
- Sign-in to your Yahoo
- The Zoom meeting details will appear, click Save.


Add a Meeting to Your Google Calendar via the Desktop App
- Sign into your Zoom desktop app.
- Click Meetings at the top.
- Click the meeting you want to add to your Google Calendar.
- On the right-side pane, click Edit.
- Under Calendar, click Google Calendar.
- Click Save.
- Sign-in to your Google account.
Note: If this is the first time you’re adding a Zoom event, a prompt will appear asking you to give Zoom permission to access events on your calendar. Click Allow if you want to proceed to adding the Zoom meeting to your Google Calendar. (You may need to re-confirm this action by clicking Allow again on the next prompt.)
- You will now see details of the meeting on your Google Calendar, click Save.
Add a Meeting to Your Outlook Calendar via the Desktop App
- Sign into your Zoom desktop app.
- Click Meetings at the top.
- Click the meeting you want to add to your Outlook Calendar.
- On the right-side pane, click Edit.
- Under Calendar, click Outlook.
- Click Save. This will open the Outlook email client on your PC, showing the meeting event.
- Click Copy to My Calendar.
- In the Outlook prompt that appears, click Accept the meeting.
- Click OK, and then click Yes.

Test Your Microphone Before a Zoom Meeting
- Sign into your Zoom desktop app.
- Click the Settings gear icon on the top right .
- In the Audio section, click Test Mic.
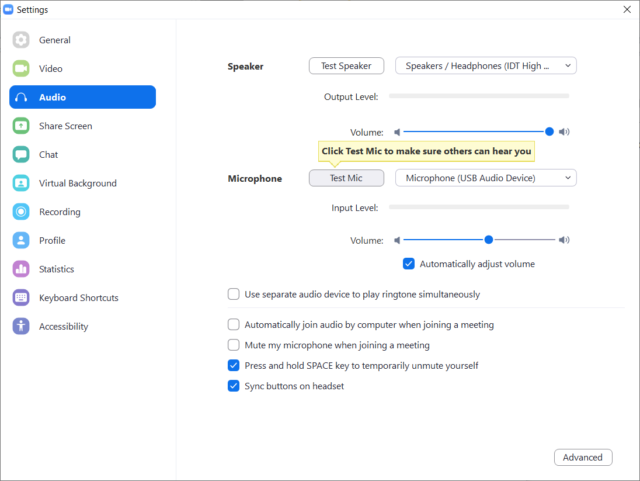
- Say something to your microphone.
- Zoom will play back what you said if your mic is working properly. If not, select a different microphone until you find the one that works.
- Close the Settings window to save your selection.

FIX IT -> Zoom Mic Not Working in Windows 10 (With Pics!)
Test Your Speakers Before a Zoom Meeting
- Sign into your Zoom desktop app.
- Click the Settings gear icon on the top right .
- In the Audio section, click Test Speaker.
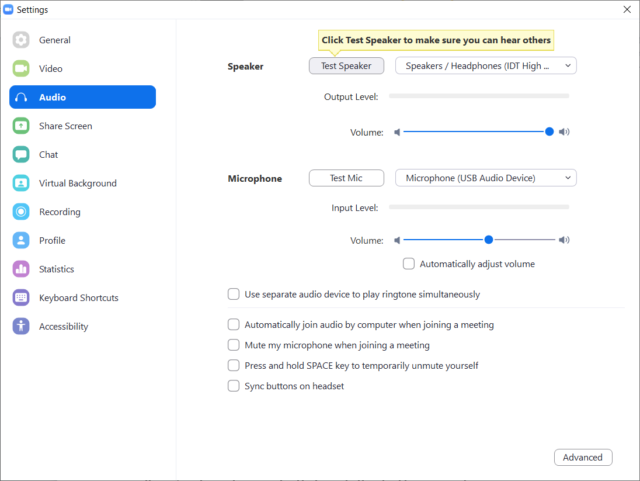
- Zoom will play a test audio clip, if you hear this click Stop. If you don’t hear the audio clip, select a different speaker until you find the one that works.
- Close the Settings window to save your selection.

FIX IT -> Still having audio problems in Zoom? Click here to update your audio drivers.
Begin a Meeting
- Sign into your Zoom desktop app.
- Click Meetings at the top.
- Under the Upcoming tab, select the meeting you want to start.
- Click Start.


Join a Meeting without Signing Into the Desktop App
- Open or launch the Zoom desktop app.
- Click Join a Meeting.
- Type the Meeting ID number for the meeting and your display name.
- Choose if you want to turn on audio and/or video on your end for the meeting and then click Join.

Join a Meeting via the Desktop App
- Open or launch the Zoom desktop app.
- Click Sign In to log into your Zoom
- Type your Zoom email and password, and then click Sign In.
- Click Join.
- Type the Meeting ID number for the meeting and your display name.
- Choose if you want to turn on audio and/or video on your end for the meeting and then click Join.
Join a Meeting Using Google Chrome
- Open Google Chrome.
- On the address bar, go to zoom.us
- Enter the meeting ID as provided by the meeting organizer.
- Click Join.


Note: If this is your first time to join a meeting via Google Chrome, you will be asked to open the Zoom meeting client. Click Open Zoom Meetings.
Join a Meeting Using Mozilla Firefox
- Open Firefox.
- On the address bar, go to zoom.us
- Enter the meeting ID as provided by the meeting organizer.
- Click Join.

Note: If this is your first time joining via the Firefox web browser, you may be asked to open Zoom or the Zoom installer package. Click Open Link.
Join a Meeting Using Microsoft Edge or Internet Explorer
- Open Microsoft Edge or Internet Explorer.
- On the address bar, go to zoom.us
- Enter the meeting ID as provided by the meeting organizer.
- Click Join.
Join a Meeting Using the Meeting Invitation Link You Received via Email
- Open your default email client (e.g., Mail, Outlook, etc.)
- Locate and select the Zoom meeting invitation you received.
- Click the Join Zoom Meeting link you received.

Note: Depending on your default web browser, you may be asked to open Zoom to join the meeting. Click Allow if you want to proceed with joining the meeting.
Turn Off Video When Joining a Zoom Meeting
- Sign into your Zoom desktop app.
- Click your profile picture, and then click Settings.
- On the left pane, click Video.
- On the right pane, under Meetings, click Turn off my video when joining a meeting.
Share Only a Portion of Your Active Screen During Zoom Meetings
- On the Zoom call control panel, click the Share Screen.

- Click Advanced.
- Click Portion of screen and then click Share.

Note: A ‘share window frame’ will appear. Use your mouse to drag this frame to only the portion of the screen you want to share.
- Click Stop Share (at the top of your screen) when you no longer want to share your screen.
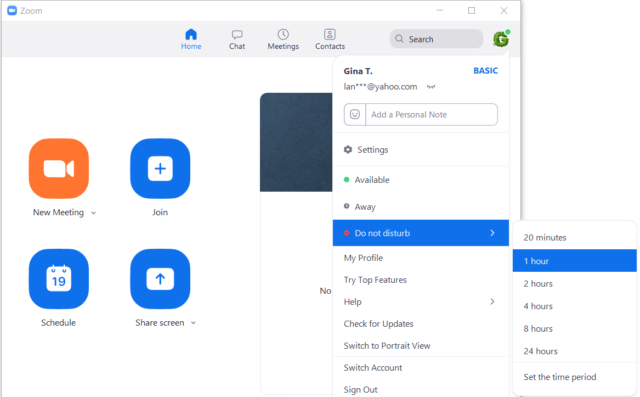
Set Up Your Zoom Status to ‘Do Not Disturb’
- Sign into your Zoom desktop app.
- Click your Profile
- Click Do not disturb, and then click for how long this status should last.

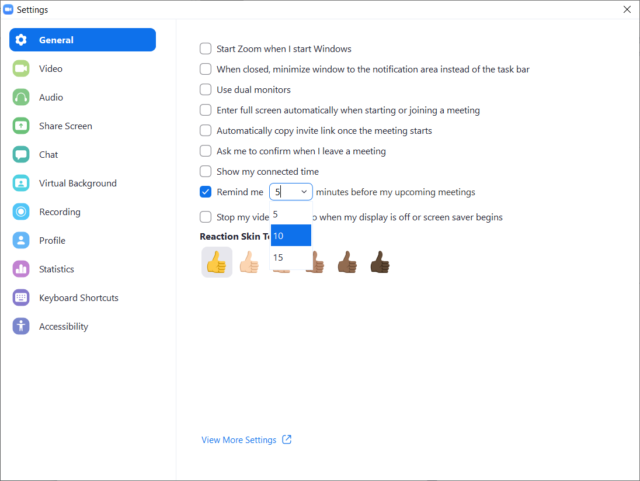
Always Get a Reminder Before a Zoom Meeting Starts
- Sign into your Zoom desktop app.
- Click the Settings gear icon on the top right .
- In the General section, click the Remind me drop-down arrow and then select to be reminded 5, 10 or 15 minutes before a meeting starts.

Share Your Screen During a Zoom Call
- On the Zoom call control panel, click the Share screen.
- Select the screen window or application that you want to share with others and then click Share.
- Click Stop Share (at the top of your screen) when you no longer want to share your screen.


I hope you enjoyed this article!
If you have any other Zoom questions, just comment below and I’ll personally respond to them.😉


