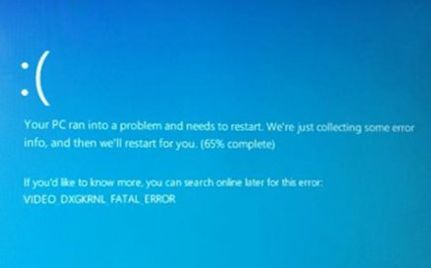
The DXGKRNL fatal error in Windows is a Blue Screen of Death error (or STOP error) that will halt the operating system. A critical error in the DirectX software system causes this error.
When this error occurs, you will see the BSOD with the error message. Depending on the Windows version, the system will halt, or Windows will try to recover by scanning for problems.
Cause of the DXGKRNL Fatal Error
As mentioned, the problem is related to the DirectX graphics system that is installed in Windows. DirectX is a library that enables software to interact with the PC’s video and audio hardware. It is mainly used by gaming software. DirectX has been part of Windows since XP (version 9.0) until Windows 11 (version 12).
DirectX allows software to use the multimedia accelerator features of your video and audio hardware for great performance. But to do this, DirectX operates at a high security level in the operating system. So, if something goes wrong, problems are serious for the operating system.
What can go wrong? Well, mainly device drivers and DirectX itself. DirectX uses objects and drivers that execute at kernel level, and it also interacts with devices through device drivers for the video and audio hardware. Any problem with the DirectX file or configuration, or a problem with the device drivers can cause the DXGKRNL fatal error.
Solving the DXGKRNL Fatal Error
There are two main solutions to fixing the error. The first is updating or reinstalling DirectX, and the second is updating or reinstalling the device drivers for video and audio hardware.
If you can still boot into Windows, you can execute the steps to solve the error. If Windows won’t start anymore, try using the Safe Mode boot. In that startup mode, Windows only uses a standard video driver with minimal features. For Windows 7 and Windows 8, the steps are different. Press F8 during boot to get into the Advanced Boot Options screen and select Safe Mode.
DirectX in Windows
With most software, you would simply say: uninstall it, reboot, and then reinstall it. That was possible for older versions of DirectX as well, but not in the latest Windows versions. DirectX is an integral part of Windows in the latest Windows versions.
For Windows 7 there was still a separate update that can be downloaded to install DirectX 11.1.
For later Windows versions, you simply need to make sure you run Windows Update.
In Windows 10, open Settings, select Update & Security and click Check for updates.
In Windows 11, open Settings, select Windows Update and click Check for updates.
DirectX Diagnosis
To check the version, and any potential problems, you can use the DirectX Diagnostic Tool. This tool is part of the DirectX installation and can be started by typing “dxdiag” in the Start menu search box.
After starting the dxdiag app, you will see the details of the DirectX installation.
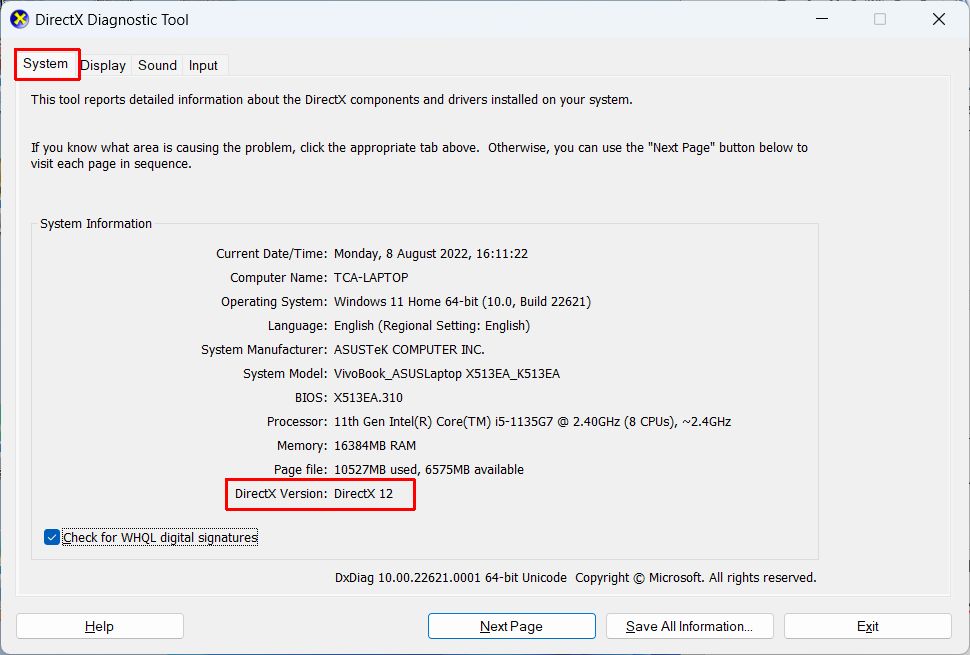
With the System tab active, the DirectX Version can be seen at the bottom of the list with System Information.
Use the Next Page button to jump through the pages, or simply use the tab selectors to switch directly to the Display, Sound, or Input options.
In the Display tab, you can see which features are enabled. The Notes section will show any problems with the DirectX functionality. The Notes section is present for all tabs.
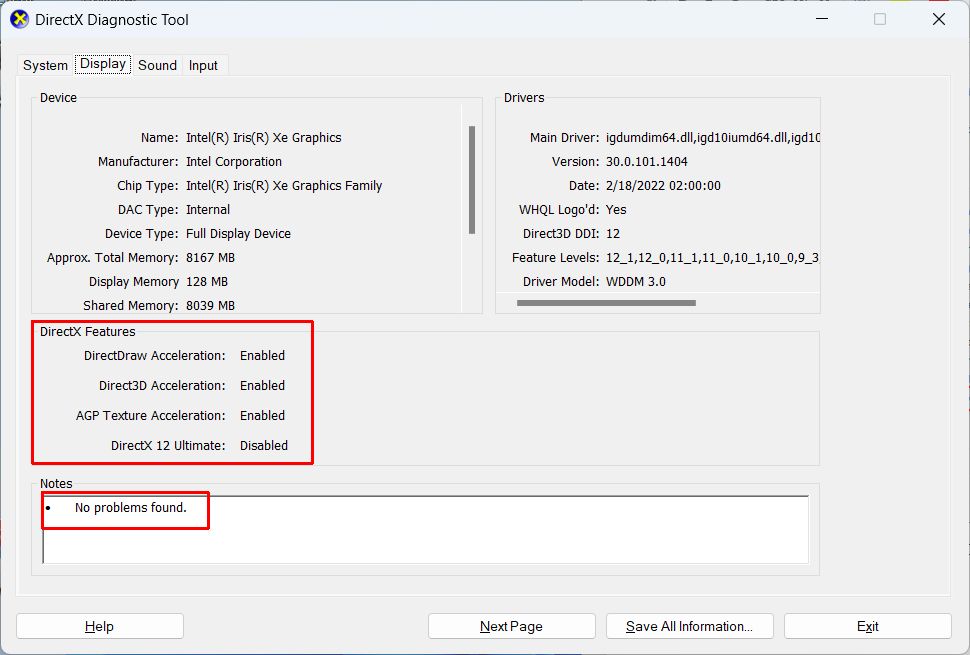
If a DirectX feature is Disabled, it might either disabled in the settings, not be supported by your PC hardware, or not supported due to driver limitations.
Update the Display Driver
If the DXGKRNL fatal error is caused by a device driver, the first step is to update the driver to the latest version. Updated drivers can have bug fixes, performance improvements, and feature enhancements.
To update the display driver in Windows, use the Device Manager.
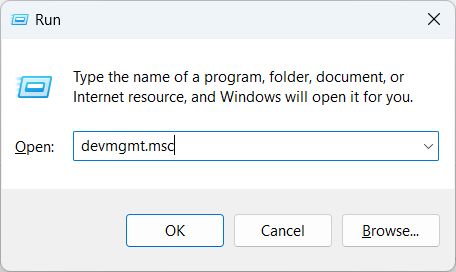
- Open the Device Manager using the search box in the Start menu, or press the Windows key + R and type devmgmt.msc in the Run box followed by the Enter key.
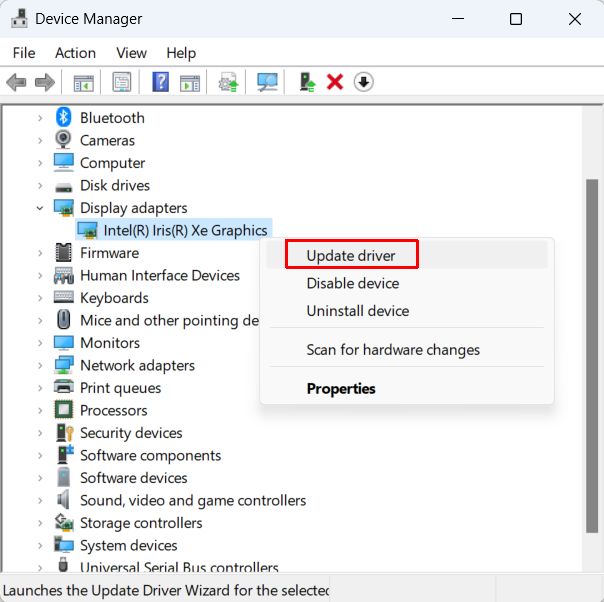
- In the Device Manager, expand the Display adapters category by double-clicking it.
- Next, right-click the listed graphics adapter, and in the popup menu, select Update driver.
- Use the option Search automatically for drivers to let Windows check for graphics driver updates automatically. If you have downloaded the latest graphics driver for your computer manually, use the option Browse my computer for drivers and select the location.
- Once the updated driver is installed, click Close and close the Device Manager.
Next, restart the computer and see if the problem is resolved.
Uninstall the Display Device to fix the DXGKRNL error
There may be no driver update available for the graphics card. Or an update is available, but the update did not fix the problem. In that case, the driver configuration may be a problem. Uninstalling the display device can then help solve the error.
Uninstalling a device and then restarting the PC will force Windows to reinstall the graphics device. If the driver was also deleted during uninstall, the driver will also be downloaded and installed again.
- Use the instructions from the previous section to open the Device Manager and expand the Display adapters
- Right-click the graphics adapter, and in the popup menu select Uninstall device.
- In the Uninstall Device window that shows next, make sure to select the option Attempt to remove the driver for this device.
Note: for previous Windows versions this option is worded a little differently.
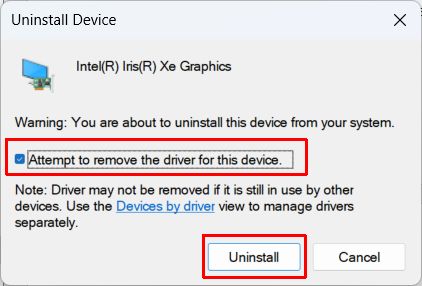
- Click the Uninstall button to continue.
Once the device is uninstalled, restart Windows. The display device will be reinstalled during the restart with the latest driver.
Note: in case the display device is not automatically reinstalled, use the Scan for hardware changes in the Action menu of the Device Manager to force the device installation.
System Restore
None of the solutions so far working? If your Windows configuration is using System Protection, you can try the System Restore option to revert to an earlier, working configuration.
With every change, Windows can create a restore point that will help bring back a previous configuration. Here are the instructions for Windows 11.
- Open Settings from the Start
- Select System, and then About.
- Scroll down to the Related links section, and then click Advanced system settings. This will bring up the System Properties.
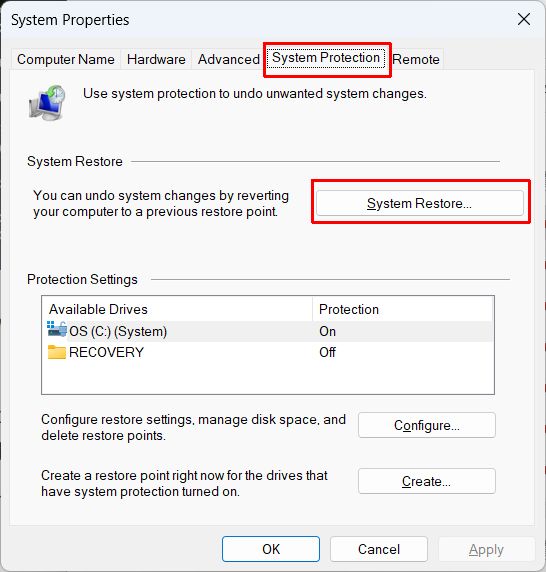
- In the System Properties window, select the System Protection
- Next, click the System Restore button.
- Click Next to show the list of restore points on your computer.
- Select which restore point to use, and then click Next.
- Click the Finish button to confirm the restore operation.
- Click Yes in the confirmation window.
Windows will now create a restore point. Your PC may restart during the process. Just be patient and let the system restore complete.
After the final restart, see if the problem is solved.
Although this specific error is related to the display aspect, DirectX also uses sound and other media and input drivers. It is recommended to keep all device drivers up to date using DriverFinder.

