
With each new version of Windows, more devices are automatically supported. This is also the case for Windows 11. But if your device is not supported, or not automatically installed, you may need to manually install drivers.
The need to manually install drivers in Windows 11 can also come up when a non-supported device needs to be installed. If hardware is not compatible with Windows 11, but there are drivers for the hardware for previous Windows versions, these older drivers can often be used.
For Windows 11, Windows 10 drivers are almost always compatible. But even Windows 8 or Windows 7 drivers can often be used. Just make sure the right architecture is supported. For Windows 11 all drivers need to be 64-bit since that is the only Windows 11 version available.
Steps to manually install drivers in Windows 11
First, make sure you have the driver file available on your Windows 11 system. Download it from the hardware manufacturer’s website. If possible, use the installer that came with the driver. If that does not work, the manual install process is required.
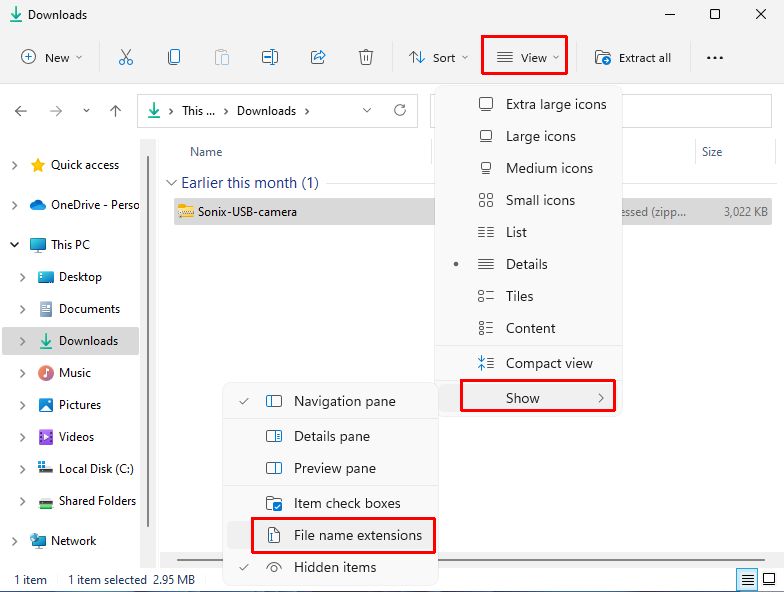
- Make the driver files available in the installable format. That means you need to see files with a .SYS, .CAB, and .INF file extension. File extensions can be made visible in the File Explorer by clicking the View menu, followed by clicking Show in the dropdown menu, and finally selecting File name extensions.
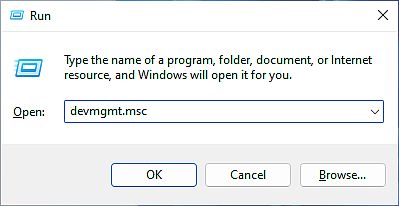
I would recommend installing the 7-Zip program, as it actually supports many archive and compression formats. Even .ISO and some .EXE files can be extracted with it. - Once the driver files are available, open the Device Manager. Press the Windows + R keys, and type devmgmt.msc in the Run window. Then press Enter or click OK.
- In the Device Manager, select the device for which you need to install the driver.
- Right-click the device, and in the popup menu click Update driver.

- Right-click the device, and in the popup menu click Update driver.
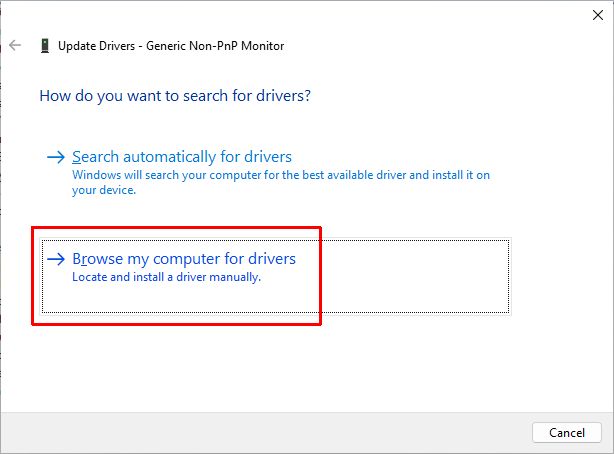
- In the window that shows next, click the option Browse my computer for drivers.
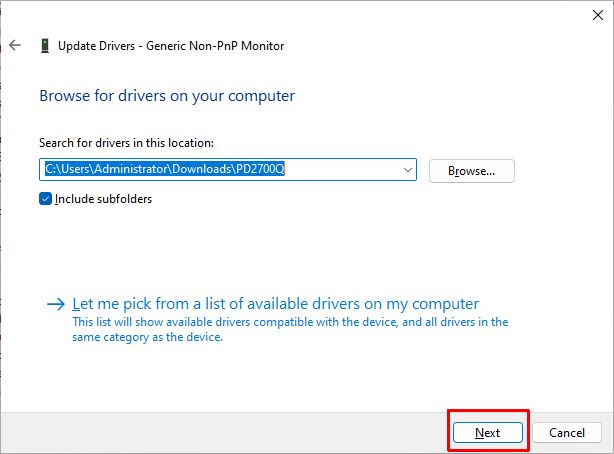
- Next, use the Browse button to select the file location that contains the driver files (as downloaded and extracted earlier).
- Once selected, click the Next button.
- Windows will analyze the driver files and match them with the selected device. If the drivers are compatible with the device, the drivers will be installed and the device should work after this.
- Click the Close button to close the window.
- Finally, close the Device Manager.


Hopefully with above steps you can find and install the required drivers for Windows 11. This way you can often keep using older hardware, even not directly supported by Windows 11.
As always, if you have trouble finding support for your hardware in Windows, try using our DriverFinder software to automatically analyze the hardware devices and look for available and compatible drivers.