External storage devices like USB Flash drives and external hard disk (HDD) or SSD drives are quite handy and popular. They’re commonly used for backups, or as simple storage devices. Normally, when you plug a USB device, its corresponding drive simply shows up in File Manager. So what do you do if you face a “USB drive not showing” on your Windows 10 computer?

#1 – Check the USB Device.
The first thing to do is to check if the USB device itself is okay.
You can do this by connecting the USB drive to a different computer. If it is correctly recognized there, then you know the USB drive itself is fine and that the problem is with your Windows 10 system.
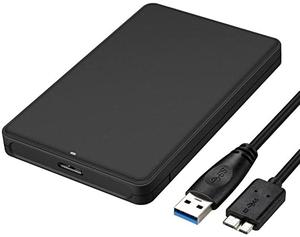
If the device is an external hard disk (or SSD), or ZIP drive, also check if the cable is defective by exchanging it with a different cable if possible. This is a less frequent cause, but not something to be ignored.
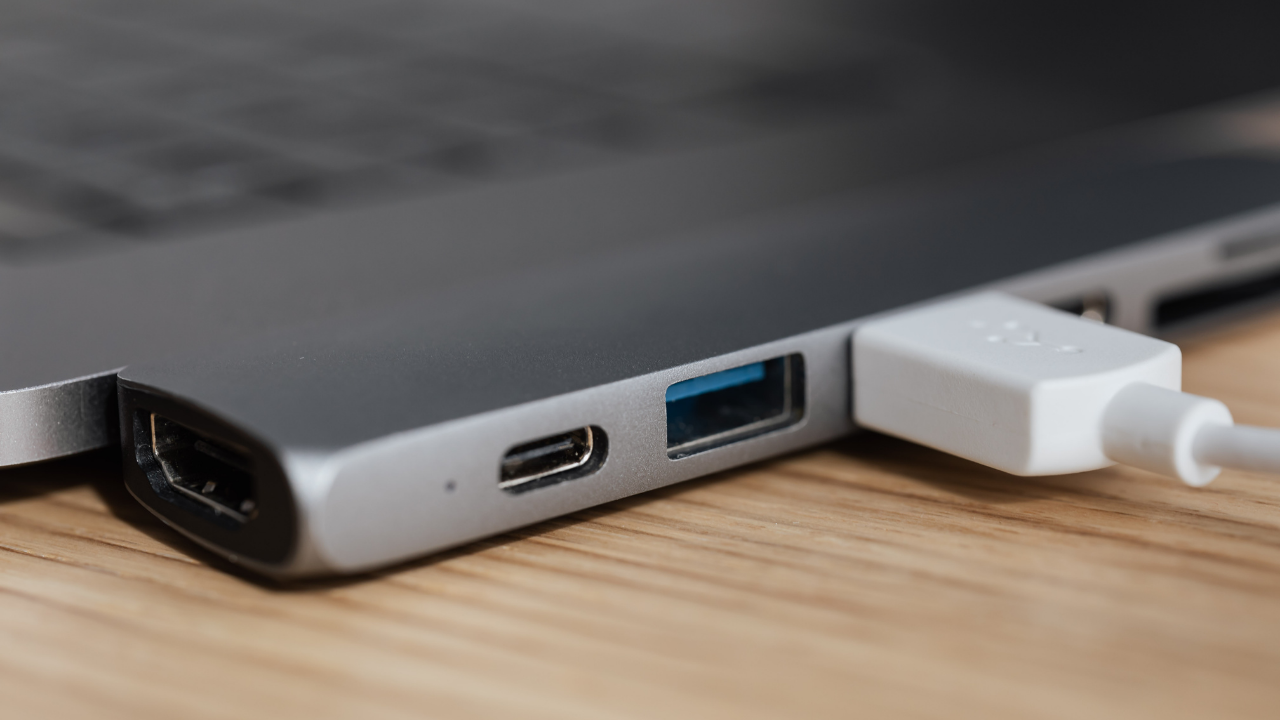
Also make sure to connect the USB device directly to a USB port on the Windows 10 PC, not through an extension cable or USB hub. Long cables, extra connections, or insufficient power can also be a cause for problems with USB drives (this is especially true for the older USB 1.1 and USB 2.0 ports and devices).
#2 – Check Your PC.
Unless you made changes, there is normally no reason to assume anything is wrong with your computer. However, for older PC’s it can be helpful to turn the PC off, remove the USB devices, and completely unplug the PC.
While troubleshooting the issue with the USB drive, leave other USB devices disconnected (unless you really need them, like a mouse or keyboard).
If you did make changes to your computer, like putting additional hardware, upgrading its firmware, or changing its BIOS settings, then try reverting these changes and testing the USB drive again to ensure that these changes have not caused the issue. This is particularly true if you added additional USB devices!
#3 – Check Windows 10 Settings.
If your USB drive is still not showing up in Windows 10, then it’s time to to get into the Device Manager.
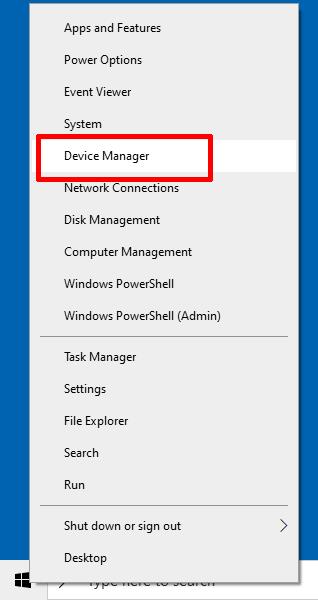
Right-click the Windows Start button, and in the popup menu, select Device Manager.
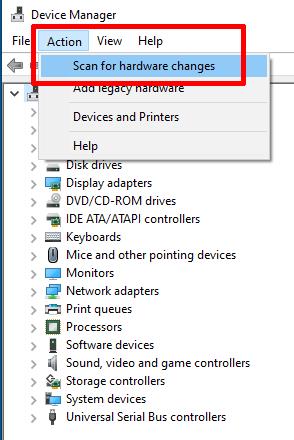
In Device Manager, click the Action menu, and then click Scan for hardware changes. Windows will enumerate all hardware devices again and initialize any newly found devices into the configuration.
Once complete, check if the USB drive is showing up in Windows Explorer. If not, try the next step.
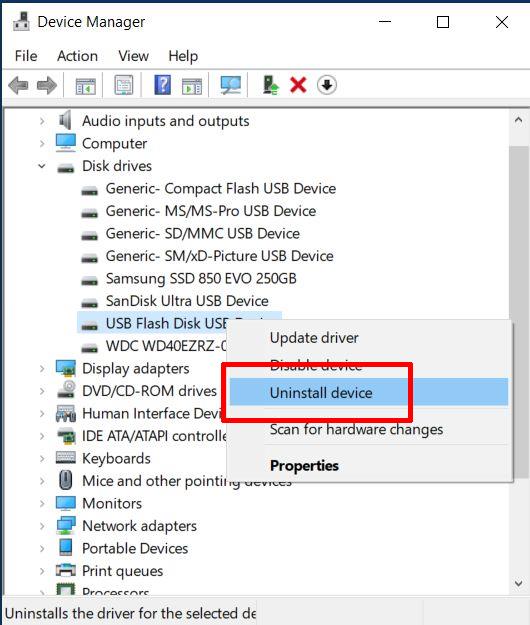
In Device Manager, open up the Disk drives list, right-click the USB drive, and then click Uninstall device.
Next, restart your PC. When Windows 10 restarts, it will automatically re-detect the USB device and install the available driver for it. This step can solve configuration issues with the USB drive, so it will show up again.
If your USB drive is still now showing up, try updating the driver for the USB device.
This can be done from the Device Manager. Simply right-click the USB drive in the list of Disk drives, and in the popup menu, click Update Driver.
Next, click the option Search automatically for drivers, and wait for the driver update to complete.
Be aware that this step only checks for updated USB device drivers. In most cases the correct operation of USB devices depends on the USB controller, which is a system device. So it is best to check for updated chipset drivers as well.
A simple way to do that is to download a driver tool like DriverFinder and scan your PC for all hardware devices and find the latest drivers.
#4 – Check Windows 10 Disks and Drives.
If the USB device is working properly, but the drive is now showing up in Windows Explorer, it is possible that the drive has no drive letter assignment.
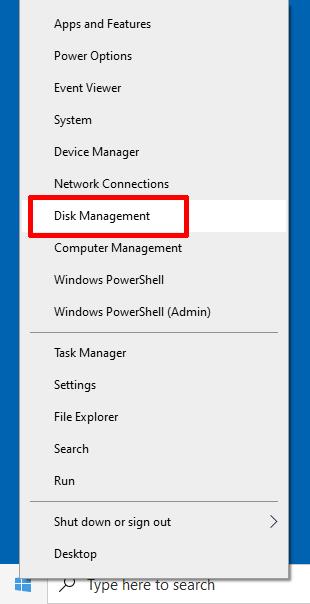
Right-click the Windows Start menu, and then click Disk Management.
Once the Disk Management window opens, you will see all disks present in the PC.
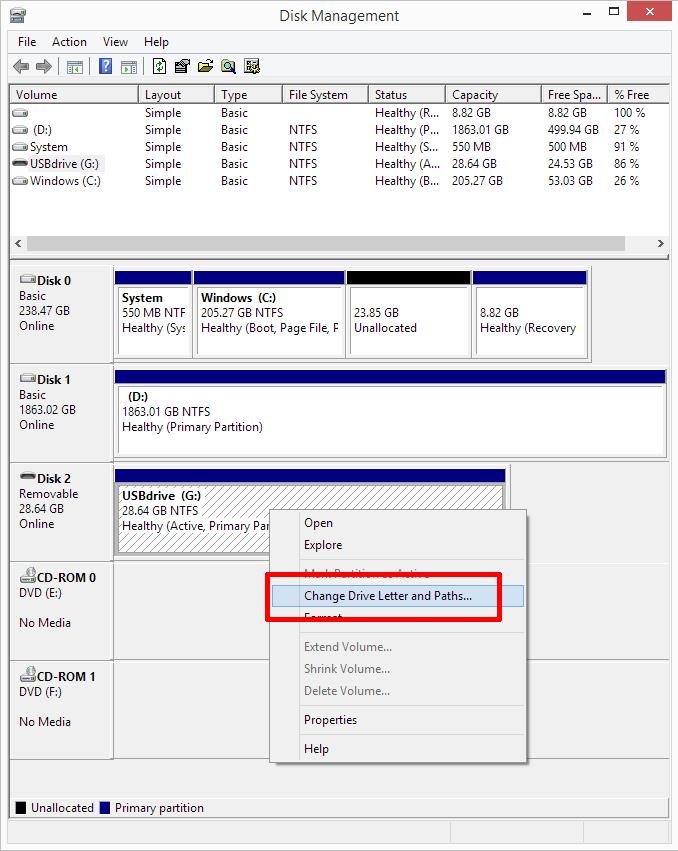
Find the disk that represents the USB drive and check that it has a drive letter assigned to it. In the screenshot above, Disk 2 is the USB device and it has the drive letter G assigned to it.
To find your USB drive, check for a disk that is listed as “Removable” (although it can also be listed as “Basic“), and compare the size to that of your USB drive. If you are not sure, compare the Disk Management screen with the USB drive that’s not connected.
If there is no drive letter assignment, simply right-click the partition (the block next to the disk with the blue bar at the top), and in the popup menu, click Change Drive Letter and Paths.
Next, click the Add button.
Next, change the drive letter (or leave it as is to get a default assignment), and then click OK .
Even if there is already a drive letter assigned to the USB drive, it is still useful to try and change it. The reason for this is that it is possible that there are drives using the same drive letter assignment. Even if another USB device with the same drive letter assignment is not present at the moment, the configuration could still cause conflicts.
To change the drive letter to a higher character, click the Change button rather than the Add button. After that, the steps are the same; i.e., change the drive letter and click the OK button.
Note: If the partition for the USB disk shows as a black bar, rather than a dark blue bar and is listed as Unallocated, that means the drive formatting is not recognized. This means that the disk needs to be formatted before it can be used. If there data is expected to be present on the USB drive, a data recovery tool needs to be used for retrieval of the files.
If the USB disk is still not showing up in Windows Explorer, a final step is to try the Windows 10 Hardware and Devices Troubleshooter. Just type “troubleshoot” in the Search box in the Windows Task Bar to start the Troubleshooter. Follow the on-screen instructions to complete the troubelshooter.

