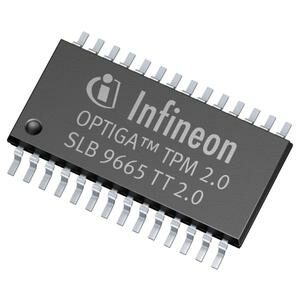
If you are upgrading to Windows 11, or want to secure your PC, dealing with TPM is inevitible. We’ll explain what TPM is all about and what TPM drivers are needed for Windows.
What is TPM?
TPM is short for Trusted Platform Module. TPM is implemented using a hardware chip on the motherboard of a computer. The TPM chip is used to provide a hardware-level security to Windows. It generates encryption keys, which are not accessible from outside of the computer hardware.
Most modern computers (required since 2016) will have a TPM chip on board. In some older systems a TPM chip can be added when not present. Manufacturers of TPM chips include Infineon, STMicroelectronics and Nuvoton. In the Windows device details the manufacturer can also show Intel or AMD.
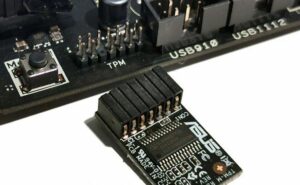
In older boards, it is often possible to add a TPM module using a pin header.
What is TPM used for?
As mentioned the TPM module enable implementation of hardware-level security, which typically used for encryption of data. Practically speaking, TPM is used for Windows Hello (face recognition, finder print recognition, iris login), and BitLocker (drive encryption).
TPM is partly convenience, as it is performing a task which otherwise would need to be performed by the CPU and software. And it is partly increased security, decryption of encrypted data is only possible in the system itself (containing the TPM module used for encryption).
Windows 10 already had functionality that used the TPM module, but with Windows 11, Microsoft has made the presence of TPM mandatory. To be specific, Windows 11 requires TPM version 2.0. Version 1.2, which is also present on a lot of older systems is not enough.
The differences in version 2.0 vs version 1.2 are that the new version offers better security features. If you want to know the exact details, Microsoft has more information on TPM.
Tip: Not installing a TPM 2.0 module, or disabling the TPM option (or setting it to version 1.2 compatibility) is a method to prevent a Windows 11 upgade. If you would want that.
What TPM version do I have?
Before you check the version, you need to know if TPM hardware is present. Since physically checking the motherboard is not all that practical, the best step is to check the BIOS/UEFI settings.
One thing to keep in mind is that older BIOS versions might not directly support TPM, while the motherboard does. In that case you first need to update the BIOS to access the TPM features of the motherboard.
Check BIOS/UEFI
You can access the BIOS/UEFI through the computer startup process. When rebooting, press the required key (typically F2 or Delete, but it can also be Esc, F10).
Once the BIOS/UEFI screen shows, locate the security settings and then select the TPM, or Intel Platform Trust Technology, or AMD fTPM. If none of these are available, you can safely assume your computer does not have a TPM chip. If the setting is available, make sure it is turned on. The BIOS/UEFI settings for TPM will generally also show the version.
Note: If you have the AMD fTPM option available, you may want to use a separate hardware-based TPM solution. There have been issues with the AMF fTMP solution. At least make sure to upgrade to the latest BIOS version before using fTMP.
Security Settings in Windows 10
If you are running Windows 10, you can also check the TPM status and version using the Windows Settings option.
- Open Settings from the Start
- In the Settings window, click Update & Security.
- Next, click the Windows Security option in the left-hand pane.
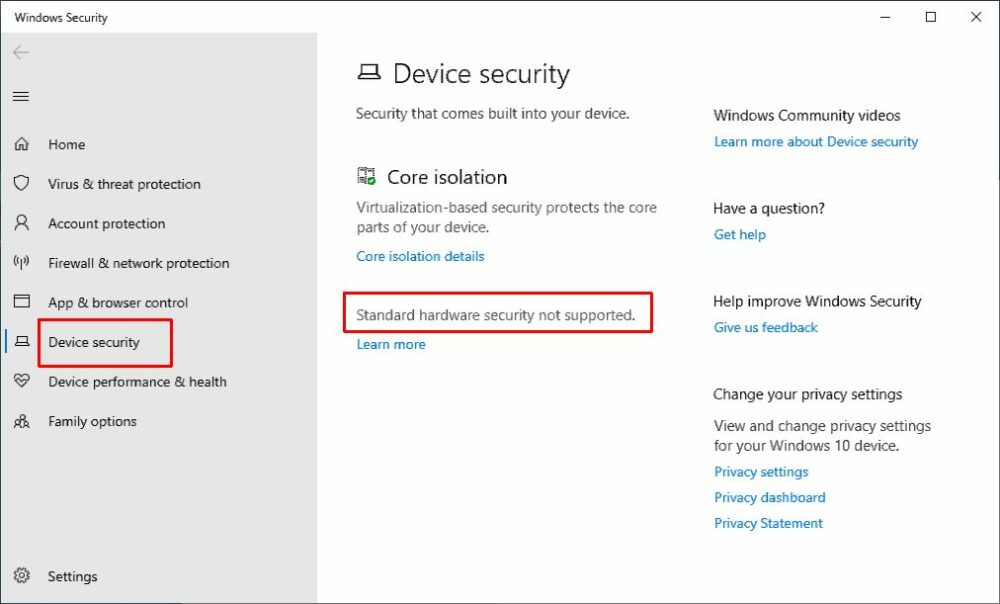
- Finally, click the Device security option in the left-hand pane to show the details of your TPM configuration.
If there is no TPM support, you will see “Standard hardware security not supported”. This could mean there is no TPM chip, or it is not enabled in the BIOS/UEFI.
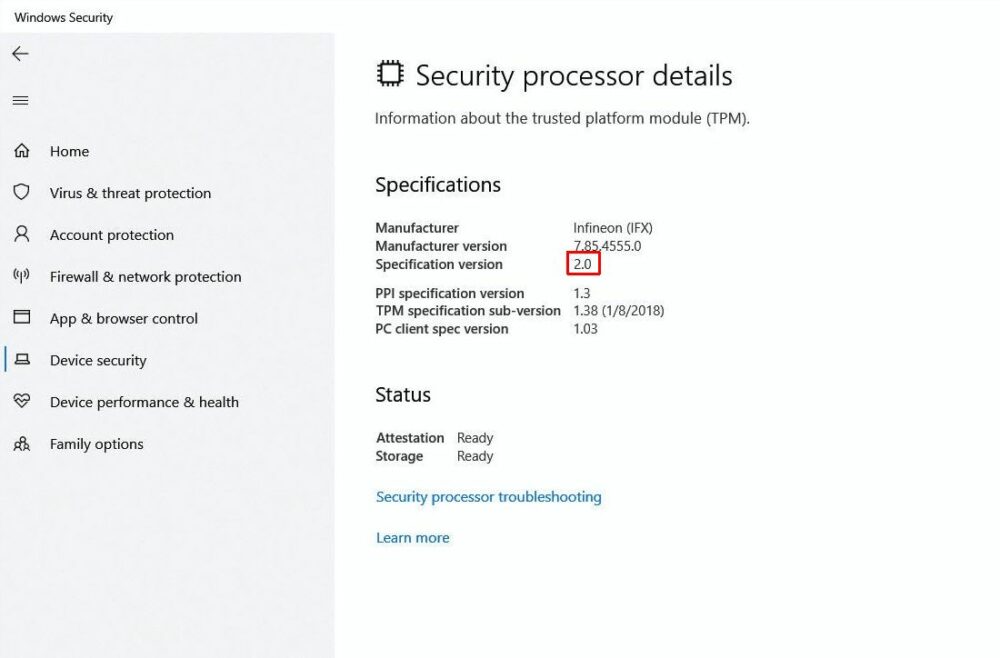
In the case that there is a TPM chip onboard, and it is enabled, you will see the details and version supported.
Using the Trusted Platform Module Management
Windows has a special management console for the TPM. This can also be used to check the TPM version details.
- In the Start menu, select the Run option (or press Windows key + R).
- Then type TPM.MSC and press Enter.
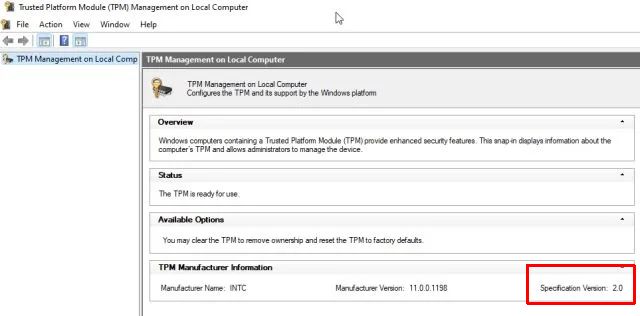
This will bring up the TPM Management window, there you can see the Specification Version for your TPM module.
Window TPM Drivers
Since the TPM chip is a hardware device, Windows needs to be able to communicate with the device. For this device drivers, or TPM drivers, are required. Although there are different manufacturers of TPM chips, the drivers needed by Windows are the chipset drivers.
Installing the latest Intel chipset or AMD chipset drivers would normally be sufficient to enable support for the TPM functions within Windows 10 or Windows 11.
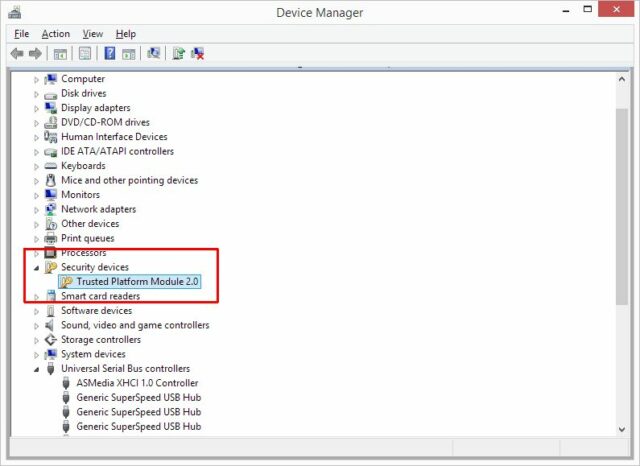
The Device Manager can be used to check if the drivers for the TPM device are correctly installed. The TPM device will show under the category Security devices as Trusted Platform Module 2.0 (the name can vary depending on the manufacturer).
Some manufacturers provider their own driver installers for TPM modules from Nuvoton, Atmel or other third party TPM manufacturers. Check the manufacturer support pages for these.
TPM Firmware
Apart from installing the chipset device drivers, it is may also be needed to update the TPM firmware. This will make sure the TPM device is up to date with the latest security patches and supports Windows 11 requirements.
For Infineon based TPM solutions, the best place to start is their TPM update page. It contains links to different vendors with direct installers for TPM updates.
A recent vulnerability in TPM 2.0 would also require an update in the firmware. Hardware manufacturers may warn about the security risk (like Lenovo did), but the real solution is updated firmware.
After updating the firmware you need to clear the TPM. If it is not a new PC, make sure to back up your data first before performing these steps.
- In the Windows Settings window Security processor details (see previous steps), click the link Security processor troubleshooting.
- Under the header Clear TPM, click the button Clear TPM.
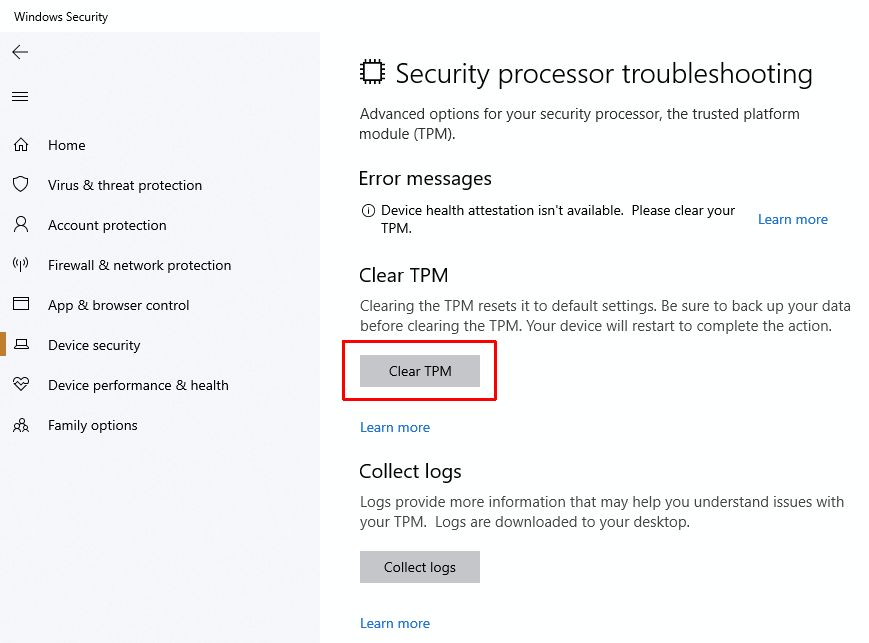
- In the confirmation windows that follows, click the Clear and restart button.
With the above information, we hope you can get TPM working in Windows 10 to enable the upgrade to Windows 11. Do not forget to check the other Windows 11 requirements before you upgrade!
And as always, we recommend you keep your drivers up to date with DriverFinder.

