
Out of all the errors you can get with Windows device drivers, the thread stuck in device driver error is one of the most serious ones. The reason is that this error results in a blue screen of death (BSOD), which requires a PC restart.
What is the Thread Stuck in Device Driver error?
As the name suggests, the error basically means that the device driver software is stuck in a loop waiting for a hardware device to respond. Although this could be caused by the hardware device itself, in most cases, it is the result of a problem with the device driver software.

The error can occur on all Windows versions and is often seen with high-utilization types of processing, like gaming, or high CPU or GPU type of processing.
Once you see the error, you’ll want to fix the error.
Here is what you can try.
Steps to Fix the Thread Stuck in Device Driver error
There are a number of things you can try to solve the error. We’ll list them in sequence, so you can spend the least amount of time possible in solving the driver error.
1 – Update Windows
This may look like an obvious step, but it is so easy to overlook pending updates in Windows, especially in the latest Windows versions. So, make sure to go into the Settings (or Control Panel), and check for Windows Updates (1) and (2).
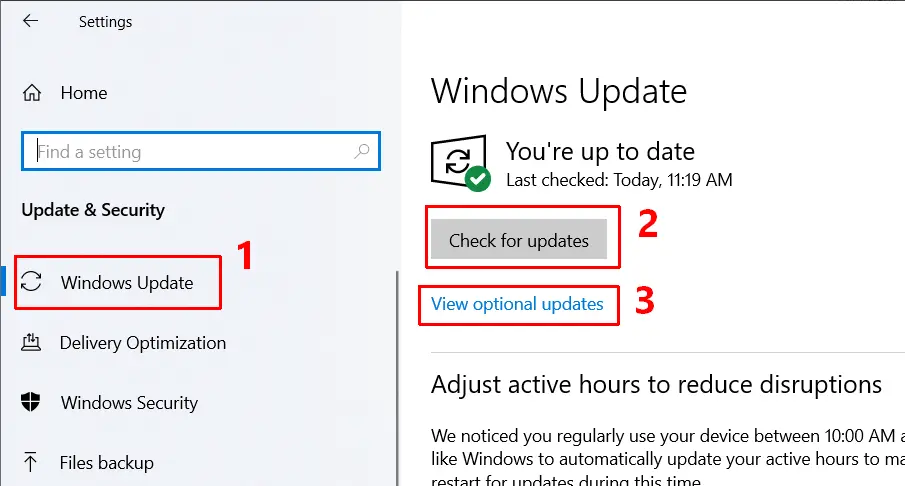
Tip: make sure to check for any optional updates (3), as Microsoft does not push all driver updates as mandatory! Optional driver updates will show here.
2 – Run the Troubleshooter
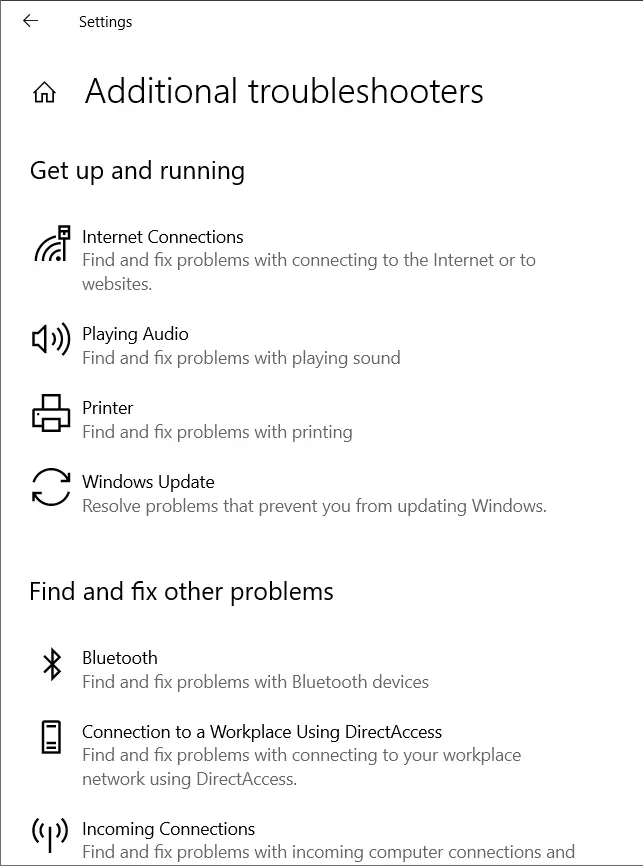
If you are running Windows 10 or Windows 11, you can try running the Troubleshooter from the Windows Settings. These built-in troubleshooters will check your system for common, known problems.
If a recommended troubleshooter is shown, (like the BSOD Troubleshooter), click the Run the troubleshooter button. If there is no recommendation, click the Additional troubleshooters link to pick one manually.
Apart from running the troubleshooter, Microsoft also recommends using the GetHelp app.
3 – Update your drivers
Even though you ran Windows Update, you may still be missing some important driver updates. Examples are:
- drivers that are not distributed by Microsoft (non-WHQL)
- drivers with newer generic device support that are not limited to specific hardware manufactures
- drivers that are incompatible with the supporting software (like control panels)
It is best to check for additional driver updates. You can manually visit your PC manufacturer’s website and look for your PC model and any available driver update.
We recommend using our free driver finder software. DriverFinder will scan your PC for hardware devices and find the latest version of available drivers compatible with your Windows version. Simply download and install to make sure the latest driver is available for the device.
Tip: In some cases, it can be required to update the BIOS of your PC. Older BIOS versions may limit compatibility with newer Windows versions. Simply visit your PC manufacturer’s support website and see if an updated BIOS version is available for your model.
4 – Reinstall the device
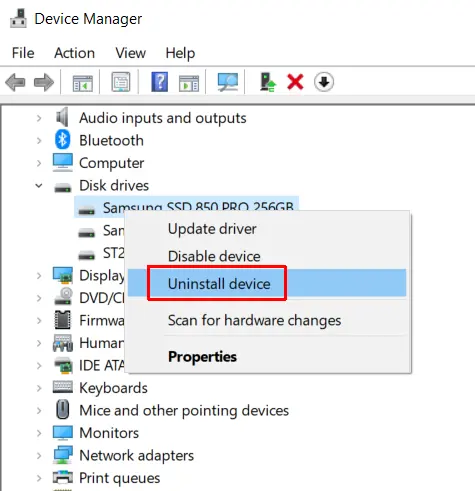
Using the Windows Device Manager, it is possible to uninstall a device (and optionally the driver). When Windows restarts, the device is then reinstalled. This can sometimes help with the device and driver configuration.
Simply start the Device Manager by searching for it in the Windows search bar. Then select the device that is causing the device error. Right-click the device, and in the popup menu select Uninstall device.
Next, restart your PC and check if the error persists.
5 – Analyze the system logs
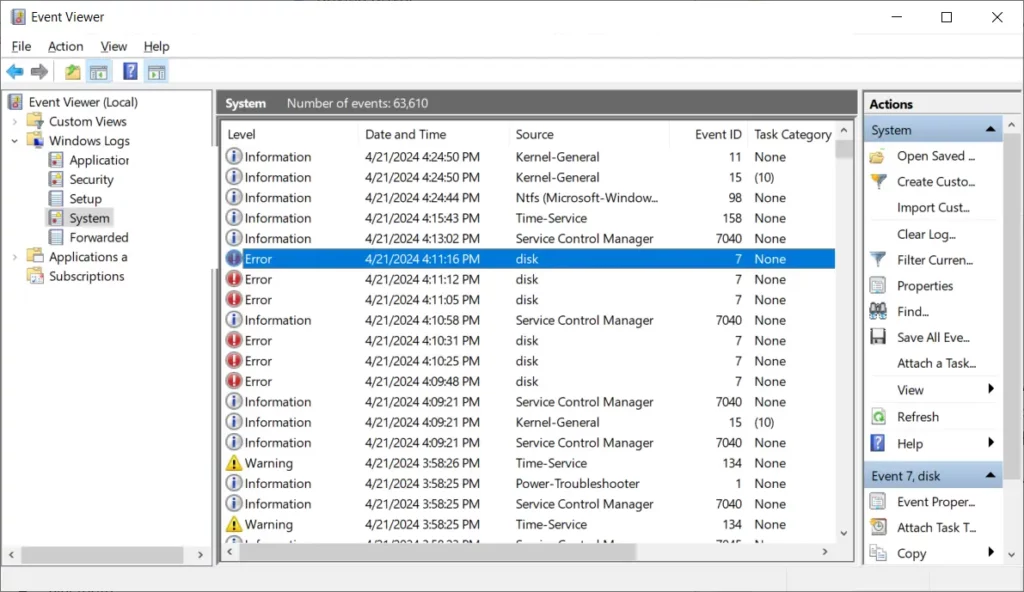
Unfortunately, this process requires technical skills. The first step is to look at the event viewer. This Windows software can help you pinpoint the cause of the thread stuck in device driver error. Looking through the System events, you can often pinpoint the device linked to the error. This in turn can then let you know which troubleshooter to run, or which driver to update.
Apart from the Event viewer, you can look at the minidump.
When a serious error occurs, like the thread stuck in device driver error, Windows creates a log file called a minidump. These files are stored in a folder called Minidump in the system root (typically C:\Windows\Minidump). The minidump filename will have the date in it and have an extension .dmp. If no such file is created, check the configuration for creating minidumps.
These crash dump files when generated as a result of the THREAD STUCK IN DEVICE DRIVER ERROR will often contain the filename, which in turn can help pinpoint the driver.
Reading and analyzing a minidump file is a rather technical process. Luckily, tools are available that can read minidump files and show the result in a more user-friendly way. Try BlueScreenView or WhoCrashed.
6 – Check the hardware
As mentioned earlier, the error is not often caused by a hardware error. But if you recently made changes to your system, like changing the video card, or adding memory, it is good to double-check. Make sure all hardware is properly inserted and compatible with your motherboard.
For disks, check the cables that connect them to the motherboard or disk controller.
7 – Disable GPU acceleration
The graphics processor is used for hardware acceleration by default. Disabling it, and effectively switching to CPU-based processing, can help solve the problem as well.
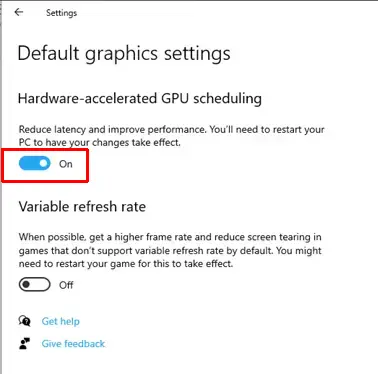
In Windows, open the Settings, and then select System -> Display. Then scroll down and select Graphics or Graphics settings.
Toggle the option Hardware-accelerated GPU scheduling from On to Off.
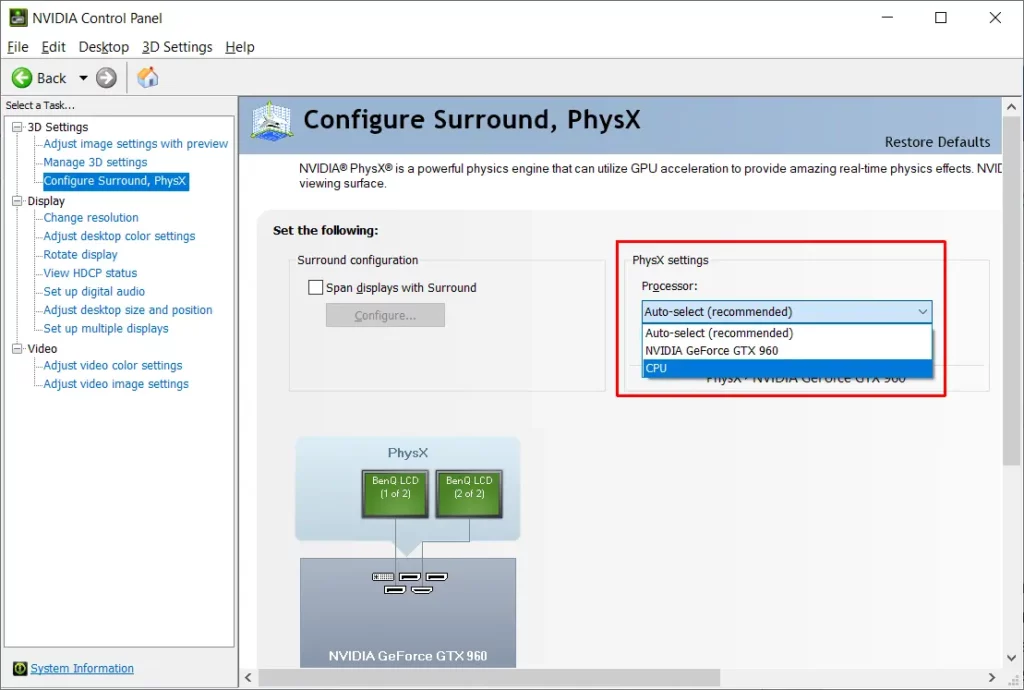
It is possible that this option is overruled by your display control software. For Nvidia, you can check the PhysX settings in the NVIDIA Control Panel. Switch it to CPU to disable the use of the GPU.
Note: disabling hardware acceleration can have a significant impact on the graphics performance. Even if this is a solution, it is best to look for an updated, compatible driver to enable the hardware acceleration again.
Hopefully with all these steps you will be able to solve the thread stuck in device driver error and prevent further blue screen occurences.


