
Curious about how to set up a VPN connection? That’s not surprising. With privacy and security so important these days, it is a good idea to use a VPN connection in Windows 10.
VPN is short for Virtual Private Network. It helps protect your personal data and shields your location whenever you’re online. But how do you go about this in Windows 10? This article will help you set up a VPN and connect it to Windows 10.
Set Up a VPN Connection in Windows 10
Before you can use a VPN connection in Windows 10, you must first create the VPN connection itself.
To create a VPN connection:
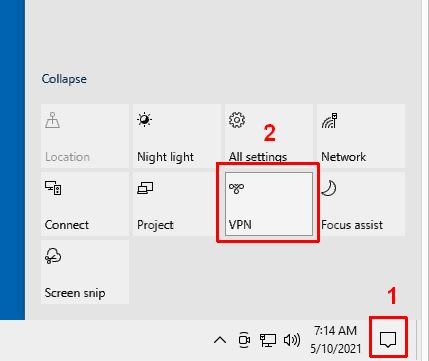
- Click on the notification area in the Windows 10 Taskbar (1).

- Next, click on the VPN block in the popup window (2).
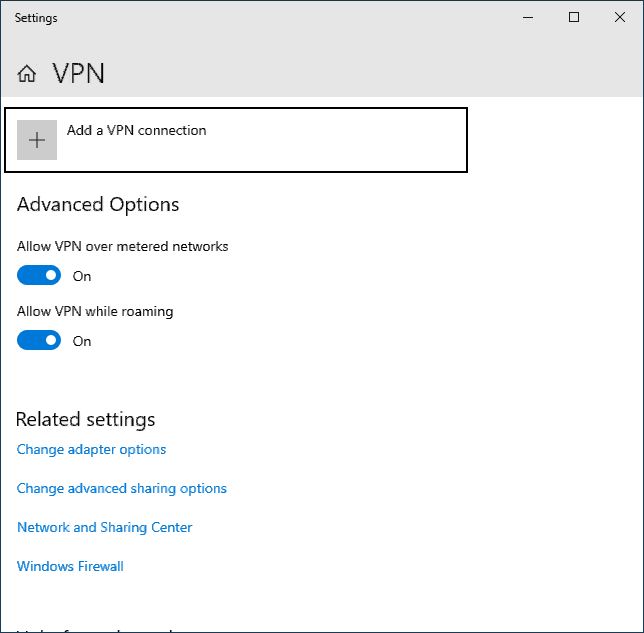
- This will bring up VPN Settings. In this window, click Add a VPN connection.
- Now you will need to enter the details for the VPN connection.
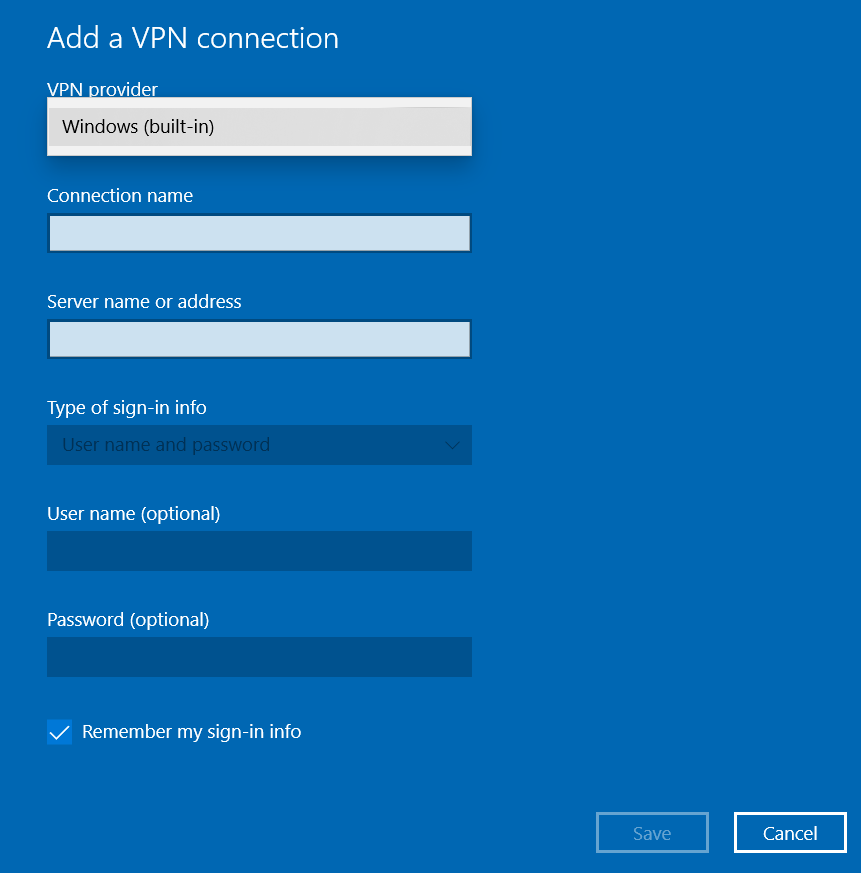
- For the VPN provider, select Windows (built-in). For the Connection name, you can enter any convenient name for the connection (e.g. Personal Connection, or Work Connection).
- For the server name or address, enter the name or address of the VPN server.
- Then select the type of sign-in info, or leave the default User name and password.
- Enter the details for the sign-in authorization (User name and password, or other means of authorization).
Note: For work type of connections, simply request the necessary configuration details from the IT administrator. For Paid VPN services, the VPN provider will give you the configuration details. - Click Save to finalize the creation of the VPN connection.


Connect to a VPN in Windows 10
Once you have created a VPN connection in Windows 10, you need to connect to it to make sure your privacy is shielded when you go online.
To connect to an existing VPN connection:
- Click on the notification area in the Windows 10 Taskbar.
- Click the VPN block in the popup window.
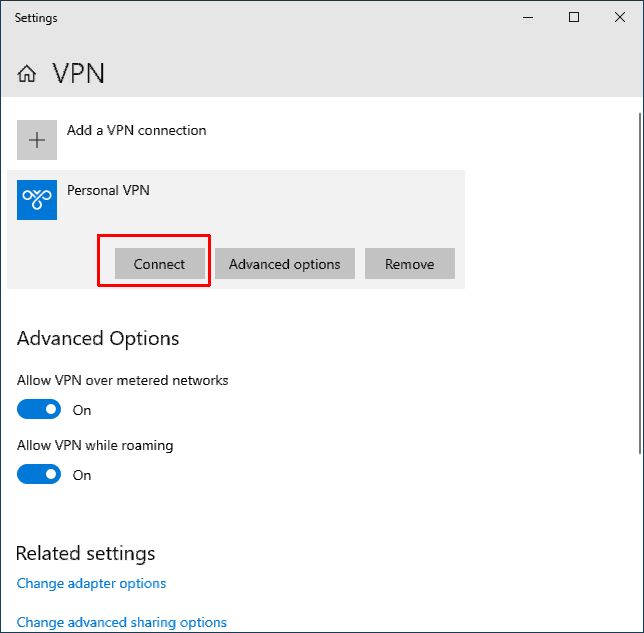
- In the VPN Settings window, click the VPN connection you want to use.
- Click Connect.

- Optionally, enter the authorization details for the VPN connection to complete the sign-in.
Once you are connected to the VPN, you should be able to see this from the Taskbar. Click the WiFi or Network icon. The VPN connection should show Connected below it.
Use a Browser-Based VPN Connection
Apart from the above described method of using a VPN connection in Windows 10, it is also possible to use a VPN connection through your browser.
Both Chrome and Firefox have extensions or add-ons that offer VPN connections.
I hope you enjoyed reading this article!
Having other problems with your network connection? Easily check if you have the latest drivers for your wireless or network card by downloading DriverFinder.