The DYMO LabelWriter 450 is a compact thermal label printer designed for home and office use. First released in 2009, it connects to your computer via a USB connection and prints labels without the need for ink or toner. This makes it ideal for printing any kind of labels, including address labels, shipping labels, file folder labels, and more.
How to Download the DYMO LabelWriter 450 Driver
To ensure your printer works correctly in Windows, you’ll need the latest driver and software for it.
Official Download
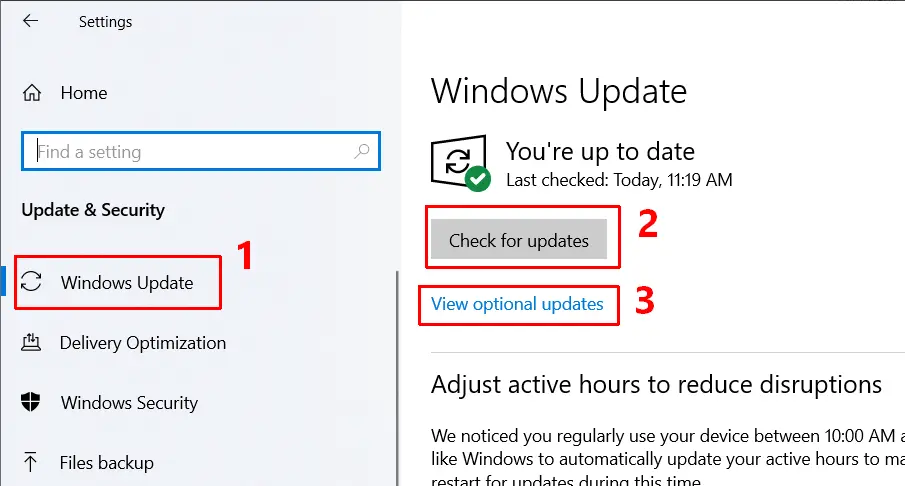
Visit the DYMO Support Page and select “The Latest Software & Drivers for all LabelWriters and LabelManager” from the list (the first option in the list). Download the latest version of DYMO Connect for Desktop Windows (v1.4.9 at the time of this writing).

Save the downloaded file to your computer if your web browser prompts you to. The download will take about 375 MB of disk space.
How to Install the Driver on Windows
Once you have downloaded the software, you can start installing your printer. Follow the steps below.
Note: The full installation, including the MS .NET desktop runtime, will require approximately 651 MB of disk space (217 MB for .NET and 434 MB for DYMO Connect).
- Unplug the printer from your computer.
- Run the installer you downloaded. E.g., double-click the file in the File Explorer (DCDSetup1.4.9.12.exe in this case).
- Follow the prompts on screen to:
- Select the language,
- Install the Microsoft .NET Desktop Runtime (if not installed yet) – takes an additional 57 MB of disk space to download,

- Accept the license agreement,

- Select the location where to install the software,
- Choose “Complete” installation,
- Click “Install” to start the driver and software installation.
- Finish the installation and uncheck any optional offers.
- Plug in the printer when prompted. The printer requires a standard USB 2.0 port. A USB 3.0 or higher can be used, but is not required.
After installation, your LabelWriter 450 should appear in your list of printers. Open by using: Settings -> Devices -> Printers & scanners.
How to Use the DYMO LabelWriter 450
After installing the driver and software, you can start using the LabelWriter 450 to print labels.
- Open the DYMO software you installed.

- Select a label template or create a new one.
- Enter your text and add any images or barcodes.
- Load the correct label roll into the printer.
- Click “Print” to produce your label.
Make sure to select the correct label size in the software to match the labels you’ve loaded.
Common Problems and Fixes
1. Installation Problems
- Run the installer with administrator rights: Depending on the access rights for the Windows user, you may need to run the installer with admin rights.
Simply right-click the downloaded installer, and in the popup menu click Run as administrator.
- Reinstall the .NET Windows Desktop Runtime: If this software is not properly installed, you may see errors during the installation of the DYMO software. An example is:

- Restart and restart the installer: Failed previous installations can cause problems during the installation process. Restarting Windows will often clean up such remnants and allow the installer to execute successfully after the restart.
2. Printer Not Recognized
- Check the USB connection: Ensure the cable is securely connected.
- Try a different USB port: Sometimes, ports can be not working as a result of USB configuration problems or simply a faulty port. Plug the LabelWriter 450 USB cable directly into a USB port on the computer; do not use a USB extension cable or USB hub.
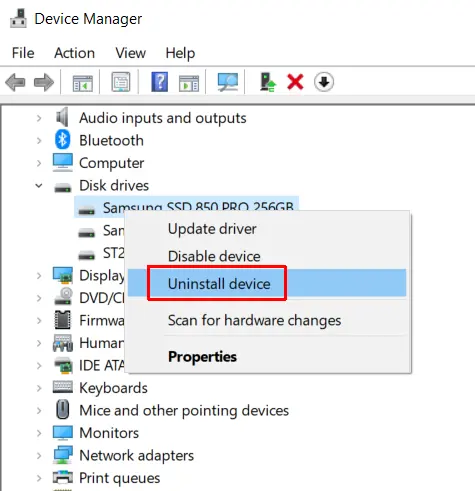
- Reinstall the driver: Uninstall and then reinstall the DYMO software.
3. Poor Print Quality
- Use genuine DYMO labels: Third-party labels may not work well.
- Clean the print head: Use a soft brush or cotton swab to clean the print head and remove any debris that may affect the print quality.
- Replace old labels: Labels can degrade over time. Hey, the printer is available from 2009, maybe your labels are also not the newest?
4. Printer Feeds Blank Labels
- Check label alignment: Ensure labels are loaded correctly.
- Reset the printer: Unplug it, wait 30 seconds, and plug it back in. Leave the printer powered on during these steps.
- Inspect the sensor: Make sure it’s clean and unobstructed.
4. Labels Cut Off or Misaligned
- Verify label size settings: Ensure the software settings match the label size that you are using.
- Adjust print settings: Set the orientation to “Landscape” if needed.
Additional Support
For more detailed troubleshooting, visit the DYMO LabelWriter 450 Troubleshooting Guide.
By following these steps, you should be able to set up and use your DYMO LabelWriter 450 with ease. If you encounter any issues, refer to the troubleshooting section or consult the official DYMO support resources.
Need other Windows device drivers? Download and use the DriverFinder software to scan your PC for missing and outdated drivers and download and install them.