windows 10 | DriverFinder - We Make Drivers Work for You - Part 5

How to Fix USB Drive Not Showing Up in Windows 10

Is your USB drive not showing in Windows 10? Here’s a quick step-by-step fix… with pics!

usb-drive-not-shownExternal storage devices like USB Flash drives and external hard disk (HDD) or SSD drives are quite handy and popular. They’re  commonly used for backups, or as simple storage devices. Normally, when you plug a USB device, its corresponding drive simply shows up in File Manager. So what do you do if the USB drive is not showing up on your Windows 10 computer?

#1 – Check the USB Device.

The first thing to do is to check if the USB device itself is okay.

You can do this by connecting the USB drive to a different computer. If it is correctly recognized there, then you know the USB drive itself is fine and that the problem is with your Windows 10 system.

If the device is an external hard disk (or SSD), or ZIP drive, also check if the cable is defective by exchanging it with a different cable if possible. This is a less frequent cause, but not something to be ignored.

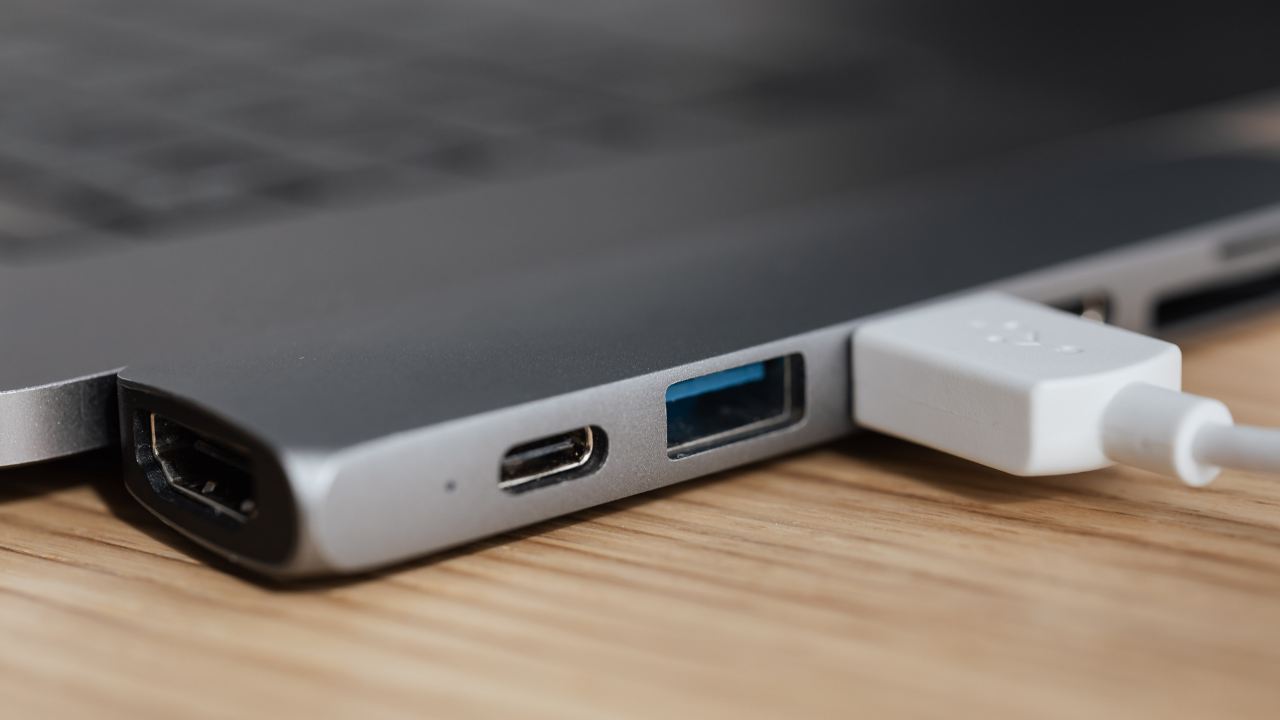
Also make sure to connect the USB device directly to a USB port on the Windows 10 PC, not through an extension cable or USB hub. Long cables, extra connections, or insufficient power can also be a cause for problems with USB drives (this is especially true for the older USB 1.1 and USB 2.0 ports and devices).

#2 – Check Your PC.

Unless you made changes, there is normally no reason to assume anything is wrong with your computer. However, for older PC’s it can be helpful to turn the PC off, remove the USB devices, and completely unplug the PC.

While troubleshooting the issue with the USB drive, leave other USB devices disconnected (unless you really need them, like a mouse or keyboard).

If you did make changes to your computer, like putting additional hardware, upgrading its firmware, or changing its BIOS settings, then try reverting these changes and testing the USB drive again to ensure that these changes have not caused the issue.

#3 – Check Windows 10 Settings.

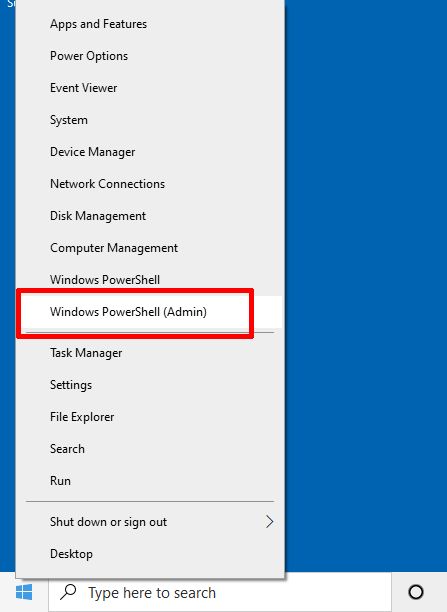
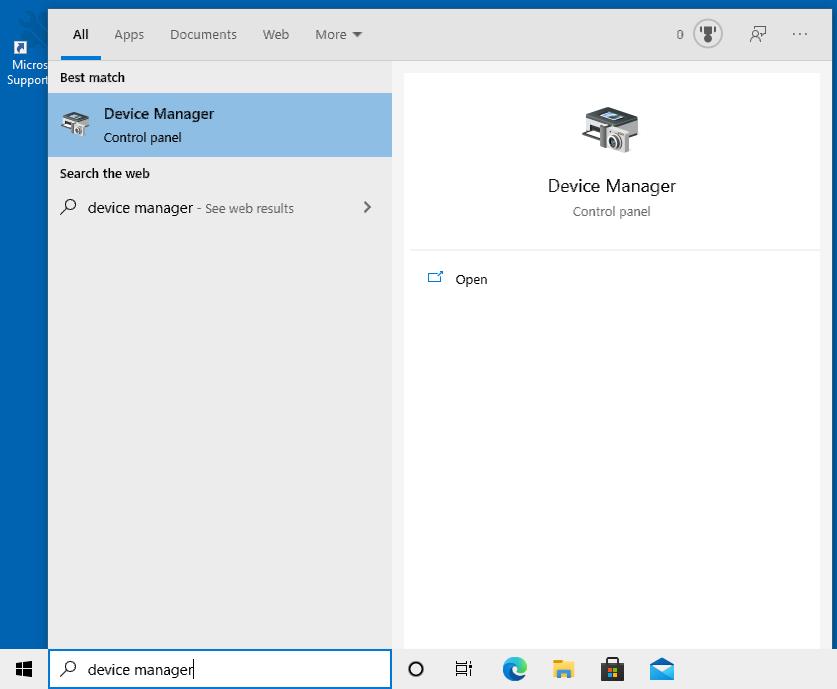
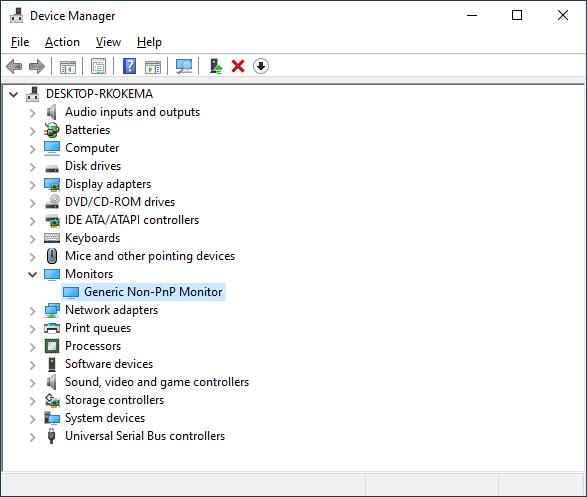
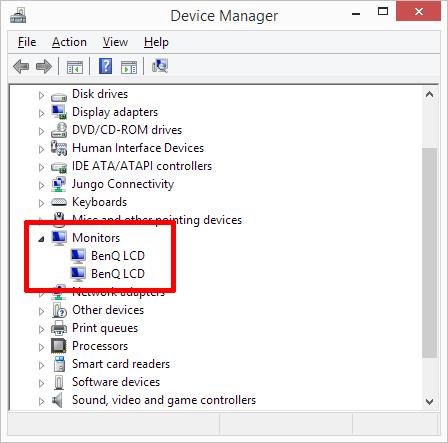
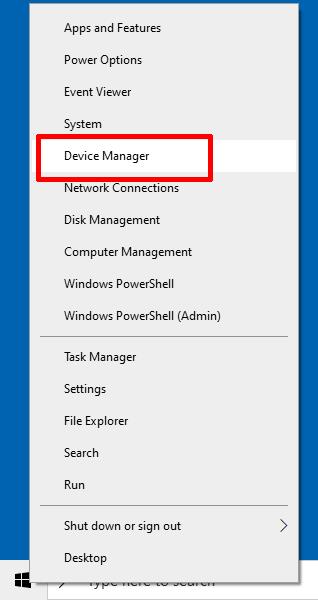
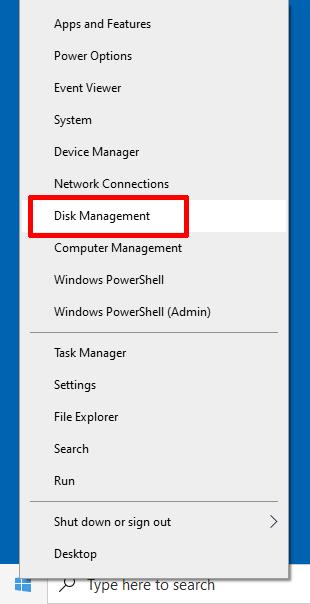
If your USB driver is still not showing in Windows 10, then it’s time to to get into the Device Manager.

Right-click the Windows Start button, and in the popup menu, select Device Manager.

Start Device Manager

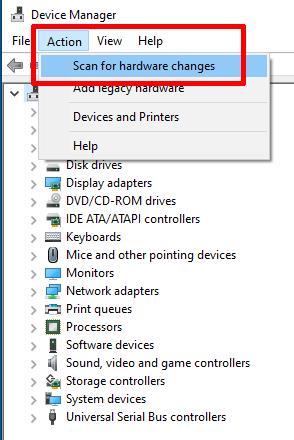
In Device Manager, click the Action menu, and then click Scan for hardware changes.

Scan for Hardware Changes

Once complete, check if the USB drive is showing up in Windows Explorer. If not, try the next step.

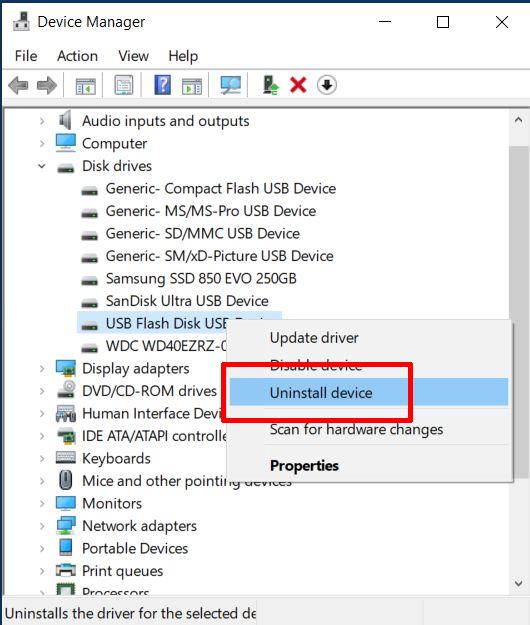
In Device Manager, open up the Disk drives list, right-click the USB drive, and then click Uninstall device.

Uninstall Device

Next, restart your PC. When Windows 10 restarts, it will automatically re-detect the USB device and install the available driver for it. This step can solve configuration issues with the USB drive, so it will show up again.

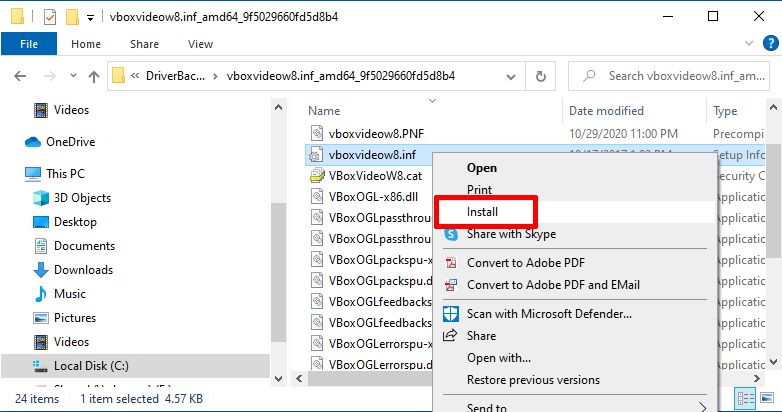
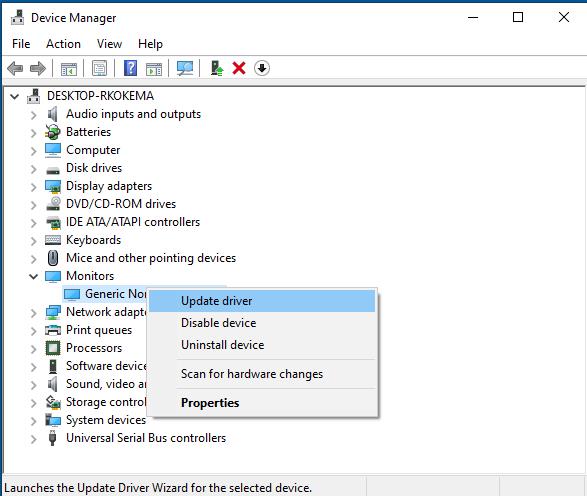
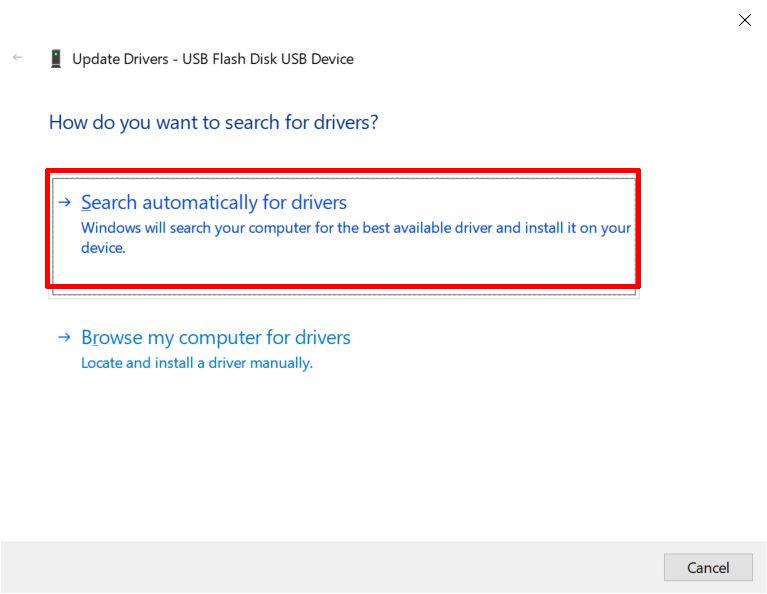
If your USB drive is still now showing up, try updating the driver for the USB device.

download-usb-drivers

This  can be done from the Device Manager. Simply right-click the USB drive in the list of Disk drives, and in the popup menu, click Update Driver.

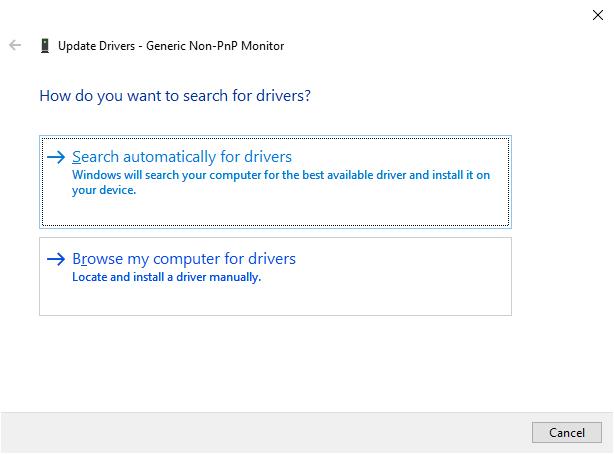
Next, click the option Search automatically for drivers, and wait for the driver update to complete.

Update Driver

Be aware that this step only checks for updated USB device drivers. In most cases the correct operation of USB devices depends on the USB controller, which is a system device. So it is best to check for updated chipset drivers as well.

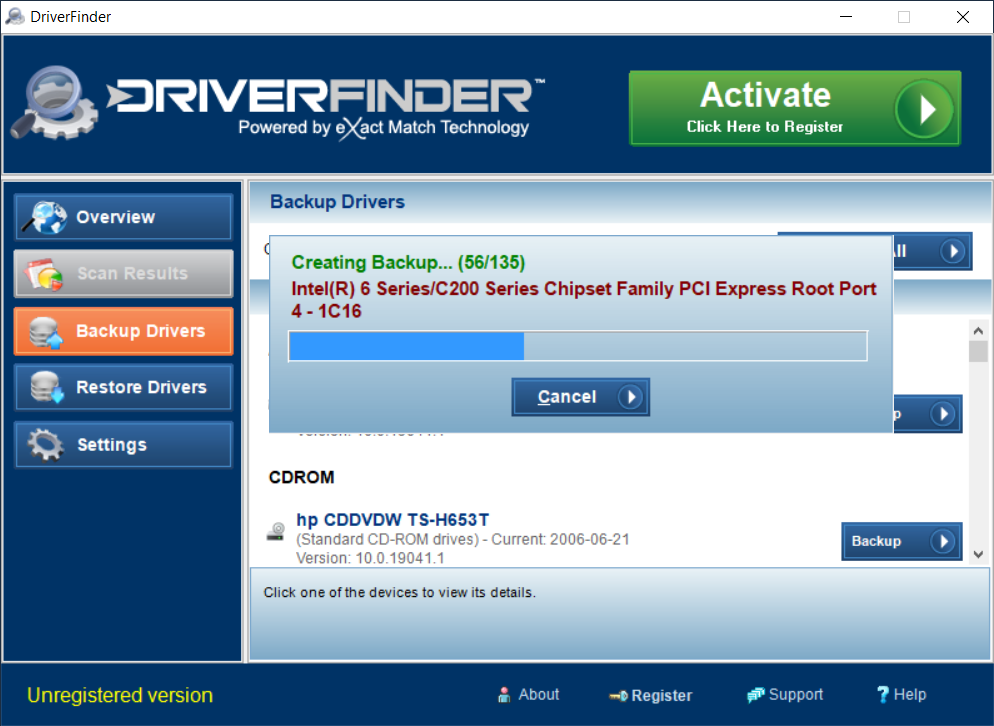
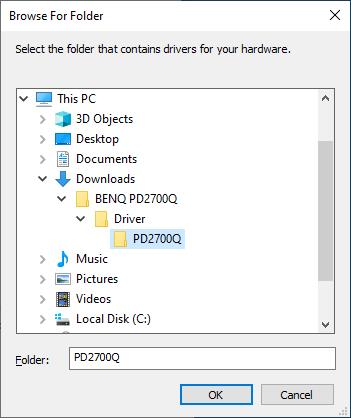
A simple way to do that is to download a driver tool like DriverFinder and scan your PC for all hardware devices and find the latest drivers.

#4 – Check Windows 10 Disks and Drives.

If the USB device is working properly, but the drive is now showing up in Windows Explorer, it is possible that the drive has no drive letter assignment.

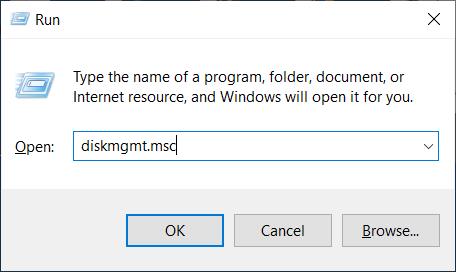
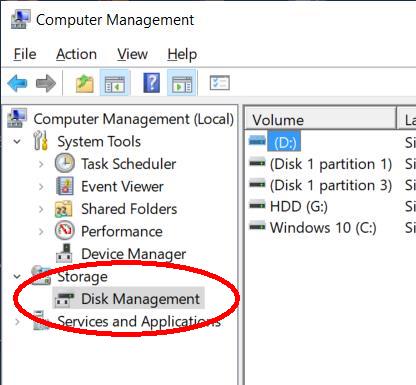
Right-click the Windows Start menu, and then click Disk Management.

Start Disk Management

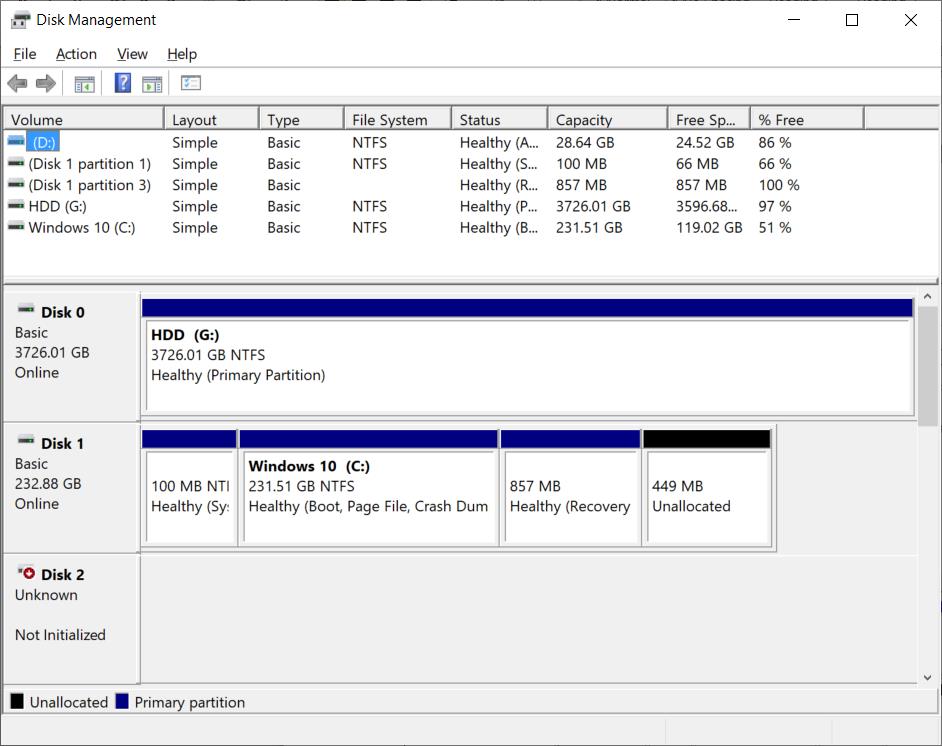
Once the Disk Management window opens, you will see all disks present in the PC.

Windows 10 Disk Management

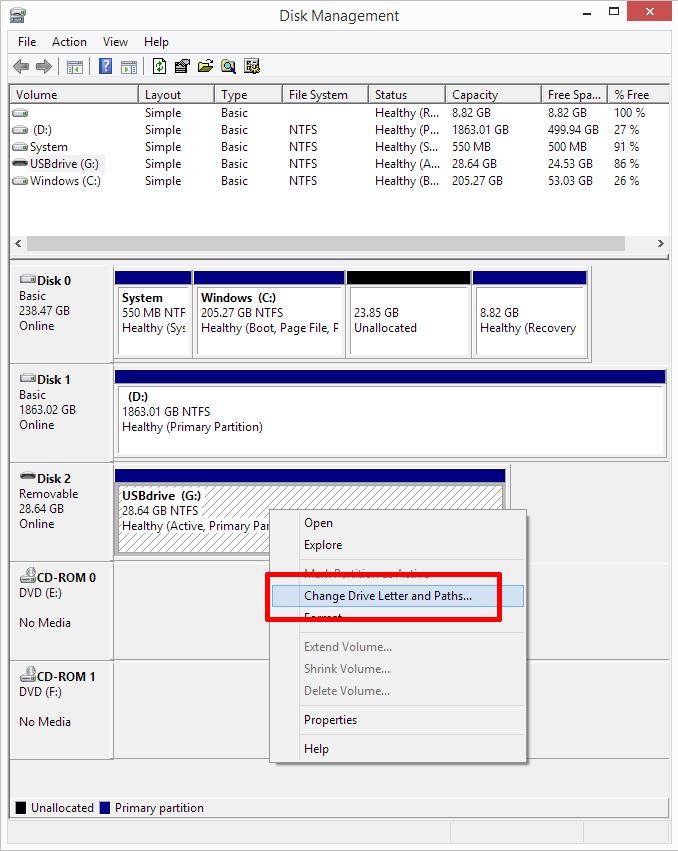
Find the disk that represents the USB drive and check that it has a drive letter assigned to it. In the screenshot above, Disk 2 is the USB device and it has the drive letter G assigned to it.

To find your USB drive, check for a disk that is listed as “Removable” (although it can also be listed as “Basic“), and compare the size to that of your USB drive. If you are not sure, compare the Disk Management screen with the USB drive that’s not connected.

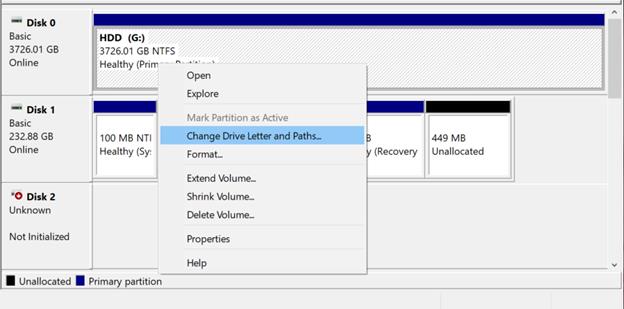
If there is no drive letter assignment, simply right-click the partition (the block next to the disk with the blue bar at the top), and in the popup menu, click Change Drive Letter and Paths.

Next, click the Add button.

Next, change the drive letter (or leave it as is to get a default assignment), and then click OK .

Even if there is already a drive letter assigned to the USB drive, it is still useful to try and change it. The reason for this is that it is possible that there are drives using the same drive letter assignment. Even if another USB device with the same drive letter assignment is not present at the moment, the configuration could still cause conflicts.

To change the drive letter to a higher character, click the Change button rather than the Add button. After that, the steps are the same; i.e., change the drive letter and click the OK button.

Note: If the partition for the USB disk shows as a black bar, rather than a dark blue bar and is listed as Unallocated, that means the drive formatting is not recognized. This means that the disk needs to be formatted before it can be used. If there should be data on the USB drive, a data recovery tool needs to be used for retrieval of the files.

If the USB disk is still not showing up in Windows Explorer, a final step is to try the Windows 10 Hardware and Devices Troubleshooter. Just type “troubleshoot” in the Search box in the Windows Task Bar to start the Troubleshooter.

What is WiFi 6E? (Windows 10 Support, Others)

This article discusses the new WiFi standard – WiFi 6E. Find what it is and if it’s supported in Windows 10.

Intel WiFi 6E

What is WiFi 6E?

WiFi 6E is a new WiFi standard that includes support for the 6GHz band (in addition to the 2.4GHz and 5GHz bands). The technology used is the same as on the 5GHz band, so the maximum speed is the same, 9.6Gbps.

Essentially WiFi 6E is the same as WiFi 6 but with the addtional 6GHz band included. The WiFi 6 standard is identified as 802.11ax. WiFi 6E will use the same identification.

What is the Benefit of WiFi 6E for Wireless Networking?

The main benefit is speed. The 5GHz band has a limited spectrum, which affects WiFi signals. Having the additional 6GHz band available will allow for more devices and faster connections. Remember that the 2.4GHz band offers more range, but the 5GHZ (and 6GHz) bands allow for faster connections.

In the 5GHz band, the spectrum is limited to about 400MHz, while the FCC is opening up 1200MHz of spectrum in the 6GHz band. That means the channel size will increase (7 channels of 140MHz), resulting in performance improvements, and even range benefits.

Wi-Fi ^e Channels and bandwidth

One of the main benefits that will come from the new WiFi standard is the improved support for MU-MIMO  technology (Multi-User, Multiple-Input, Multiple-Output). This allows multiple users to access a wireless network at the same time. With more devices, more speed means better support for multi-user home networking, or online classrooms. This is great news in this time of the COVID-19 pandemic and good news for the Internet-Of-Things, where all home devices will be connected to the Internet.

The benefits of WiFi 6E will benefit services that need high-speed bandwidth, like video streaming, virtual reality and gaming.

Since WiFi 6 is backward compatible, new devices will still be compatible with older hardware, although the limitations of the older hardware will then apply.

Are There Any Limitations to this WiFi Standard?

Well yes. The 6GHz band is approved for unlicensed use by the FCC in the US. In other countries the use of the 6GHz band will also need to be allowed. For European countries, that could be expected this year. For other countries, the approval will also need to be given before the WiFi 6E can be used. UK and South Korea are other early adopters of the standard.

When Will WiFi 6E be Available?

Manufacturers have already started adopting the new WiFi 6E standard and are supporting it in their devices. Companies like Intel, Realtek, Broadcom and Qualcomm have committed devices to be compatible with the new standard. Router companies like Netgear and Linksys will also support the new standard in their new or updated products. Cell phone companies will also adopt the new standard based on its approval in various countries.

Support for WiFi 6E is starting to be available this year. Samsung is expected to include support in their new Galaxy S21 series phone, and others will surely follow soon.

The same applies to routers and network cards. Netgear routers with support for WiFi 6E are expected in Spring 2021. TP-Link, Asus and Linksys routers will also be available during Spring or Summer of 2021.

Intel AX210Intel already launched their first wireless card that has WiFi 6E support, the Intel WiFi 6E AX210.

The card has a M.2 2230 interface, so you’ll need a motherboard that supports a M.2 WiFi module. But it supports the 802.11ax protocol.

Other manufacturers have also used the Intel chipset to create WiFi 6E cards, like the OKN Intel WiFi 6E AX210. Most new cards also support the Bluetooth 5.0 standard, and this OKN device even supports Bluetooth 5.2 (high-speed transfer, low latency).

Asus ROG Raptrure GT-AXE1On the router front, the Asus ROG Rapture GT-AXE1 1000 Gaming Router is one of the first that has support for the WiFi 6E standard.

TP-Link also has a range of WiFi 6E compatible devices available (router, mesh devices, PC card).

ASRock has also released new motherboards that support WiFi 6E (and Bluetooth 5.2). The Z590 Extreme WiFi 6E for example.

What Does this Mean for Windows 10 Support?

For Windows 10 support of the new WiFi 6E standard, all that is required will be a compatible device and updated device drivers. That means a laptop, notebook or portable device that uses a chipset with WiFi 6E support, or for a desktop computer, adding a wireless network card that supports the new WiFi 6E standard.

For the Intel AX210 based M.2 cards, the latest Intel Wireless drivers are required, which support the 802.11ax protocol.

For other manufacturers, updated drivers will need to be installed for the WiFi 6E compatible devices when they become available.

If you cannot manually find a driver for your WiFi 6E device, download DriverFinder and let it find a wireless driver for you automatically, and find updates for other device drivers at the same time.

How Can I See If I’m Connected to WiFi 6 in Windows 11?

To check if your PC is connected to a WiFi 6 network, simply check the properties of the wireless connection in Windows 11.

  1. Right-click the wireless icon on the right side of the taskbar (1).
  2. Click Network and Internet settings in the context menu (2).
    Windows 11 Wireless Internet Settings
    This will open the Settings window.
  3. Click the Wi-Fi option to show the currently active wireless network.
  4. Next, click the properties option for the current wireless network (identified by the network SSID).
    Wireless SSID connection
  5. Scroll down to the section that contains the Protocol. It will show Wi-Fi 6 (802.11ax) when the connection is using the WiFi 6 protocol.
    Wi-Fi 6 Protocol
    Tip: Further down in the wireless properties you can also see the driver version for your wireless adapter!
  6. Close the Settings window when done.


How to Back Up and Restore Drivers in Windows 10 – easy steps with pics!

Backup and restore drivers in Windows 10. Manual and automated ways are discussed so you can keep a copy of your driver files and restore them when needed.

There are a couple of reasons why knowing how to backup and restore drivers in Windows 10 can come in really handy. For instance, you may want to re-install Windows or upgrade your hard drive to an SSD. It’s also just plain good practice to backup drivers once in a while.

Manually Back Up Drivers Using ‘DriverStore’

To manually backup driver files in Window 10 is to simply copy the DriverStore folder. This folder is located in C:WindowsSystem32 (assuming the C: drive is your system drive).

Use File Explorer and navigate to C:WindowsSystem32 folder, locate the DriverStore folder, and then right-click it to Copy it.

Copy DriverStore Windows 10

After that, navigate to a backup location (a USB stick or external drive is a good idea), and then right-click the storage location and select Paste.

Keep in mind that the DriverStore folder can be large (several GB), so it is a good idea to right-click it first and select Properties to see the size. That way you can make sure there is enough space available in the backup location.

Manually Back Up Drivers Using the Deployment Image Servicing and Management Tool (DISM)

Another method to manually backup drivers in Windows 10 is to use the DISM tool. This will make a backup of all third-party drivers. Windows will install any directly supported devices automatically from the installation location, or from the Windows Update service. So getting a copy of only the installed third party drivers can make sense.

For this driver backup method, you will need to start the Windows PowerShell with administrator rights.

Right-click the Windows Start button, and in the Start menu, click Windows PowerShell (Admin).

Start PowerShell in Windows 10

This will open a new PowerShell window (similar to a command window). You will first be prompted by the User Account Control to confirm starting the PowerShell with admin rights. Click the Yes button to confirm.

Windows 10 UAC

In this PowerShell windows, type the command -> DISM / Online /Export-Driver /Destination:C:\DriverBackup

DISM command windows 10

C:\DriverBackup in this example is the destination location for the driver backup files. You can change this to the backup location for your drivers. Make sure it is an existing, valid path, or the command will not work.

Press Enter after typing the command, and then wait for the operation to complete. This can take a bit, depending on the number of drivers and the speed of your destination location.

DISM export driver success

Once the command completes it will show a message stating “The operation completed successfully.

After that, you can type Exit and press Enter to close the PowerShell.

How to Install Drivers from a Backup in Windows 10

To install drivers from a back up to a Windows 10 installation, you need to load all the driver packages back into the driver repository. Once there, they can be used to install devices that match those drivers.

As expected there is an option to add drivers using the DISM tool that was described earlier to create a back up. The limitation of that however, is that you can only add drivers to a Windows Image file using this method. Not to a live Windows installation.

So the tool to use to install drivers from a driver backup location into Windows 10 is called PnPutil. This is a command line tool to perform actions on driver packages, and it is included in all Windows versions, starting with Windows Vista.

Open a Command prompt with administrator rights (right click the command prompt icon and in the popup menu, select Run as administrator). Confirm the UAC message by clicking Yes.

Admin Command Prompt

Now type the following command -> PnPutil /add-driver “C:\DriverBackup*.inf” /subdirs /install /reboot

PnPutil command Windows 10

Again, change the C:DriverBackup path to where your driver backup is located. The /reboot is not required, but recommended since driver installation often requires a reboot to complete. You can also manually reboot the computer afterwards of course.

The /subdirs parameter will ensure that all subfolders are also included for available driver INF files, while the /install parameter ensures that any devices that are compatible with the added drivers get installed in the process.

After pressing Enter, the command will start adding the driver packages from the specified backup location back into the driver store.

PnPutil command execution

Although in most cases installing drivers from a backup into Windows 10 using this method will work, be aware that you have no control over the sequence of the driver installation. In many cases it is recommended to install the chipset drivers before any of the other drivers.

If that is a cause for things to fail, you might want to install some drivers manually first. Simply right-click the INF file and in the popup menu, select Install.

Manually Install INF file

You will again be prompted by the User Account Control to confirm. Simply click Yes to continue.

Sometimes, you may not get any message whether a driver installation is successful or not. Just reboot your computer and check the Device Manager to see if the newly installed driver is active for the device it is intended.

How to Automatically Backup and Restore Drivers

Are the above steps getting a bit too technical for you? No problem because you can simply use DriverFinder (free version!) to backup and restore drivers in less than 60 seconds!

  1. Click here to download and install DriverFinder on your Windows 10 computer.
  2. On the left side, click Backup Drivers.
  3. If you want to back up a single driver, scroll to find that driver and click the Backup button beside it. To back up ALL your windows 10 drivers, click Backup All.backup and restore drivers
back up Windows drivers
The driver backup process just takes a few seconds. Wait till DriverFinder confirms that the backup completed successfully.

That’s it! In the process above, backing up the 135 drivers in my Windows 10 system took just 56 seconds!

So now that you’ve backed up your drivers using DriverFinder… where are the backups?!? Glad you asked :)

On the left-side of DriverFinder, click Settings. Here you’ll find where the driver backups are located.

driver backup file location

You can keep your driver backups here or you can copy or move them to another storage device (e.g., CD, DVD, USB, etc.)

Now, if you ever need to restore a driver, simply click Restore Drivers on the left side of DriverFinder.

Select the driver you want to restore and then click Restore. Simple.

how to restore drivers
go-proYou can backup and restore Windows 10 drivers using the free version of DriverFinder any time.

The Registered/Pro version enables you to run a driver scan so you can update all your drivers before you back them up.

How to Manually Install Monitor Drivers in Windows 10

Manually installing monitor drivers in Windows 10 can help you solve screen display limitations. Follow these easy steps to install a monitor driver for your PC.

Monitor drivers tell your Windows PC what display monitor you are using and what the capabilities of the monitor are. The monitor driver ensures that your display can be optimized for color usage, refresh rates, and screen resolutions.

In Windows 10 a lot of hardware is recognized and supported directly, so in many cases monitor drivers are installed automatically.

But if your monitor is not recognized or detected properly, your screen resolution and other display settings will be limited. In that case it might be required to manually install monitor drivers in Windows 10. That will then allow you to use the maximum capabilities of the monitor.

Monitor Driver Installation Steps for Windows 10

Step 1– To start with the manual installation of the monitor driver, you need to open the Device Manager in Windows.

Right-click the Start button, and in the Start menu, select Device Manager.

Windows 10 Start Menu

Alternatively, simply type “device manager” in the search box, and then click the Device Manager in the search results.

Search Device Manager

Step 2 – In the Device Manager window, open the Monitors group, and select the monitor for which you manually want to install the driver.

Monitor in Device Manager

Step 3 –Right-click the monitor item, and in the the popup menu, select Update driver.

Update Monitor Driver

Step 4 – In the Update Drivers window, select the option Browse my computer for drivers

Browse Monitor Driver Files

Step 5 – Next, click the Browse button and navigate to the location of the monitor driver files.

Navigate to Monitor Driver Files

Monitor driver files typically exist of at least 3 files, a file with file extension .INF, a file with file extension .CAT, and a file with file extension .ICM.

The INF file is used by Windows for the driver installation and contains driver installation information. The CAT file is a catalog file that contains, as Microsoft calls it, thumbprints for all files in the driver collection. The ICM file contains the color profile for the monitor that allows Windows to match colors with the display characteristics of the monitor to show realistic colors.

Step 6 – Click the OK button to confirm the location of the monitor driver files.

Select Monitor Driver Files

Step 7 – Click the Next button to confirm the monitor driver file location.

Windows 10 will now install the monitor drivers for your monitor and show a message that it has successfully updated your drivers.

Step 8 – Click the Close button to finish.

The Device Manager should now list the monitor(s) with the correct brand/model indication.

Windows 10 Monitor Drivers installed

Problems Related to Monitor Drivers in Windows 10

The most common problem you will face if Windows 10 does not recognize the monitor is that the screen resolution is limited to a low resolution (640×480, 800×600, or 1024×768). Especially with modern (4K) screens, resolutions can be a lot higher.

For non-LCD screens, the refresh rates can also be limited, which might result in a flickering screen.

Dual (multi) display setups can also have restrictions as result of the monitors not being recognized.

I already mentioned the color profile for monitors. A ICM file is used to specify the International Color Consortium compatibility for a monitor. To make sure the intended colors are properly displayed by the monitor they are calibrated and the values are defined in the color profile. This prevents the problem with the monitor displaying incorrect colors.

One thing to keep in mind though is that it is not only the monitor driver that affects display issues. The graphics card and the driver for the graphic card are just as important. Memory limitations on the graphics card can limit possible screen resolutions, and so can DisplayPort-to-HDMI dongles. So make sure you check and update the graphics card drivers as well.

Where Do I Find Monitor Drivers for Windows 10?

If you have your original monitor installation package, you could find a CD-ROM (or DVD) with it that contains the original drivers. Even though they may not be the latest drivers for your monitor, it is a good place to start if you still have them. But most manufacturers of display monitors will have a support section on their website where you can download monitor driver files for their models.

Unlike many other device drivers, monitor drivers are less limited to Windows versions, so even if there is no direct support for Windows 10, you can often use a monitor driver for an older version of Windows in Windows 10. In general, there is also no distinction between 32-bit and 64-bit versions for monitor drivers.

If you cannot manually find a monitor driver for you monitor, try downloading DriverFinder and let it find a monitor driver for you automatically.

Additional Monitor Software

Apart from getting the right driver for your monitor device, installing the software from the original manufacturer can also help install addional software. For the example used in this article, we used a BenQ display. That comes with something called Display Pilot.

BenQ Display Pilot software

This type of software can help control settings for your monitor(s). Instead of using physical controls, you can change the contrast and brightness from the program. ViewSonic has the vDisplay Manager, which is something similar.

Some other features, like different color profiles, virtual desktops, and similar options can have an overlap with standard features in Windows itself. So the added value of this type of software needs to be assessed, so you do not install unneeded software. Typically these programs are run at startup (or logon), so they can increase the Windows start time.

How to Open Disk Management in Windows 10 – Manage Your Disk Drives

Disk Management in Windows 10 is used to manage your disk drives and volumes. Learn how to open Disk Management in Windows 10 in different ways and pick the one you like best. Clear instructions with illustrative images.

In Windows 10, there’s a built-in mechanism that can help you easily manage your disk drives. It’s called Disk Management. But first, how to open it?

The easiest way to open Disk Management in Windows 10 is by using the Quick Access menu.

Right-click the Windows Start button on the bottom-left corner of your screen. This will show the Quick Access menu. From here, click Disk Management.

Disk Management from Quick Access Manu

If you prefer using the keyboard, you can also use the Search box in the taskbar. Type disk management in the search box and when shown, select Create and format hard disk partitions in the search results.

Disk Management from Search

Another keyboard method to open Disk Management in Windows 10 is to press the keyboard combination Windows + R, which will open the Run window. Next, type diskmgmt.msc and then click OK.

Disk Management from Run

If you can remember the exact command this is a good alternate to the search option.

download-windows-10-drivers

The Disk Management Window

Another way to open Disk Management in Windows 10 is to use the Computer Management option. You can access Computer Management from the Quick Access Menu as well.

Once the Computer Management window is open, navigate to Storage -> Disk Management on the left-hand panel and select it. Please note that depending on the computer configuration, it can take a moment for disk management details to show.

Computer Management window

Once the Disk Management window shows, you will see all the disks and volumes (or partitions) in your computer.

Disk Management Window

The top table shows the volumes with the file system and available disk space.

In the bottom section, you will see the disk drives in the computer, and how the storage space on the disks is allocated to the different volumes (partitions).

Why Use Disk Management in Windows 10?

Normally you would only use disk management when you install a new version of Windows, or when you add or replace a disk drive to your computer.

But there are also scenarios where Disk Management in Windows 10 can be useful during normal computer usage.

  • Changing a drive letter for a volume can be helpful to prevent external drives not being recognized due to drive letter conflicts. If a USB stick or external USB drive is plugged but does not show up in Windows Explorer, check the drive letter assignment first!
  • Simply changing the name of a volume to a more useful indication of what is stored on the drive is another example.
  • And, maybe less frequent, you might need to change the size of a drive.

In all these cases, simply right-click the volume in the disk management window and select the option in the popup menu.

Disk Management Popup Menu
Note: Use the Properties option to change the name of a volume.


I hope this article has helped you guys when trying to find the Disk Management tool in Windows 10. If you have any questions, feel free to let me know in the comment section below, and I’ll do my best to answer them!

Copyright 2009 and Beyond - DriverFinderPro.com - All Rights Reserved